4 - Physics
Overview
Fusion 104 will examine how Fusion interacts with PhysX in a server authoritative game.
At the end of this section, the project will allow the player to spawn and interact with a physics controlled ball.
Setup
By default, Fusion will run the physics simulation on the host and the clients will follow. However, this puts physics objects in a different time compared to local predicted objects which will cause problems for the physics simulation if these objects collide.
Dual time is a complex topic which can be dealt with in a variety of ways - some are downright hacks, and others are too expensive for general application or do not provide the immediate feedback gamers expect. There is unfortunately not a simple fix that works for all cases.
For this tutorial we will use Fusion's Physics addon to predict physics objects locally, placing the physics controlled objects in the same time as the player controlled avatar. This is a solid solution which can be used in production as well, but keep in mind that running prediction and resimulation in PhysX is expensive (i.e. multiple times per tick).
To get the Physics addon, go to Download page, select the Unity package and import it into the project.
Physics Object
The prefab for a networked, PhysX controlled, object uses the same Rigidbody as a regular Unity PhysX object, but has a different Fusion component to synchronize the visual child object called NetworkRigidbody. This replaces the NetworkTransform as far as networking goes.
- Create a new empty GameObject in the Unity Editor
- Rename
GameObjecttoPhysxBall - Add a new
NetworkRigidbody3Dcomponent. - Fusion will show a warning about a missing
NetworkObjectcomponent, so go ahead and pressAdd Network Object. Fusion will automatically add a regular Unity RigidBody as well since this is needed for the PhysX simulation. - Add a Sphere child to
PhysxBall - Scale the child down to 0.2 in all directions
- Drag the child object into the
InterpolationTargetof theNetworkRigidbody3Dcomponent on the parent object. - Remove the collider from the Sphere
- Create a new sphere collider on the parent object with radius 0.1 so that it completely covers the child object.
- Add a new script to the game object and call it
PhysxBall.cs, - Drag the whole object into the project folder to create a prefab
- Save the scene to bake the network object and delete the prefab instance from the scene.
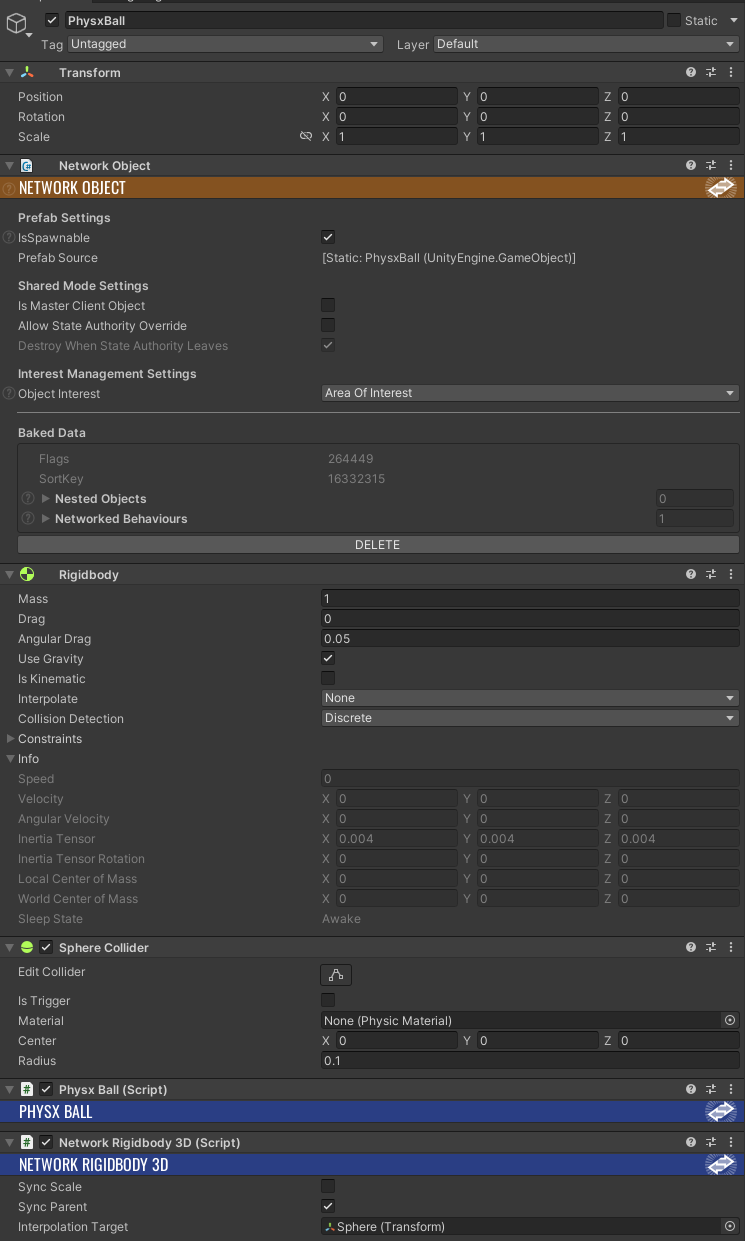
For physics objects separating the visuals and assigning them as the Interpolation Target is recommended but not always necessary. The collider and the rigidbody have to be on the parent object together with the NetworkRigidbody.
The PhysxBall Script
Because the ball is driven by PhysX and the NetworkRigidbody takes care of the networked data, it needs less special code to get working than its kinematic cousin. All that needs to be added to PhysxBall.cs is the timer that will despawn the ball after a few seconds (this is exactly the same as for the kinematic ball), as well as a method to set the initial forward velocity.
Both are covered by the Init() method, like this:
C#
using UnityEngine;
using Fusion;

public class PhysxBall : NetworkBehaviour
{
  [Networked] private TickTimer life { get; set; }

  public void Init(Vector3 forward)
  {
    life = TickTimer.CreateFromSeconds(Runner, 5.0f);
    GetComponent<Rigidbody>().velocity = forward;
  }

  public override void FixedUpdateNetwork()
  {
    if(life.Expired(Runner))
      Runner.Despawn(Object);
  }
}
Input
To spawn the ball, the code needs to be extended following the same three steps as for the kinematic ball, but changed to use the second mouse button instead:
1. NetworkInputData
In NetworkInputData.cs Simply add a new button flag:
C#
using Fusion;
using UnityEngine;

public struct NetworkInputData : INetworkInput
{
  public const byte MOUSEBUTTON0 = 1;
  public const byte MOUSEBUTTON1 = 2;

  public NetworkButtons buttons;
  public Vector3 direction;
}
2. BasicSpawner
In BasicSpawner.cs Poll the second mouse button in the same fashion as the first, and set the flag accordingly:
C#
  private bool _mouseButton0;
  private bool _mouseButton1;
  private void Update()
  {
    _mouseButton0 = _mouseButton0 || Input.GetMouseButton(0);
    _mouseButton1 = _mouseButton1 || Input.GetMouseButton(1);
  }

  public void OnInput(NetworkRunner runner, NetworkInput input)
  {
    var data = new NetworkInputData();

    ...

    data.buttons.Set(NetworkInputData.MOUSEBUTTON0, _mouseButton0);
    _mouseButton0 = false;
    data.buttons.Set(NetworkInputData.MOUSEBUTTON1, _mouseButton1);
    _mouseButton1 = false;

    input.Set(data);
  }
3. Player
Player.cs holds the code that spawns the actual ball prefab so in addition to needing a prefab reference like this,
C#
[SerializeField] private PhysxBall _prefabPhysxBall;
the Player must also call spawn and set the velocity (just a constant multiplied to the last forward direction) using the Init() method created earlier.
C#
public override void FixedUpdateNetwork()
{
  if (GetInput(out NetworkInputData data))
  {
    data.direction.Normalize();
    _cc.Move(5*data.direction*Runner.DeltaTime);

    if (data.direction.sqrMagnitude > 0)
      _forward = data.direction;

    if (HasStateAuthority && delay.ExpiredOrNotRunning(Runner))
    {
      if (data.buttons.IsSet(NetworkInputData.MOUSEBUTTON0))
      {
        delay = TickTimer.CreateFromSeconds(Runner, 0.5f);
        Runner.Spawn(_prefabBall,
          transform.position+_forward,
          Quaternion.LookRotation(_forward),
          Object.InputAuthority,
          (runner, o) =>
          {
            // Initialize the Ball before synchronizing it
            o.GetComponent<Ball>().Init();
          });
      }
      else if (data.buttons.IsSet(NetworkInputData.MOUSEBUTTON1))
      {
        delay = TickTimer.CreateFromSeconds(Runner, 0.5f);
        Runner.Spawn(_prefabPhysxBall,
          transform.position+_forward,
          Quaternion.LookRotation(_forward),
          Object.InputAuthority,
          (runner, o) =>
          {
            o.GetComponent<PhysxBall>().Init( 10*_forward );
          });
      }
    }
  }
}
For networked physics to work a RunnerSimulatePhysics3D component is needed on the runner object. So open the BasicSpawner.cs and add the following line after the line which adds the runner component in the StartGame function:
C#
gameObject.AddComponent<RunnerSimulatePhysics3D>();
Finally, to test the new ball, assign the created prefab to the Prefab Physx Ball field on the Player prefab and build and run it.
Next Host Mode Basics 5 - Property Changes
Back to top