Structure & Content
The project is split in two parts:
- the core (Framework); and,
- the gameplay Template.
Template Structure
During the early development stages, you should not need to make changes in the core. The core scripts can be inherited from and / or extend through partial implementations. However, if your project specifications require changes in the core, we advise you to discuss these with the FPS team beforehand.
In the follow sections, [YOUR_PROJECT] represents a custom folder with the name of your project. Although these are marked as optional, it is strongly recommended to segregate your scripts and assets from the template ones to simplify upgrading the SDKs.
Quantum solution
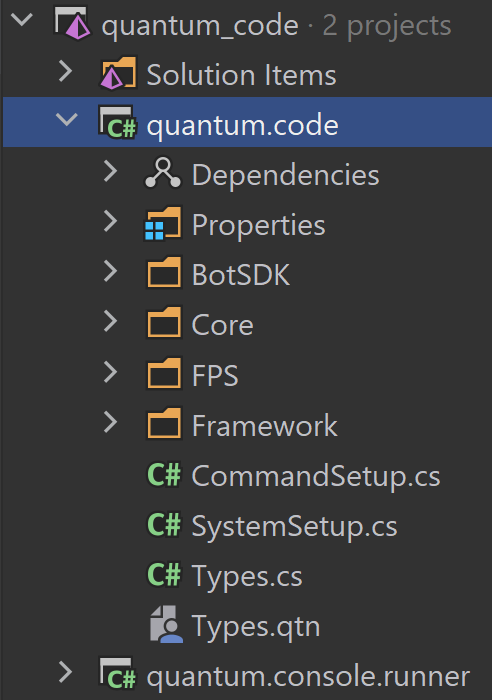
BotSDKcontains scripts for the Quantum Bot SDK.Corecontains the core scripts of Quantum SDKFrameworkcontains core scripts of templateFPScontains project specific scripts for FPS template[YOUR_PROJECT]this will be your folder to create new scripts (optional)
Unity project
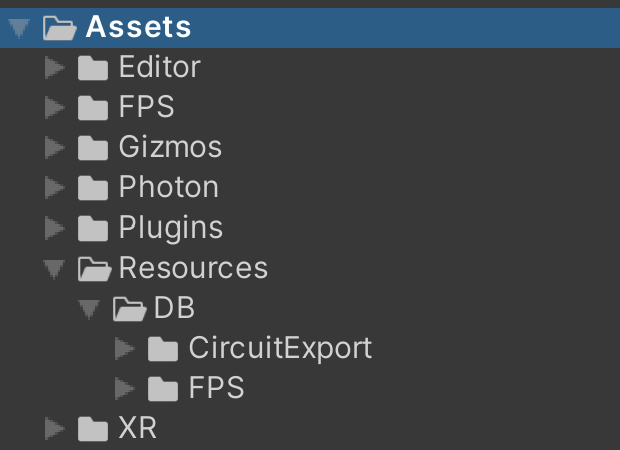
FPScontains assets for FPS examplePhotoncontains Quantum SDK, Bot SDK, Framework core scripts, Photon Realtime SDK and Photon Chat SDK[YOUR_PROJECT]this will be your folder to store your assets (optional)Resources/DB/FPScontains entity prefabs, quantum related asset and baked data of FPS exampleResources/DB/[YOUR_PROJECT]this will be folder to store your entity prefabs and quantum assets (optional)
Modifying the Template
There are 3 possible ways to advance development:
- Modify FPS example assets in place as you need, at a later stage you need to clean up the project selectively. Merging changes and new features into example files is hard, depending on changes.
- Move the FPS example assets from FPS to [YOUR_PROJECT] folder, then make changes. At a later stage you easily delete FPS folders to clean up all example assets. Merging changes and new features is hard, depending on changes.
- Selectively duplicate FPS example assets to [YOUR_PROJECT] folder, then make changes. At a later stage you easily delete FPS folders to clean up all example assets. Merging + tracking changes and new features is easy, these can be reflected into your project assets on demand.
Variant 3. is recommended as it allows you to track new features and fixes in both template core scripts and FPS example files as long as you want. You also don’t spend extra time on cleaning up the project before release.
Template Content
The FPS Template presents the recommended way to implement Scene loading, Entity setup, as well as gameplay.
Scenes
The reference examples comes with a set of scenes. These sample scenes fall into various categories:
- Game Scenes are the core scenes found in any game (startup, menu and gameplay).
- UI Scenes are game menus, game overlays (e.g. HUD) and loading related scenes (fading and animation).
- Testing Scenes are scenes decidated to test specific aspects of gameplay (movement, interactions and shooting).
- Profiling Scenes are made to stress test and evaluate the performance of your game.
All scenes can be found in Assets/FPS/Scenes.
Game Scenes
All gameplay scenes are playable in a standalone offline mode (run directly without loading Menu).
- Startup: The initial scene with the fastest possible loadtime. It displays a splash screen and takes care of reading the game (initializing the subsystems, player login, etc...).
- Menu: The default menu scene.
- Deathmatch: The default gameplay scene with simple deathmatch.
UI Scenes
The UI scenes are always loaded additively after the Menu/Gameplay scene.

- MenuUI: The scene with UI for menu scenes.
- GameplayUI: The scene holding the UI for gameplay scenes.
- FadeLoading: A scene with a color fader active when switching between menus and gameplay.
- AnimationLoading: A scene with an image animation active when between switching menu and gameplay.
Testing Scenes
All scenes with the PLAYGROUND prefix are scenes meant for gameplay testing.
- PLAYGROUND_Movement: A scene dedicated to test movement behavior (slope, stairs, surfaces, moving platforms, ...).
- PLAYGROUND_Interactions: A scene for testing interactions (buttons, door, heal area, ...).
- PLAYGROUND_Shooting: A scene for testing weapons and shooting.
Profiling Scenes
Scenes carrying the prefix PROFILING are aimed at stress-testing and emulating the game under specific circumstances.
- PROFILING_Simple: To profile low performance mobile devices.
- PROFILING_Medium: To profile more players and entities.
- PROFILING_Heavy: To profile high amount of players and entities.
Entities
The reference example includes several types of entities, each with their own behaviour and independent setup. The EntityPrototypes for these example entities can be found in Assets/Resources/DB/FPS/Prefabs.
The included entity examples are:
- 1 Playable Character (Human)
- 1 NPC (Spider)
- 3 Unique Weapons and Projectiles
- 4 Unique Abilities: Dash, Gadget, Grenade, Teleport
- 4 Pickup: Health, Shield, Weapon, Ammo
- Interactable Button/Toggle
- Teleporter
- Mine
- Controllable Turret
- Moving Object
- Destructible Object
- Physics Obstacle
- Damage Area
- Healing Area
- Killing Floor
- Explosions
- Spawn Point
- Spawn Zone
- Waypoint
- Jump Pad
- Air Lift
- Door
Gameplay Features
The reference example includes the following gameplay features:
- 1 gameplay mode: deathmatch
- 5 AI Difficulties:
- Very Easy
- Easy
- Normal
- Hard
- Nightmare
- 5 Attributes:
- Damage
- Healing
- Speed
- Armor
- Critical
- Various game mechanics such as:
- Auto Reload
- Auto Fire