Quick Start Guide
The Fusion Unreal SDK 3.0.0 is provided as development snapshots and is not intended to be used for live or released games. There may be blocker bugs and the API can change or break during the preview phase.
Introduction
This document is a quick reference to start developing using Fusion with Unreal. The guide will explain the process of adding networked movement to a third person game and demonstrate a few core features of Photon Fusion for Unreal.
This guide builds upon a template from Unreal 5.6. However the approach and methods used can be applied to all Unreal versions supported by Photon Fusion.

Create a Photon App ID
Fusion runs on the Photon Cloud. The App ID ties your project to a backend that handles connection, authentication, matchmaking and state distribution. Follow these steps to create a new App ID for this guide:
- Create or log on to an account at dashboard.photonengine.com.
- Click Create a New App, select Fusion as the SDK and Fusion 3 Unreal as the SDK Version. Give the app a name and press Create.
- Copy the App ID from the newly created app.
Keep this App ID at hand — you will paste it into the Fusion Settings in a later step.
Create a new project
Create a new Unreal project in Unreal 5.6 and select the Third Person template as a base. It can be a Blueprint or C++ project.
Setup the Photon Fusion Plugin
To setup Fusion Unreal in a new or existing project:
- If it doesn't already exist, create a
Pluginsfolder inside your Unreal project folder. - Download the Fusion Unreal Plugin.
- Unzip the Fusion Unreal Plugin and copy the
PhotonFusionfolder into thePluginsfolder. - Open the project and ensure the
Photon Fusionplugin is enabled in the Plugin window. - Open the
Fusion Settingssection of the project settings and paste your App ID.
Connecting to Photon and Joining a Room
The first thing the game needs to do is join a Photon room and start a Fusion Session. The Blueprint nodes below can be used to connect to Photon and then to join or create a room. When using these BP nodes a Fusion session will be automatically started after joining a room. This allows states between clients to be replicated.
Create a new Actor Blueprint called BP_FusionSetup and add the following BP logic to the BeginPlay of the Event Graph.
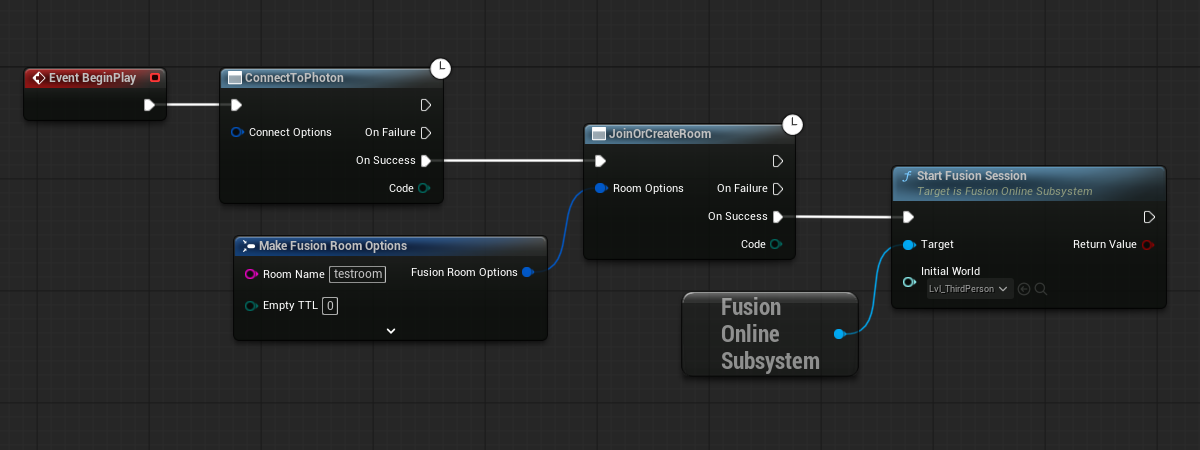
Any string can be used for the Room Name and set the InitialWorld to Lvl_ThirdPerson. Customized ConnectOptions do not need to be provided for this simple test case, but is where Region options can be found.
Finally, add BP_FusionSetup anywhere in the Lvl_ThirdPerson map in order for the logic to join the room to be executed as soon as the game starts.
Actor Replication
In order for an Actor to be considered for replication it needs to have Replicates ticked and have a Fusion Actor Component.
Fusion Actor Component has a number of properties that can be adjusted to better suit your game, however we find the majority of the defaults perform well for a range of common scenarios.
- Ensure
Replicatesis ticked in theClass Defaults. - Open up
BP_ThirdPersonCharacterand add theFusion Actor Component. - Adjust the
Ownershipdropdown on theFusion Actor Componentto bePlayer Attached.
Setting the Actor ownership to be Player Attached attached means it will be destroyed when the player leaves the room.
Testing
Enough setup has now been performed to allow for basic character replicated movement.
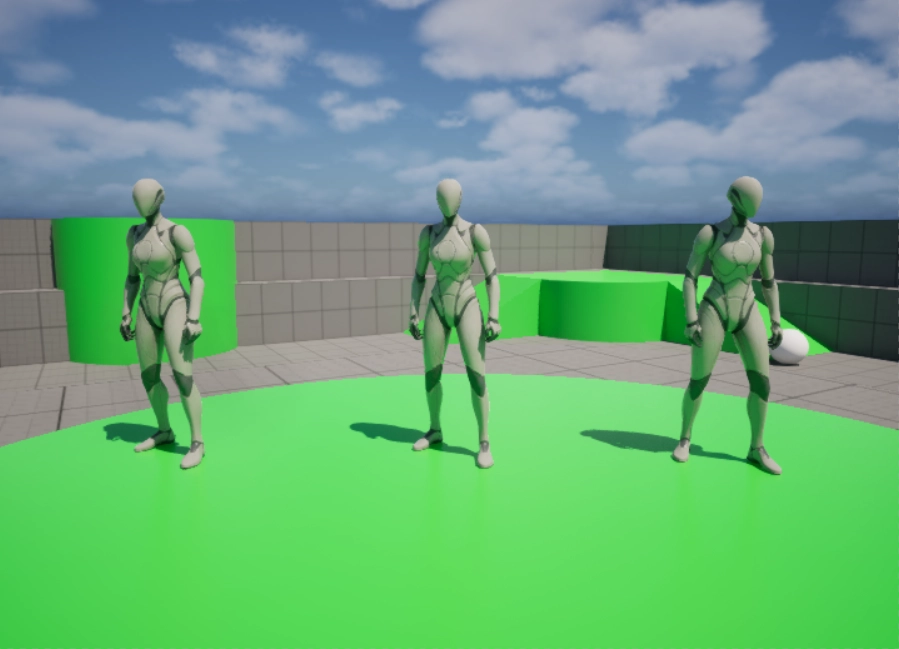
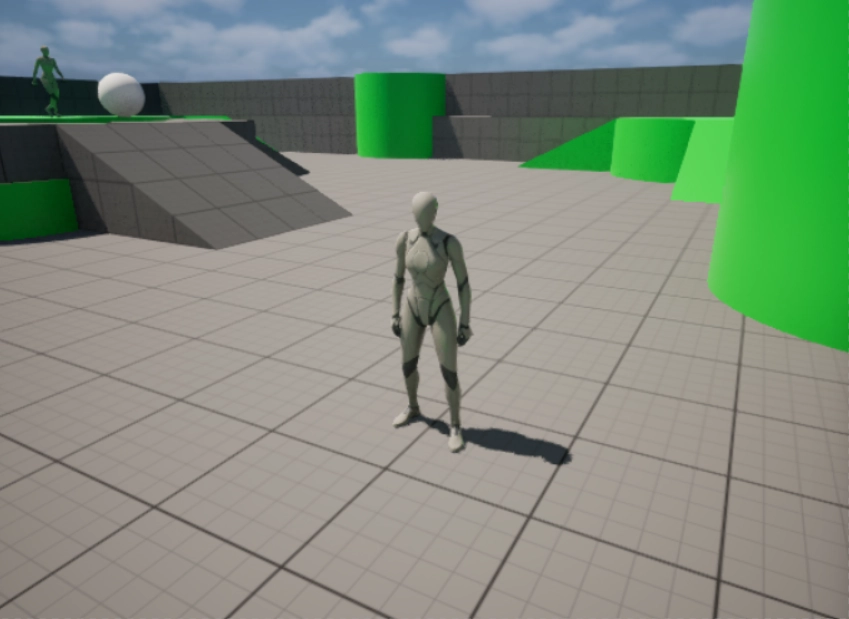
Open the Lvl_ThirdPerson map and start the game with multiple PIE windows.
After you press play you should see all your characters standing in the map. Take a moment to switch between windows and run around as the different players. You should see each character move around from all client perspectives.
Congratulations, you have just created your first networked experience using Photon Fusion!
Property Replication
This section takes advantage of Photon Fusion's support for standard Unreal replication by adding the ability to change the color of the player character and have that change appear on all clients.
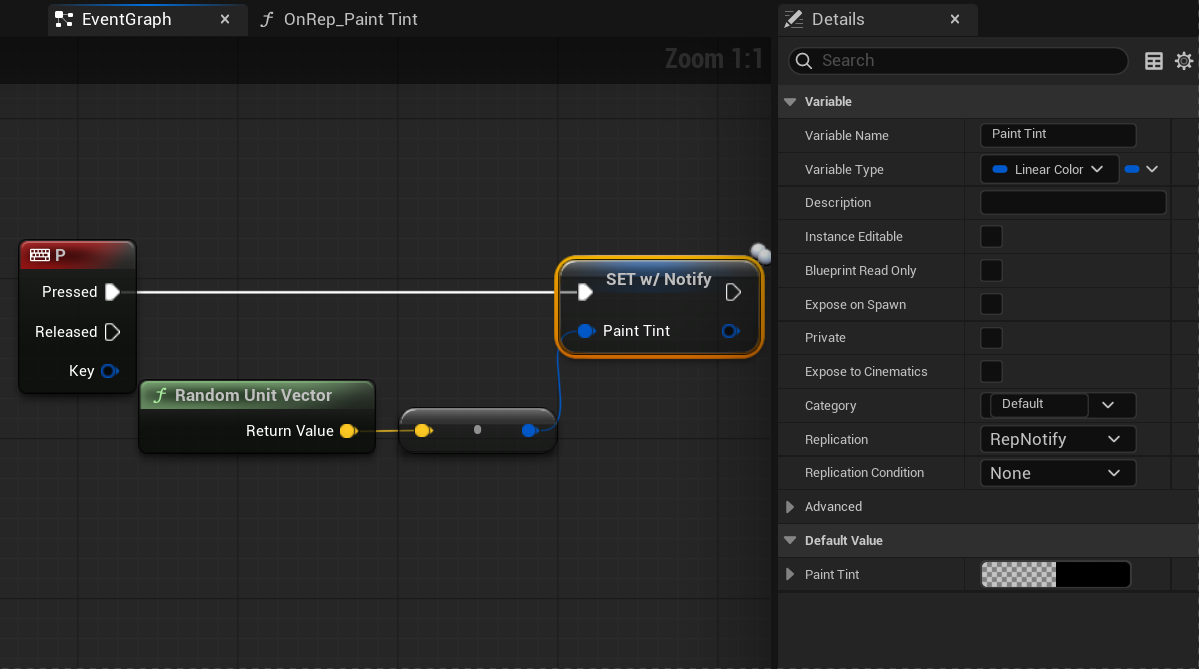
Add the following logic to BP_ThirdPersonCharacter to randomly create and save a new color for the character when the P key is pressed. Name the Linear color variable Paint Tint and set the replication setting to RepNotify
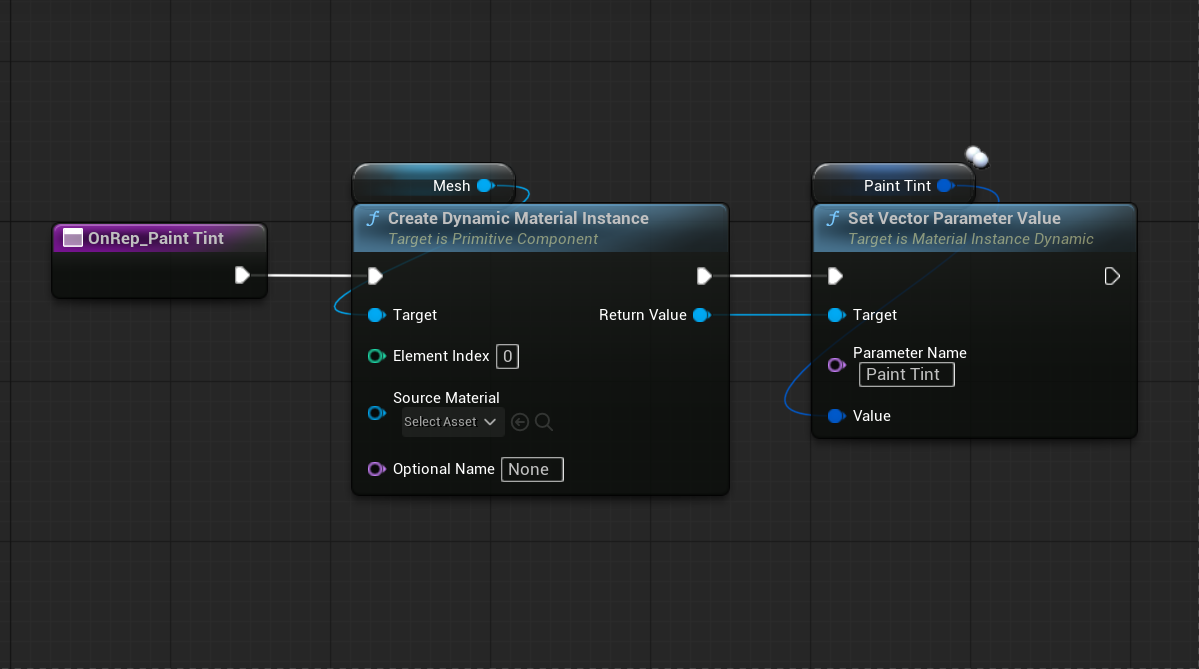
Add the following logic to the RepNotify function. The Paint Tint variable is used to set the corresponding parameter in the material. (For simplicity sake we create the Dynamic Material here, but it is generally best practice to cache it).
The player colour change should now be replicated for each player.
Only one variable type has been replicated here, but Photon Fusion has support for all variable types either with or without a RepNotify.
Try pressing the P key in game to see a new color randomly chosen for your character. The color change will be replicated to the other clients.
Adding a Physics Object
Photon Fusion offers Forecast mode for synchronising physics object states between clients. Extrapolation is used to predict the remote state of the object before combining it with the local state and physics simulation.
Any networked Actor with a primitive component — such as a Static Mesh — that has Simulate Physics enabled will use Forecast by default. This can be disabled in the Fusion Actor Component as required.
- Create a new StaticMesh BP Actor called
BP_Ball. - Ensure replication is enabled by ticking
Replicateson the actor. - Set the mesh to be a Sphere and ensure the
Simuate Physicsoption is enabled. - Add the
Fusion Actor Component. - Adjust the
Auto Dynamic Ownership Rangeon theFusion Actor Componentto be 500. - Drag the
BP_Ballinto the map.
Auto Dynamic Ownership Range is used to automatically adjust ownership of the actor based on player distance. This means that a player within this range will be assigned ownership of the BP_Ball and will become the remote state for the other clients to base their extrapolation on.
This ranged based check can be disabled by setting the value to 0 and then manually calling SetWantsOwner(Actor) on the FusionOnlineSubsystem as required.
RPCs
Photon Fusion has support for Unreal's built in replicated events, however it is possible to create custom Fusion RPCs that are better suited to the distributed authority architecture.
For more information on RPCs visit the following guide: RPCs in depth
In the steps below we will create a custom Fusion RPC to spawn an explosion effect at the player's feet whenever the E key is pressed.
- Add the
StarterContentpack to the project if it has not yet been imported. This will make an explosion effect available for use.- From the Content panel: Add -> Add Feature or Content Pack -> Content -> Starter Content
- Open
BP_ThirdPersonCharacter. - Create a new
Custom EventcalledSpawnExplosionRPCwith a Vector input parameter for the location. Add the logic from the image below. - Right click on the event graph and create a
Custom Fusion RPC. - In the details panel for the
Custom Fusion RPCselect theSpawnExplosionRPCevent from theReference Event Namedrop down. - Hook the
Custom Fusion RPCnode up to theEkeyboard event.

When playing the game you should see an explosion effect appear whenever the E key is pressed.