Procedural Demo
Introduction
In this demo we want to demonstrate how to handle procedural generated worlds and modifications applied to them with the Photon Cloud. Therefore the PUN 2 package includes a demo in which we can create a world made of cubes / blocks. For the creation process itself we have different options which we can select to create different worlds.
This documentation page describes how the demo and the world generation works and how applied modifications are synchronized across all clients. It also shows some of the most common mistakes which are made when creating procedural generated worlds with the Photon Cloud and in general.
How this demo works
When being connected to a room, the MasterClient can control the deterministic world generator by using the control panel. The control panel and it’s related options are described in the next chapter. When the world generator is running, it creates multiple clusters, each containing multiple blocks forming the world. Dividing the world into different clusters, helps synchronizing it later on, when modifications are applied to it. How the synchronization works is also part of the description on this documentation page. To apply modifications to the world, any client can left-click on a certain block to lower its height or right-click to raise its height.
You might be wondering about lowering or raising a block’s height now. We decided to describe different height levels of a generated world by using a block’s scale on the y-axis. This has some advantages: the first is that we don’t have so many GameObjects in the scene which is good in terms of performance - Unity (as well as other engines) obviously can’t handle a nearly infinite number of objects. So for the purpose of this demo, we are fine with our implementation.
Another aspect is that we have to store the applied modifications somehow in order to make them available to all clients. Since we don’t have custom server-side logic available on the Photon Cloud (unless we are using the Enterprise Cloud), we decided to use the Custom Room Properties for storing applied modifications.
The last point is, that the implemented solution is easier to understand than a more complex and maybe ‘production-ready’ solution. However this demo still demonstrates the possibilities we have when using the Photon Cloud when developing a procedurally generated game.
Generating a world
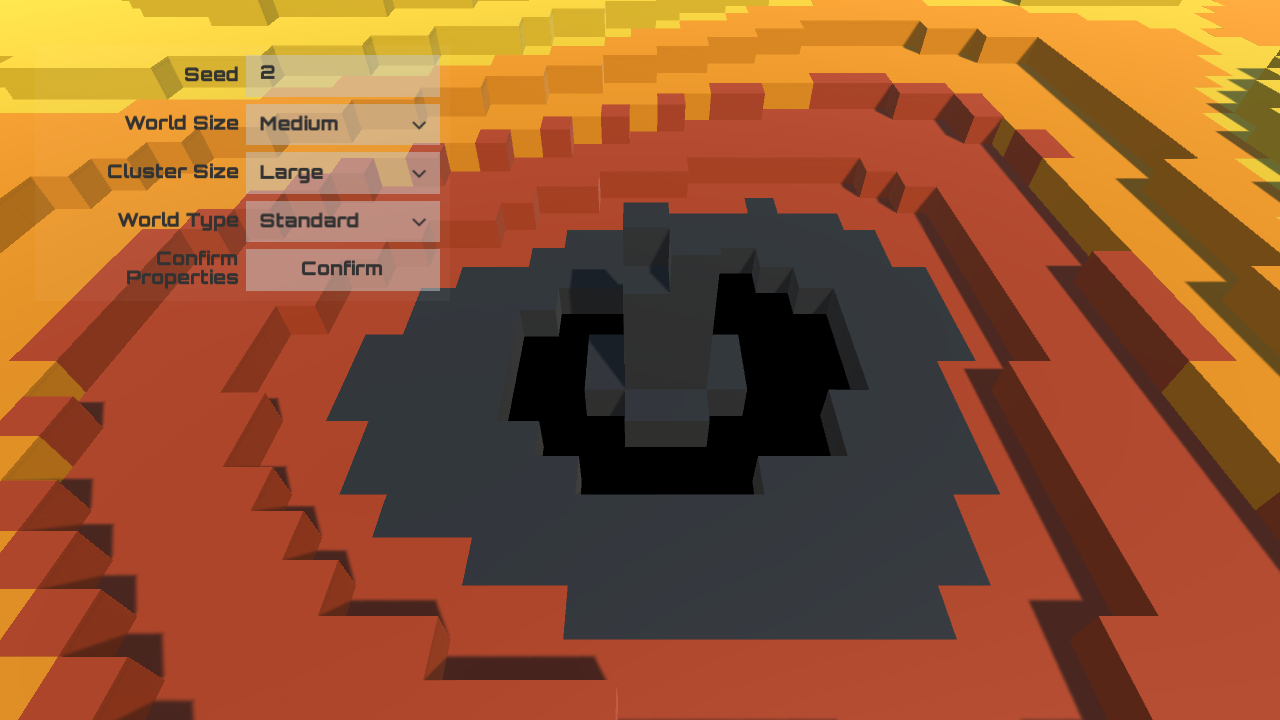
When launching the demo you may notice the control panel in the top left corner of the game window. This panel can only be used by the MasterClient because it controls the world generator. In this demo we have four options available which influences the world generator.
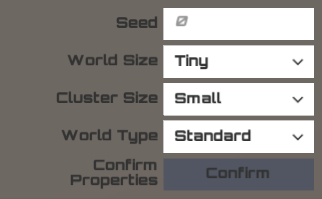
One of these options is the seed which is represented by a number in this demo. The seed needs to have at least one digit and can have up to ten digits, resulting in an interval from 0 to 9,999,999,999.
Another option describes the overall size of the world. For this demo we can create worlds with dimensions from 16 x 16 blocks up to 128 x 128 blocks. Please note that for the purpose of this demo, the generated worlds are not infinite.
A third option describes the size of a cluster. A cluster can contain up to 64 blocks. How many clusters are created mainly depends on this value and the previously mentioned size of the world. Having clusters with a large number of blocks will speed up generating the world (due to our implementation).
Another option describes the type of the world which has an influence on the look of the generated level. The demo has three different options included, which mainly influence the maximum height of a block during the generation process.
Whenever the MasterClient clicks the confirm button on the control panel, the selected options will be stored in the Custom Room Properties in order to make them available for all clients in the same room. Whenever a client receives those updates, he will (re-)run his world generator locally in order to create the new world. Since those options are synchronized and there is no usage of any Random functionality, each client will generate the same world.
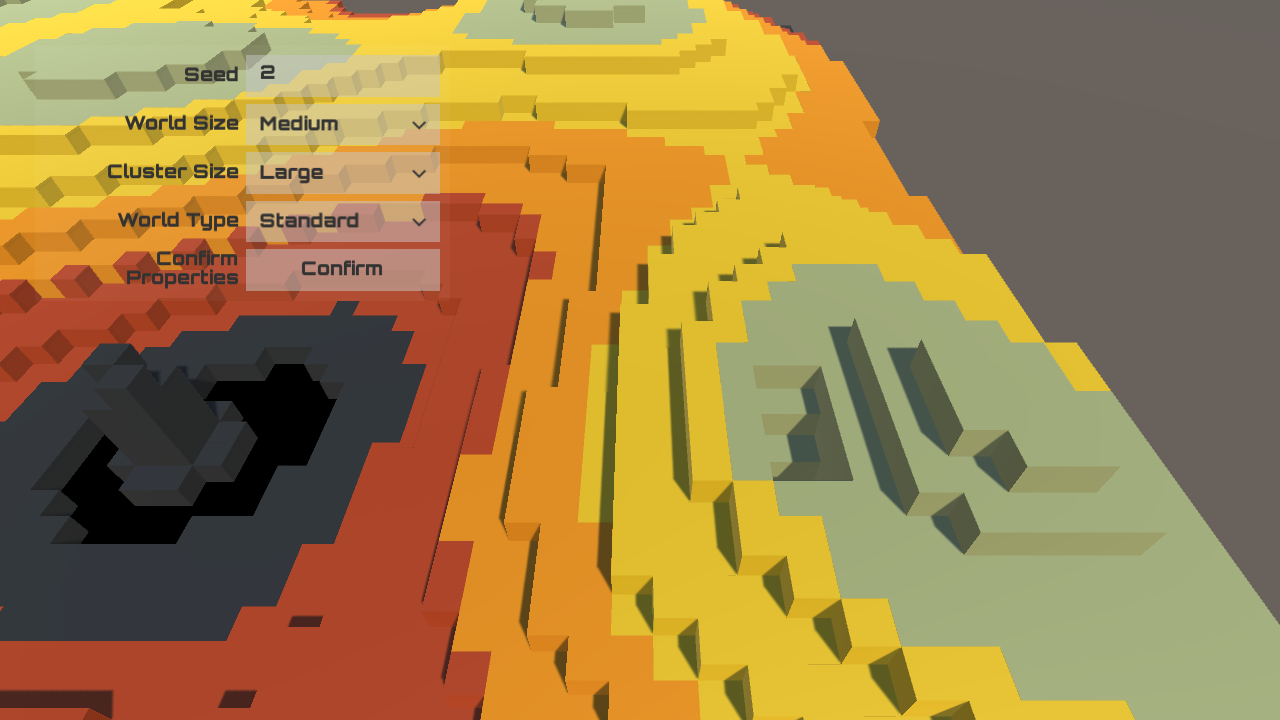
To generate a world, we make use of the Simplex Noise algorithm, which is a noise function. To do so, we are passing the x- and the z-coordinates of each instantiated block to its CalcPixel2D function. Besides the 2D capability, the used Simplex Noise implementation by Benjamin Ward offers functionality for 1D and 3D, too. Each of those functions have two important aspects in common. The first is, that those functions are always returning a value in an interval between -1.0f and 1.0f. We are using this value for calculating the height (y-scale) for each block. The height mainly depends on this value and the used World Type. The second aspect is, that the output of this function is always the same as long as the input stays the same. In other words: you will get different results when changing the input parameters, for example the seed. This is mainly the reason, why we have to synchronize the used seed and the other options for the world generator.
Synchronizing modifications
As previously mentioned, modifications which are applied to the world are stored in the Custom Room Properties. This has one major benefit: each client will automatically receive up-to-date Custom Room Properties including all modifications; we just need to handle them on client-side. This also makes things easier in terms of late-joining clients because we don’t have to think about ways to share the latest state of the world with them, it simply happens ‘automatically’.
To store modified world data in the Custom Room Properties, each Cluster adds an unique identifier and a Dictionary to them. The Dictionary itself contains the unique identifier of certain blocks and their related height (y-scale). The important aspect here is, that only modified blocks are stored in the Custom Room Properties. Unmodified blocks are still described by the previously explained world generator settings and don’t need to be stored here.
Note: we are using a Dictionary in this demo, because it’s simple to use and easier to understand than a more complex solution. There are of course other possible representations to describe modifications made to the world.
This works perfectly fine for the purpose of this demo. If you however want to create a larger scaled game with ‘infinite’ worlds for example, you have to think about hosting it either on the Enterprise Cloud or on a self-hosted Photon Server. Those two options provide the possibility to run custom server-side logic either by using Plugins or by implementing the server application on your own. This might be essential for your game, because you would bypass some limitations, for example in terms of maximum world size or loading times when joining the game.
Most common mistakes
This chapter covers some of the most common mistakes you can make while developing a procedurally generated and networked game.
The first mistake you can make is trying to ‘network-instantiate’ everything. Imagine you want to create a maze which consists of several walls. In terms of PUN an easy approach would be, to create a prefab for this wall, attach a PhotonView component to it and either place it directly in the scene while working with the Unity Editor or instantiate it at runtime using PhotonNetwork.Instantiate or PhotonNetwork.InstantiateRoomObject. This actually might work for a certain amount of objects, however one reason why this is not recommend is that there is a limit for ViewIDs per client. This limit applies for user as well as for scene objects. Due to this limitation a generated maze might also be limited by its size or its complexity for example.
Another common mistake is to use the Random class, either from the Unity or the System namespace, on each client individually. The problem with the Random class is, that you get different results on different machines as long as you don’t use the same seed. The consequence is, that different clients would generate different worlds, which is really bad in terms of multiplayer games. If you still think about using the Random class with a synchronized seed now, there is another major disadvantage: you most likely won’t get results which are visually satisfying. As described the Noise algorithm creates some kind of a heightmap which has - depending on the settings made for generating it - transitions between different height levels. When using the Random class, there most likely won’t be any nice transitions between different height levels. Instead there will be a lot of patchwork ending in a visually disappointing result.
Since we have seen an approach that stores some data by using the Custom Room Properties, you might think about using them to store the generated world entirely. This might work up to a certain point when the world gets too big. The problem however would be, that joining the room takes a long time because a lot of data has to be transferred to the client. A solution in this case would be, to add server-side logic, so that the server can decide, which data needs to be sent to the client. So instead of sending the entire world state at once, the server only sends those parts of the world, the client currently needs and will update him on demand afterwards.
Back to top