Unity Quick Start
This Quick Start provides a high level overview of how to use the Realtime API to connect, find a match and synchronize gameplay state. Each topic links to docs that go into more detail.
This doc uses code from the C# "Particle Demo", which is part of the Realtime SDK v5 for Unity. The general workflow is the same in other Realtime SDK implementations (e.g. in C++).
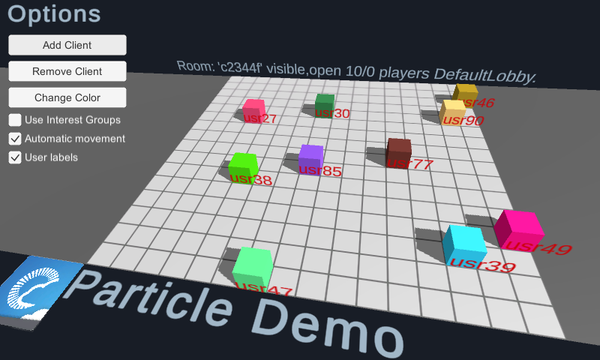
The Particle Demo is really simple: Each "player" has a position on a grid and moves randomly. A color is set per player and can be changed. Optionally, the grid of the "game" can be split into 4 parts by using Interest Groups. Simple cubes will be shown for everyone's last position.
Particle Demo Structure
The central class in the Particle Demo is the GameLogic, which represents one client (or player) without visuals or UI. The idea here is that multiple instances can run in the same app to simulate multiple players and provide some activity.
The DemoUI is a MonoBehaviour which instantiates the GameLogic and integrates it into the game loop by calling UpdateLoop. It also updates the visuals for one instance and contains the settings.
The central class of the Realtime API is the RealtimeClient. Each GameLogic creates a client instance, connects and listens for its callbacks to drive the workflow.
C#
  this.RealtimeClient = new RealtimeClient();
  this.RealtimeClient.AddCallbackTarget(this);
The callbacks for the RealtimeClient are defined in several interfaces (IConnectionCallbacks, IMatchmakingCallbacks, etc), which can be implemented as needed (more about Callbacks).
Connecting
On start DemoUI creates a GameLogic instance an calls this.ActiveGameLogic.CallConnect to go online:
C#
  public void CallConnect(AppSettings appSettings)
  {
      bool couldConnect = this.RealtimeClient.ConnectUsingSettings(appSettings);

      if (!couldConnect)
      {
          this.RealtimeClient.DebugReturn(LogLevel.Error, "Failed to connect.");
      }
  }
The AppSettings provide the configuration for the title. At the bare minimum, this defines the AppId of a title. Here you could also define the AppVersion, region, logging levels and some more.
All network activity (sending messages and dispatching incoming updates) is driven by calling RealtimeClient.Service. Without calling this, a client will go silent and the connection will eventually time out.
The GameLogic.UpdateLoop goes into a bit more detail and calls SendOutgoingCommands and DispatchIcomingCommands individually instead of Service (which calls both). This can be a good idea to dispatch incoming messages before running the simulation and sending updates after things changed.
After connecting, the client transitions through a few states. Behind the scenes, it authenticates the user, figures out the best region to connect to and eventually arrives at a Master Server, which provides matchmaking.
Once connected, the callback OnConnectedToMaster gets called when the client is ready for matchmaking.
The Realtime SDK v5 for Unity also has Async Extensions, which can be nice to use in some cases.
Matchmaking
When a client connects it goes through several steps which result a connection to a Photon Master Server. The next step is to find or create rooms.
In the simplest case, the game just waits for the callback OnConnectedToMaster to call OpJoinRandomOrCreateRoom. The Particle Demo does exactly that:
C#
  /// <summary>Called when the client arrives on the Master Server.</summary>
  /// <remarks>Part of IConnectionCallbacks.</remarks>
  public void OnConnectedToMaster()
  {
      this.JoinRandomOrCreateDemoRoom(Constants.MapType.Forest, 16);
  }

  private void JoinRandomOrCreateDemoRoom(Constants.MapType maptype, int gridSize)
  {
      // custom room properties to use when this client creates a room
      PhotonHashtable roomPropsForCreation = new PhotonHashtable()
      {
        { Constants.MapProp, maptype.ToString() },
        { Constants.GridSizeProp, gridSize }
      };

      // room creation arguments
      EnterRoomArgs enterRoomArgs = new EnterRoomArgs
      {
          RoomOptions = new RoomOptions
          {
              CustomRoomProperties = roomPropsForCreation,
              CustomRoomPropertiesForLobby = Constants.RoomPropsInLobby
          }
      };

      this.RealtimeClient.OpJoinRandomOrCreateRoom(null, enterRoomArgs);
  }
This demo uses null instead of passing JoinRandomRoomArgs to OpJoinRandomOrCreateRoom (first parameter). It does not use filters for the random matchmaking here but other titles probably do.
Despite not being used for matchmaking, the demo defines Custom Room Properties for new rooms. The enterRoomArgs define the CustomRoomProperties to describe the room and set the list of CustomRoomPropertiesForLobby to make some keys available for matchmaking.
Aside from the explicitly defined properties, a new room will
- get a GUID as room name (defined by the server)
- be open (can be joined)
- be visible (to random matchmaking and in a lobby)
- use
MaxPlayers= 0 (which makes it not limited)
The Matchmaking Guide explains matchmaking features in more detail.
Properties
Any client inside a room can access all Custom Room Properties via the Room.CustomProperties Hashtable. Changing or adding new properties must be done via room.SetCustomProperties.
The complete argument Hashtable will be sent, even if the values did not change, so ake sure to only call SetCustomProperties for new or changed properties.
Analog to the properties of a room, you can set Custom Properties per player.
Each client can set player properties as client.localPlayer.SetCustomProperties() - even before joining room.
Custom Player Properties stick with the client and carry over into any next room the player joins.
OnJoinedRoom
Calling OpJoinRandomOrCreateRoom will start the process to get into a room. When done, it will call OnJoinedRoom on registered callback implementation(s).
OnJoinedRoom is a good hook to initialize the local player. In the Particle Demo, it looks like this:
C#
  public void OnJoinedRoom()
  {
      foreach (Player player in this.RealtimeClient.CurrentRoom.Players.Values)
      {
          ParticlePlayer particlePlayer = this.AddParticlePlayer(player);
          if (particlePlayer.IsLocal)
          {
              this.LocalPlayer = particlePlayer;
          }
      }

      // no matter if we joined or created a game, when we arrived in state "Joined", we are on the game server in a room and
      // this client could start moving and update others of it's color
      this.LocalPlayer.RandomizePosition();
      this.ChangeLocalPlayerColor();
  }
On join, every "Photon Player" in the room gets mapped to a ParticlePlayer to store the position, color and last update time. This is done with the foreach loop calling AddParticlePlayer. The GameLogic.ParticlePlayers Dictionary stores all of that.
Next, the position and color for the local player gets randomized.
Events
Sending
In the Realtime API, events are the main way of synchronizing data with the other clients in the same room.
In this demo, the position and color of a player are synchronized via events. While the position changes in intervals, the color is only changed on demand (e.g. in OnJoinedRoom).
GameLogic.ChangeLocalPlayerColor not only changes the color for the local player, it also sends the event to update others:
C#
  public void ChangeLocalPlayerColor()
  {
      if (this.LocalPlayer != null)
      {
          this.LocalPlayer.RandomizeColor();

          RaiseEventArgs raiseEventArgs = new RaiseEventArgs() { CachingOption = EventCaching.AddToRoomCache };
          SendOptions sendOptions = new SendOptions() { Reliability = this.SendReliable };

          this.RealtimeClient.OpRaiseEvent(Constants.EvColor, this.LocalPlayer.WriteEvColor(), raiseEventArgs, sendOptions);
      }
  }
The OpRaiseEvent arguments are:
- byte eventCode
The event code is the identifier of an event. It typically defines the use and content of an event.
As Photon also uses some internal events in the range 200 and up, game logic event codes should use the range 1 to 199. - Object evData
This is the actual data that should be sent. It can be of any Photon serializable type but typically you want to either send a Hashtable (key valuesa are easy to organize and extend) or a byte[] for effectiveness.
Here,WriteEvColorwrites the data as Hashtable. - RaiseEventArgs raiseEventArgs
TheRaiseEventArgswrap up options to send an event to specific users (TargetActors) to an Interest Group (InterestGroup) or if the event should be cached by the server (for late-joining players).
In plenty of cases, the default arguments can be used to send an event to everyone in the room right now. - SendOptions sendOptions
With theSendOptionsyou define how the event gets sent. Events can be sent in a specificChanneland as sequenced or unsequenced. The most important choice is if an event gets sent as reliable or unreliable. It makes sense to send events reliably, if they are not repeated and outdated very soon (e.g. color). When event data is outdated very soon, send it unreliable (e.g. position updates).
In the Particle Demo, the Color update event is reliable and the position updates are unreliable.
Receiving
To react to events sent by anyone, the Particle Demo implements the IOnEventCallback interface as GameLogic.OnEvent(EventData photonEvent).
Like the other callback interfaces, OnEvent only gets called as long as the instance is a target for callbacks. In this demo, the GameLogic constructor calls RealtimeClient.AddCallbackTarget(this).
When receiving events, the photonEvent.Sender provides the ActorNumber of the player who sent the event. Events from the server (e.g. join, leave) are sent with ActorNumber 0.
The Particle Demo stores the position and color of everyone in ParticlePlayer instances by ActorNumber. This is looked up in OnEvent before the event itself is handled:
C#
  ParticlePlayer origin = null;
  bool found = this.ParticlePlayers.TryGetValue(photonEvent.Sender, out origin);
The photonEvent.Code is used to identify which sort of info arrived and to call a method that handles it. For example, this handles position updates:
C#
  case Constants.EvPosition:
      origin.ReadEvMove((PhotonHashtable)photonEvent.CustomData);
Interest Groups
To demonstrate the usage of Interest Groups, the Particle Demo can split the grid into four quadrants.
As long as Interest Groups are enabled in the demo, every client sends position events to a specific RaiseEventArgs.InterestGroup and the event no longer is received by everyone. Instead, clients have to subscribe to Interest Groups they are interested in.
GameLogic.UpdateInterestGroups calls OpChangeGroups to let the server know which Interest Groups it is interested in:
C#
  private void UpdateInterestGroups()
  {
      if (this.UseInterestGroups)
      {
          byte currentGroup = this.GetGroup(this.LocalPlayer);
          if (currentGroup != this.LocalPlayer.VisibleGroup)
          {
              this.RealtimeClient.OpChangeGroups(new byte[0], new byte[] { currentGroup });     // config the server to only send this group
              this.LocalPlayer.VisibleGroup = currentGroup;                               // store which group we now are interested in (server side)
          }
      }
  }
All groups are identified by a byte number and clients can be interested in multiple Interest Groups at the same time.
By default, events are sent to group 0 and everyone always gets this group (no way to unsubscribe).
Interest Groups can be used to reduce the number of events a client receives. They also allow you to implement events which are not received by some of the players (but this can be hacked quite easily).
Back to top