Quick Start
In this post you will get hands on our Photon Cloud "Particle Demo".
The demo that comes with our SDKs shows you how to implement some of the typical use cases you will face when trying to add multiplayer capabilities to your application.
We will take a look at the basic Photon specific operations and what they enable you to do right out of the box.
While the C# code samples below are somewhat specific to the used Photon Unity3D SDK (download),
the basic workflow to (1) connect, (2) create rooms and (3) send events is common across platforms.
Connect To Master Server
The first thing you need to do is to connect your client to the cloud.
We call this process connecting to the Master Server.
From there on the Master Server will take care of all the clients' transfers to game servers, load-balancing within the cloud and the available rooms.
Let's delve right into the code of our demo:
C#
// from "Assets\Photon\DemoCode\GameLogic.cs"
public GameLogic(string appId, string gameVersion)
{
    // this.MasterServerAddress = "your server"; // no need to set any address when using the Photon Cloud.
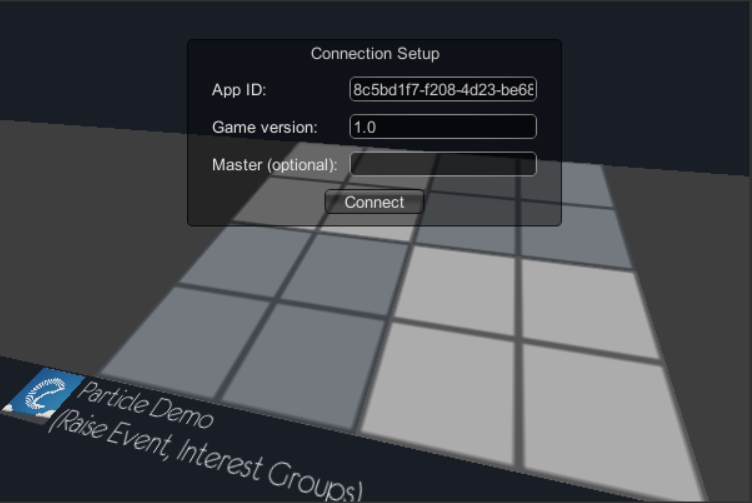
    this.AppId = appId;
    this.AppVersion = gameVersion;

    this.LocalPlayer.NickName = "usr" + SupportClass.ThreadSafeRandom.Next() % 99;

    this.StateChanged += this.OnStateChanged;
    this.UseInterestGroups = true;
    this.JoinRandomGame = true;

    this.DispatchInterval = new TimeKeeper(10);
    this.SendInterval = new TimeKeeper(100);
    this.MoveInterval = new TimeKeeper(500);
    this.UpdateOthersInterval = new TimeKeeper(this.MoveInterval.Interval);
}
GameLogic class inherits LoadBalancingClient which keeps a state and automatically executes transitions between the Master and Game Servers.
Let's take a closer look at the arguments used in the GameLogic constructor:
- string appId: Identifies your application within our cloud system.
If you don't already have an AppId you find it in your Photon Cloud Dashboard.
You need to insert a valid AppId in order for most demos to work. - string gameVersion: A string you can choose to separate distinct builds of your game.
Only clients with the same version number get matched and can communicate with each other.
This makes it a lot easier to add features without breaking older clients.

After you are connected, the Photon Cloud is ready to do your bidding.
You don't have to micromanage from here on, everything is now handled for you!
Now that we are connected to the Master Server we can list, create and join rooms.
At this point players can't communicate or interact with each other.
This is where the concept of rooms comes into play.
Read on to see what you need to do to connect the players to each other.
Lobby, Create Room and Join Room
By default, the LoadBalancing API will get you into the game's "Lobby" when you connect.
While in the lobby, the Master Server provides a list of rooms to a client.
To keep traffic low, clients can't interact with each other in the Lobby.
A room can be considered a separate area where players interact (play their games).
While they are in the same room, players can send and receive events from others, change/update properties of the room etc.
In the following sample, we use the "OpCreateRoom" operation to create and open a room. Creating one also enters it.
C#
RoomOptions options = new RoomOptions();
options.MaxPlayers = 4;
peer.OpCreateRoom("Room 42", options, TypedLobby.Default);
The most notable parameters and RoomOptions are:
- string roomName
The name of the room, used for identifying and joining the room. - bool RoomOptions.IsVisible
This variable determines if the room is in the list of visible rooms that can be seen from the lobby (i.e. players that are connected to the Master Server, but do not reside in a room).
Important is that these rooms can still be joined, as long as the client knows the exact name of the room. - bool RoomOptions.IsOpen
Determines if the room can be joined by a client.
Clients already in the room are unaffected when this variable is changing.
However, they can't rejoin the room after leaving it, as long as isOpen is false. - byte RoomOptions.MaxPlayers
Determines the maximum amount of players in this room.
If set to 0 the number is unlimited.
Note however that, if your planning to have a large amount of users in one room, you should take a look at our Photon Server MMO Application! - Hashtable RoomOptions.CustomRoomProperties
Is an optional set of keys and values you can define to describe the room.
Example: key "level" with a value of "de_dust" or other values.
Properties are synced to all clients in a room and play a role in matchmaking.
More about them, below. - string[] RoomOptions.CustomRoomPropertiesForLobby
Properties that will be shown in Lobby.
With Photon, you can change the properties of a room or of players at runtime, so you are not limited to those set via RoomOptions.CustomRoomProperties.
In a room use room.SetCustomProperties(props) to set new values or override existing ones.
Changes will be merged, so you only have to pass-in keys you want to change.
A room can have many properties but usually only a few are needed for matchmaking, so Photon expects you to define a list of room property keys that should be available in the lobby.
Even keys that are not yet defined in RoomOptions.CustomRoomProperties can be used in string[] CustomRoomPropertiesForLobby and filled with values later on.

Analog to the properties of a room, you can set Custom Properties per player.
Each client can set player properties as LoadBalancingClient.LocalPlayer.SetCustomProperties(), even before joining room.
They stick with the client and get synchronized with any room the client joins or creates.

Now that we successfully created a room, it's time for other clients to
join! Joining a room is quick and easy and shouldn't need any further
explanations as the operation is speaking for itself:
C#
// From LoadBalancingClient.cs
public void OnOperationResponse(OperationResponse operationResponse)
{
    //...
    this.OpJoinRoom(name);
}
Let's see how the players can now interact with each other.
Send Events
For clients to interact with each other, we use a simple event system.
Using events is the main way of sending and receiving fast and reliable information from and to players inside a given room.
All the necessary data for your game logic can be send between clients this way.
You can even customize the way of exchanging information by specifying a protocol (UDP vs. TCP or reliable UDP vs. unreliable UDP) with simple parameters, depending on your needs.

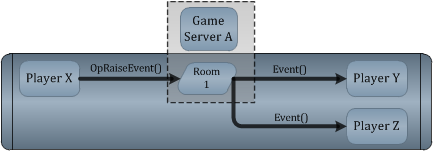
Events will be distributed among participants in the room.
You can decide if you want to send events to a specific list of players, groups or everyone.
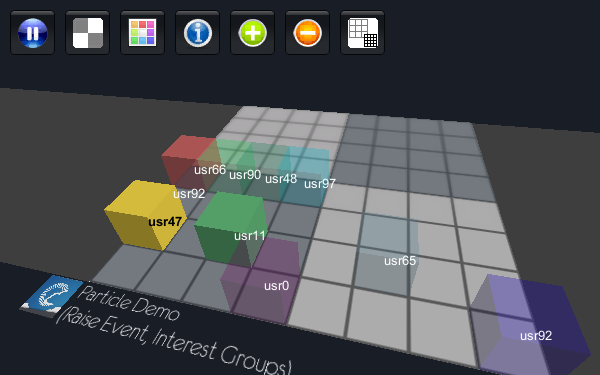
Let's take a look at an event we use in the Particle Demo, for example when changing the color:
C#
public void ChangeLocalPlayercolor()
{
    if (this.LocalPlayer != null)
    {
        this.LocalPlayer.RandomizeColor();
        this.loadBalancingPeer.OpRaiseEvent(DemoConstants.EvColor, this.LocalPlayer.WriteEvColor(), this.SendReliable, new RaiseEventOptions() { CachingOption = EventCaching.AddToRoomCache });
    }
}
The OpRaiseEvent arguments include:
- byte eventCode
The event code specifies the actual event that you want to raise.
There are predefined events by Photon starting from 255 and then moving downwards.
Beginning with 1 and up to 199, you can define your own events to use in your game logic. - Object evData
You can fill this with all the data you need to transfer.
Types used should be supported by Photon.
This is the central data-structure you will use to exchange information between clients.
Recurring and standardized steps for your game logic (e.g. end of turn) should be sent as events. - bool sendReliable
When you set this flag to "true", you switch from UDP to reliable UDP.
This means that any packages lost during transmission will be re-sent and that the clients will make sure that the packages will be interpreted in the order they've been sent.
Not that this might affect performance in a negative way as this extra steps will add additional messages and data burden to overall communication. - int[] RaiseEventOptions.TargetActors
List of ActorNumbers in the room to send the event to. - EventCaching RaiseEventOptions.CachingOption
Affects how the server will treat the event caching-wise.
Can cache events for players joining later on or remove previously cached events. - byte RaiseEventOptions.SequenceChannel
You can use different channels to group and prioritize events you are sending.
We'll illustrate this functionality in a small example:
Let's say you are using channel 1 to send relevant information about the position of players.
You enabled reliable UDP in your game, because you need the extra reliability in the type of game you are envisioning.
At some point channel 1 gets crowded by many messages because some players got delay and have a bad connection with a noticeable amount of packet loss, so a lot of messages have to be re-send.
If you would now enqueue another important event (like the end of round), it might take some time for it to be acknowledged since the clients are still busy receiving all the position updates from channel 1.
So if you dispatch an event now with channelId 0 it will take precedence over all the other queued messages.
By making smart use of this feature you can raise the perceived responsiveness and ensure a correct flow of your game logic, even under mediocre connection conditions.

Last but not least there are additional overloads that you can use to specify the receiver groups.
Thanks for taking your time reading this post!
If you have any questions or comments about this article please come over to our forum and tell us, we really appreciate your feedback!