Voice Intro
Getting Started
Photon Voice 2 is an SDK that makes it easy to add high quality low latency voice chat to a Unity application. It is built on top of Photon Realtime and inherits all of its features, including matchmaking and interest groups.
The client joins the room and creates an outgoing stream (local voice) which all other clients in the room can receive. Interest groups can be used to restrict streaming to group members inside the room.
Photon Voice 2 can be used standalone or in combination with other Photon or third-party components. For Photon Unity Networking (PUN2) and Photon Fusion, the SDK provides integration modules.
Audio is captured and played via Unity APIs by default. It's also possible to capture audio with Photon native microphone modules which enable hardware audio processing, including Acoustic Echo Cancellation (AEC). The Photon Voice 2 API allows custom integrations with third-party input and output modules. FMOD input and output modules provided with the SDK are examples of such integration.
A simple audio processing API is available for easy integration of third-party audio processing components (DSP, lip sync, speech recognition, and more). A notable example of such integration is WebRTC Audio software processing component enhancing the quality of captured audio which is useful when hardware audio processing is not available.
Join our discord server to chat with the community or one of our team members when available.
Supported Platforms
- Windows
- UWP
- macOS
- Linux
- Android (for 64-bit support read this)
- iOS
- visionOS
- WebGL (Unity 2021.2 or higher required, Safari is not supported)
- PlayStation 4 (requires a special add-on that can be downloaded here. Read more about access to consoles here.)
- PlayStation 5 (requires a special add-on that can be downloaded here. Read more about access to consoles here.)
- Nintendo Switch (requires a special add-on that can be downloaded here. Read more about access to consoles here.)
- MagicLeap (Lumin OS, requires a special add-on that can be downloaded here. Read more about Magic Leap here.)
- HoloLens 2 (ARM64 requires a special add-on that can be downloaded here.)
- Xbox One with XDK (requires a special add-on that can be downloaded here. Read more about access to consoles here.)
- Xbox One, Xbox Series X and Xbox Series S with GDK (requires a special add-on that can be downloaded here. Read more about access to consoles here.)
Scripting Backend Compatibility
Photon Voice works best with IL2CPP.
Mono is not fully supported.
Install Instructions
The minimal Unity version required is 2019.4 LTS.
Photon Voice 2 can be downloaded and imported from the Unity Asset Store here.
Photon Voice 2 package includes PUN2.
PUN2 already includes Photon Realtime Unity SDK as it depends on it, Photon Chat and Photon Unity libraries.
You can clean up PUN2 or clean up Photon Chat from the project if you want to but the other parts are required for Photon Voice to work.
For compatibility with other Photon packages and to guarantee smooth updates, we do not recommend moving Photon assets outside of root Photon folder ("Assets\Photon").
Photon Voice 2 is not compatible with PUN Classic though.
Photon Voice Classic is to be used with PUN Classic but both packages will be going away soon.
Clean Import
To avoid any conflicts errors due to versions mismatch when you import Photon Voice 2 in a project already containing PUN2, it's recommended to clean up Photon assets first:
- If you don't use another Photon package (e.g. Photon Bolt) delete "Assets\Photon" folder.
- If you imported another Photon package in parallel then delete the following folders:
- "Assets\Photon\PhotonChat"
- "Assets\Photon\PhotonRealtime"
- "Assets\Photon\PhotonUnityNetworking"
- "Assets\Photon\PhotonLibs"
You could also follow this step if you want to do a clean import after encountering an issue after updating Photon Voice 2 or importing another Photon package.
Update
We do not recommend importing PUN2 on top of Photon Voice 2.
We always try to release a Photon Voice 2 version just after a PUN2 update so you could get the latest PUN2 from Photon Voice 2.
If you encounter an issue when updating Photon Voice 2 from the Unity Asset Store try doing a clean import.
Key Components
Recorder
The Recorder is the component that captures the audio source, compresses audio data and broadcasts it in the room.
Speaker
The Speaker component and its variations (SpeakerAudioFilterRead, SpeakerFMOD) play the incoming audio stream.
The default implementation makes use of Unity's AudioSource component.
A VoiceConnection instance is responsible for instantiating a Speaker if required and routing the incoming audio stream to the proper Speaker instance.
Speaker Jitter Buffer
Speaker uses a jitter buffer to compensate for variations in packet transmission times. Use Speaker.PlayDelay property to adjust the size of the jitter buffer in ms. The default value is 200 ms.
The higher the value the larger the delay between audio recording and playback. On the other hand, too low values may cause playback to be interrupted.
VoiceConnection
A VoiceConnection instance is required in the scene to be able to connect the voice client to Photon Servers.
The SDK provides 3 VoiceConnection implementations currently: UnityVoiceClient, PunVoiceClient, FusionVoiceClient.
UnityVoiceClient
An implementation of VoiceConnection maintaining only Voice room connection.
Application Settings
UnityVoiceClient.UseVoiceAppSettings: if true, the setting from the globalVoiceAppSettingsobject are used. Otherwise, set the values specific to this UnityVoiceClient component in the "App Settings" foldout.
Streaming
UnityVoiceClient.PrimaryRecorder: if set, the Recorder attached to this object will be automatically initialized and used for streaming.UnityVoiceClient.SpeakerPrefab: the prefab that will be used to instantiate the speaker object when a new incoming stream is detected. Must contain a Speaker component.
How To Use
- Add a UnityVoiceClient component to an object in the scene.
- Set
App Id Voicein the globalVoiceAppSettingobject (click the button with that name to access it) or uncheckUse Voice's App Settingsand setApp Id Voicedirectly in UnityVoiceClient. - Add a Recorder to the scene, and assign it to the
VoiceConnection.PrimaryRecorderfield. - Add a Speaker prefab (a prefab that has a Speaker component) and assign it to the
VoiceConnection.SpeakerPrefabfield. - Add a script which joins the client to the room using Photon Realtime API on VoiceConnection component (see "ConnectAndJoin.cs" utility script for example).
- Run several instances of the app on different devices: now they are in the chat room and can communicate with each other.
- You can also test the app with only one client in the room: set
Recorder.DebugEchoModefield to true from the code or in the Editor. Outgoing stream will be routed back to the client and played through the Speaker instance.
How To Remove PUN
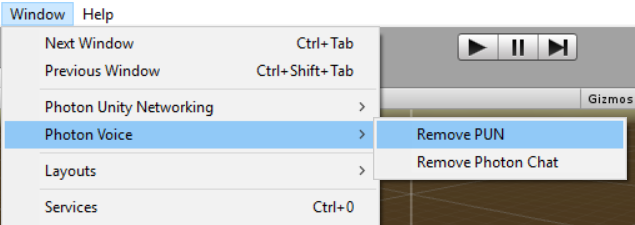
If you don't need PUN2 included in Photon Voice 2 package, you can remove it.
There is an Editor shortcut for this: "Window" -> "Photon Voice" -> "Remove PUN".
Alternatively, you can do this manually by following these steps:
- Delete "Demos\DemoVoicePUN" folder
- Delete "Photon\PhotonVoice\Code\PUN" folder
- Delete "Photon\PhotonUnityNetworking" folder
- While this should be done for you, make sure that in "Project Settings" -> "Player" -> "Other Settings" -> "Scripting Define Symbols",
PHOTON_UNITY_NETWORKING, allPUN_2_X_OR_NEWERandPUN_2_OR_NEWERare removed.
You can always add the files back at any time by importing Photon Voice 2 from the Asset Store.
How To Remove Photon Chat
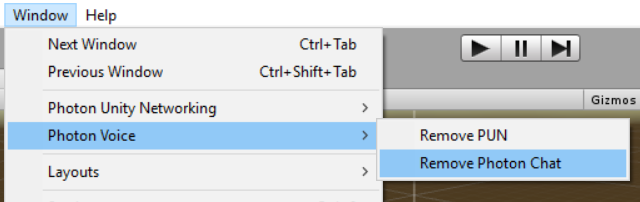
If you want to use Photon Voice without Photon Chat, you can keep Photon Chat inside your project or simply remove it.
There is an Editor shortcut for this: "Window" -> "Photon Voice" -> "Remove Photon Chat".
Alternatively, you can do this manually by deleting "Photon\PhotonChat" folder.
You can always add the files back at any time by importing Photon Voice 2 from the Asset Store.
Back to top