Step by Step Guide
Guide Intro
This guide's purpose is to show you how to create, configure and use your first Photon Server plugin.
This guide is intended for users who are discovering Photon Server plugins for the first time.
This guide should be followed carefully step by step and in order.
This guide does not replace the manual.
Your First Plugin
In this first part we will create and deploy a minimal plugin.
Extract the SDK. The resulting folder path will be referred to as "{pluginsSdkFolder}" throught this guide.
Download a valid license and save it into the "{pluginsSdkFolder}\deploy\bin_Win64" folder.
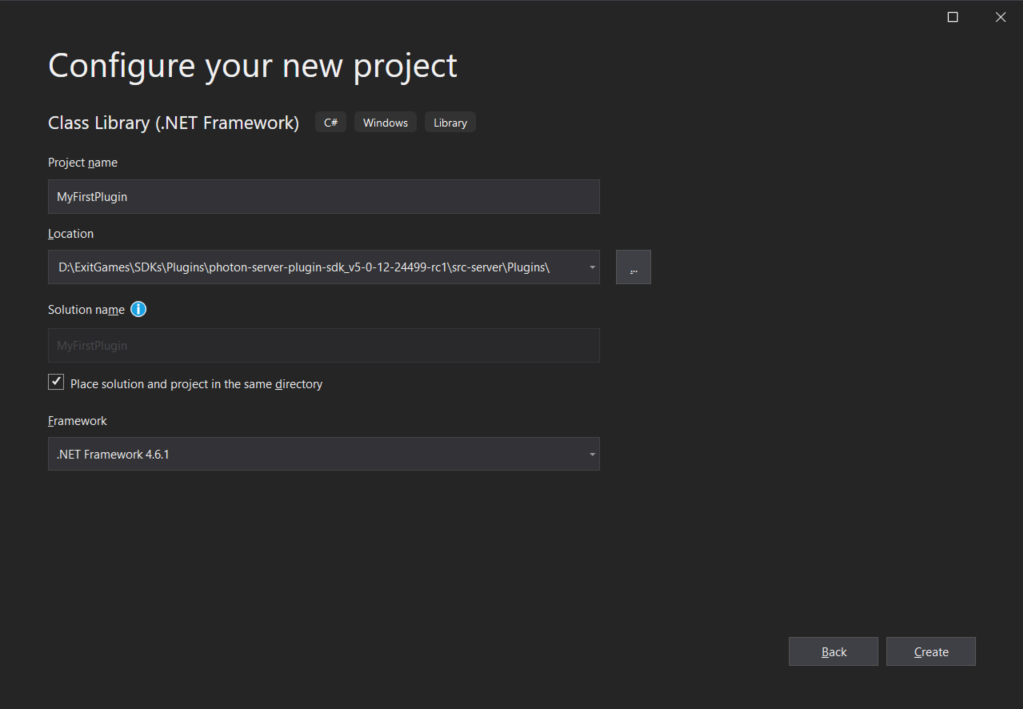
Create a new Visual Studio project (Visual Studio 2019 Community edition was used in this guide):
- Add a new project of type "Class Library (.NET Framework)"
- Project name: "MyFirstPlugin"
- Location: "{pluginsSdkFolder}\src-server\Plugins"
- Check: "Place solution and project in the same directory"
- Framework: ".NET Framework 4.6.1" (or higher)
New Project Creation Window in Visual Studio 2019 Add dependencies:
Only one library is needed: "PhotonHivePlugin.dll".
To add it from Visual Studio:- Right click on "References" from the project
- Click "Add Reference.."
- Choose "Browse"
- Click "Browse" and choose "{pluginsSdkFolder}\src-server\Plugins\lib\net461\PhotonHivePlugin.dll"
- Confirm with "OK"
Add plugin class:
- Rename the class file automatically created by VS from "Class.cs" to "MyFirstPlugin.cs".
- VS will suggest to rename the class also, accept. Otherwise rename the class yourself from
ClasstoMyFirstPlugin. - Extend
PluginBase.
C#
using Photon.Hive.Plugin;

    namespace MyFirstPlugin
    {
        public class MyFirstPlugin : PluginBase
        {
        }
    }
Set plugin name:
C#
public override string Name => "MyFirstPlugin";- The reserved plugin names are "Default" and "ErrorPlugin".
Override
SetupInstanceto create a logger:C#
private IPluginLogger pluginLogger;

public override bool SetupInstance(IPluginHost host, Dictionary<string, string> config, out string errorMsg)
{
    this.pluginLogger = host.CreateLogger(this.Name);
    return base.SetupInstance(host, config, out errorMsg);
}
Add a log message in a callback:
C#
public override void OnCreateGame(ICreateGameCallInfo info)
{
    this.pluginLogger.InfoFormat("OnCreateGame {0} by user {1}", info.Request.GameId, info.UserId);
}
Call one callback processing method:
C#
public override void OnCreateGame(ICreateGameCallInfo info)
{
    this.pluginLogger.InfoFormat("OnCreateGame {0} by user {1}", info.Request.GameId, info.UserId);
    info.Continue(); // same as base.OnCreateGame(info);
}
Add plugin factory class:
- Add a new class named
MyPluginFactory - Make it public
C#
using Photon.Hive.Plugin; namespace MyFirstPlugin { public class MyPluginFactory { } }- Add a new class named
Extend class
PluginFactoryBase:C#
using Photon.Hive.Plugin;

namespace MyFirstPlugin
{
    public class MyPluginFactory : PluginFactoryBase
    {
        public override IGamePlugin Create(string pluginName)
        {
            throw new NotImplementedException();
        }
    }
}
Create and return plugin:
C#
public override IGamePlugin Create(string pluginName)
{
    return new MyFirstPlugin();
}
Build solution (F6).
Update plugins configuration:
- Open "{pluginsSdkFolder}\deploy\LoadBalancing\GameServer\bin\plugin.config"
- Update "PluginSettings" node as follows:
XML
<Configuration>
  <PluginSettings Enabled="true">
    <Plugins>
      <Plugin
        Name="MyFirstPlugin"
        AssemblyName="MyFirstPlugin.dll"
        Type="MyFirstPlugin.MyPluginFactory" />
    </Plugins>
  </PluginSettings>
</Configuration>
Read more about plugins configuration on self-hosted Photon Server.
Copy binaries to expected path:
Copy everything from "{pluginsSdkFolder}\src-server\Plugins\MyFirstPlugin\bin\Debug" to "{pluginsSdkFolder}\deploy\Plugins\MyFirstPlugin\bin".
Open [PhotonControl].
It can be found at "{pluginsSdkFolder}\bin_Win64\PhotonControl.exe".Start Photon Server as an application:

Start LoadBalancing from PhotonControl Check the logs:
You can directly open the logs from PhotonControl:
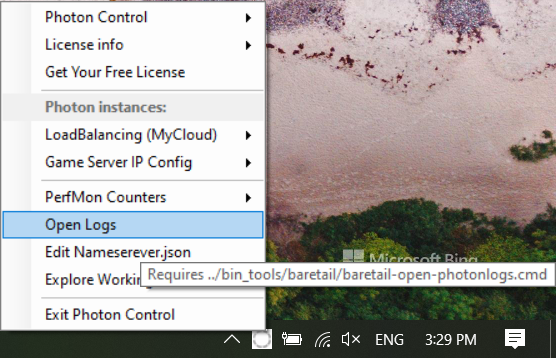
Open Logs from PhotonControl In the "{pluginsSdkFolder}\deploy\log\GSGame.log" you should see the plugin configuration parsed and processed successfully:
Plain Old Text
2021-05-24 16:00:06,904 [1] INFO  Photon.Hive.Plugin.PluginManager - Plugin configured: name=MyFirstPlugin
2021-05-24 16:00:06,909 [1] DEBUG Photon.Hive.Plugin.PluginManager - Plugin path is set to 'D:\ExitGames\SDKs\Plugins\photon-server-plugin-sdk_v5-0-12-24499-rc1\deploy\Plugins/MyFirstPlugin//bin/MyFirstPlugin.dll'
2021-05-24 16:00:06,931 [1] INFO  Photon.Hive.Plugin.PluginManager - Loaded Assembly Name=MyFirstPlugin, Version=1.0.0.0, Culture=, PublicKey token=, Path=D:\ExitGames\SDKs\Plugins\photon-server-plugin-sdk_v5-0-12-24499-rc1\deploy\Plugins/MyFirstPlugin//bin/MyFirstPlugin.dll
2021-05-24 16:00:06,931 [1] INFO  Photon.Hive.Plugin.PluginManager - Referenced Assembly Name=mscorlib, Version=4.0.0.0, Culture=, PublicKey token=B7-7A-5C-56-19-34-E0-89, Path=
2021-05-24 16:00:06,932 [1] INFO  Photon.Hive.Plugin.PluginManager - Referenced Assembly Name=PhotonHivePlugin, Version=1.1.0.24499, Culture=, PublicKey token=, Path=
2021-05-24 16:00:06,932 [1] INFO  Photon.Hive.Plugin.PluginManager - Plugin Type MyFirstPlugin.MyPluginFactory from assembly MyFirstPlugin, Version=1.0.0.0, Culture=neutral, PublicKeyToken=null was successfuly created
2021-05-24 16:00:06,933 [1] INFO  Photon.Hive.Plugin.PluginManager - Plugin manager (version=1.1.0.24499) is setup. type=MyFirstPlugin.MyPluginFactory;path=D:\ExitGames\SDKs\Plugins\photon-server-plugin-sdk_v5-0-12-24499-rc1\deploy\Plugins/MyFirstPlugin//bin/MyFirstPlugin.dll;version=1.1.0.24499
Connect to Photon Server. Use any client SDK.
Create a room. Call the appropriate method for your SDK which implements the CreateRoom operation.
Recheck the logs:
In the "{pluginsSdkFolder}\deploy\log\GSGame.log" you should see the plugin creation followed by your custom log message from the plugin callback:Plain Old Text
2021-05-24 16:03:19,734 [20] INFO  Photon.Hive.Plugin.PluginManager - Plugin successfully created:Type:MyFirstPlugin.MyPluginFactory, path:D:\ExitGames\SDKs\Plugins\photon-server-plugin-sdk_v5-0-12-24499-rc1\deploy\Plugins/MyFirstPlugin//bin/MyFirstPlugin.dll
2021-05-24 16:03:19,760 [20] INFO  Plugin.MyFirstPlugin - OnCreateGame 81f04234-892d-4b14-ae17-3708e9f7fe5c by user 848140c0-a7fb-4d61-ba5f-5846184a9b78
2021-05-24 16:03:19,761 [20] DEBUG Photon.Hive.Plugin.CreateGameCallInfo - Continue.
Debug Mode
In this second part we will show you our recommended workflow for plugins development.
Close the Visual Studio project and open it again but this time by double clicking on "{pluginsSdkFolder}\src-server\Plugins\MyFirstPlugin\MyFirstPlugin.sln" solution file.
This step is important to be able to use paths relative to the solution folder path in step 3.Update the plugin project's "Post-Build Events":
The idea here is to automatically update plugins binaries by coping and pasting from project build output directory to expected path by the Photon configuration.
Enter this command which does exactly this just after a successful build in the "Post-Build Events" text area as shown in the screenshot.
We use relative paths for convenience and portability.Plain Old Text
xcopy /Y /Q "$(TargetDir)*.*" "$(SolutionDir)..\..\..\deploy\Plugins\MyFirstPlugin\bin\"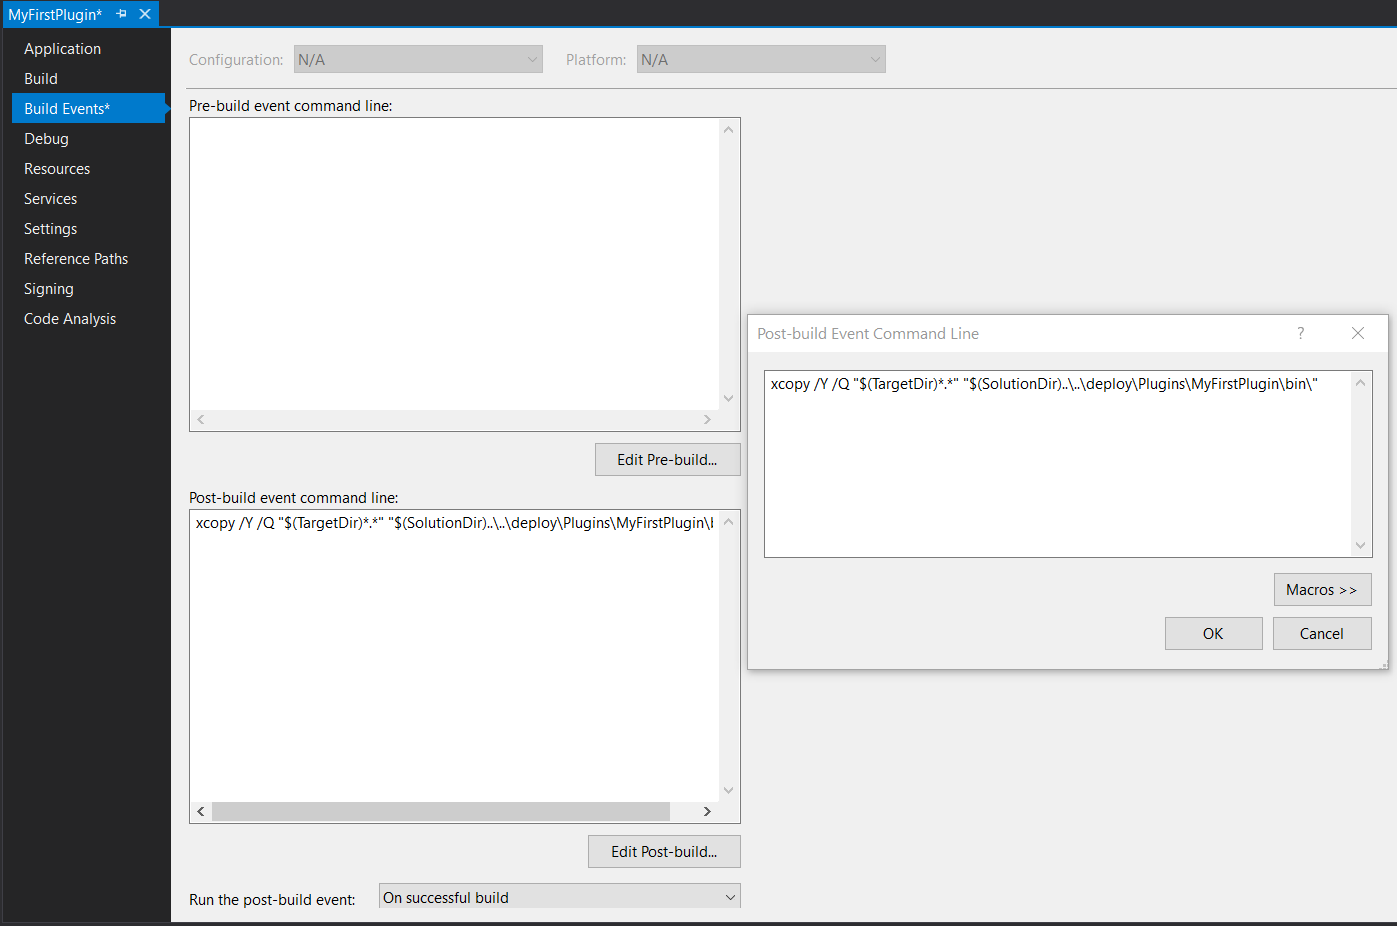
Post Build Events Do not forget to save.
Update the plugin project's "Debug" actions:
The idea here is to automatically start Photon Server when debugging plugin starts and stopping when it stops.
Configure the "Start action" and "Start options" as shown in the screenshot.
We use relative paths for convenience and portability."Start external program":
Plain Old Text
..\..\..\deploy\bin_Win64\PhotonSocketServer.exe"Command line arguments":
Plain Old Text
/run LoadBalancing /configPath ..\..\..\..\..\deploy\bin_Win64
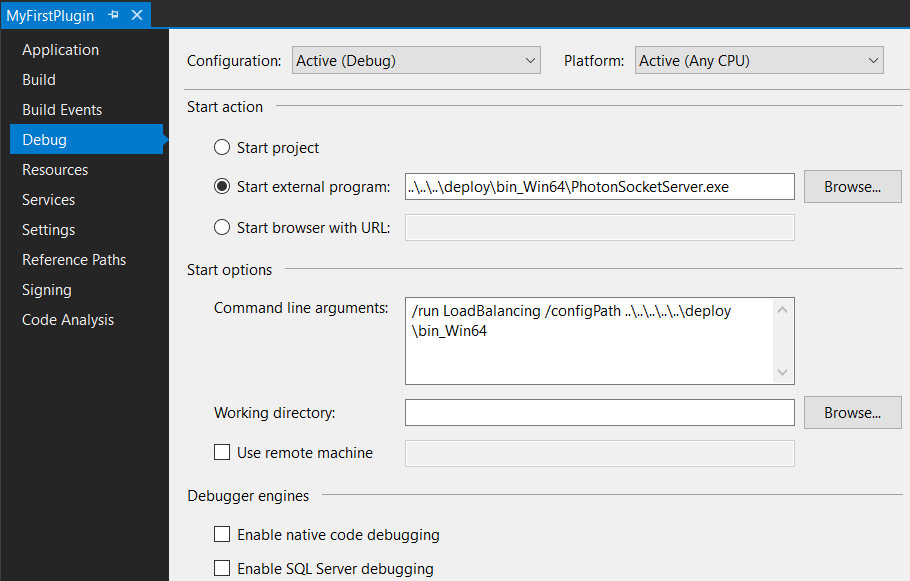
Debug Start Action Do not forget to save.
Add a breakpoint:
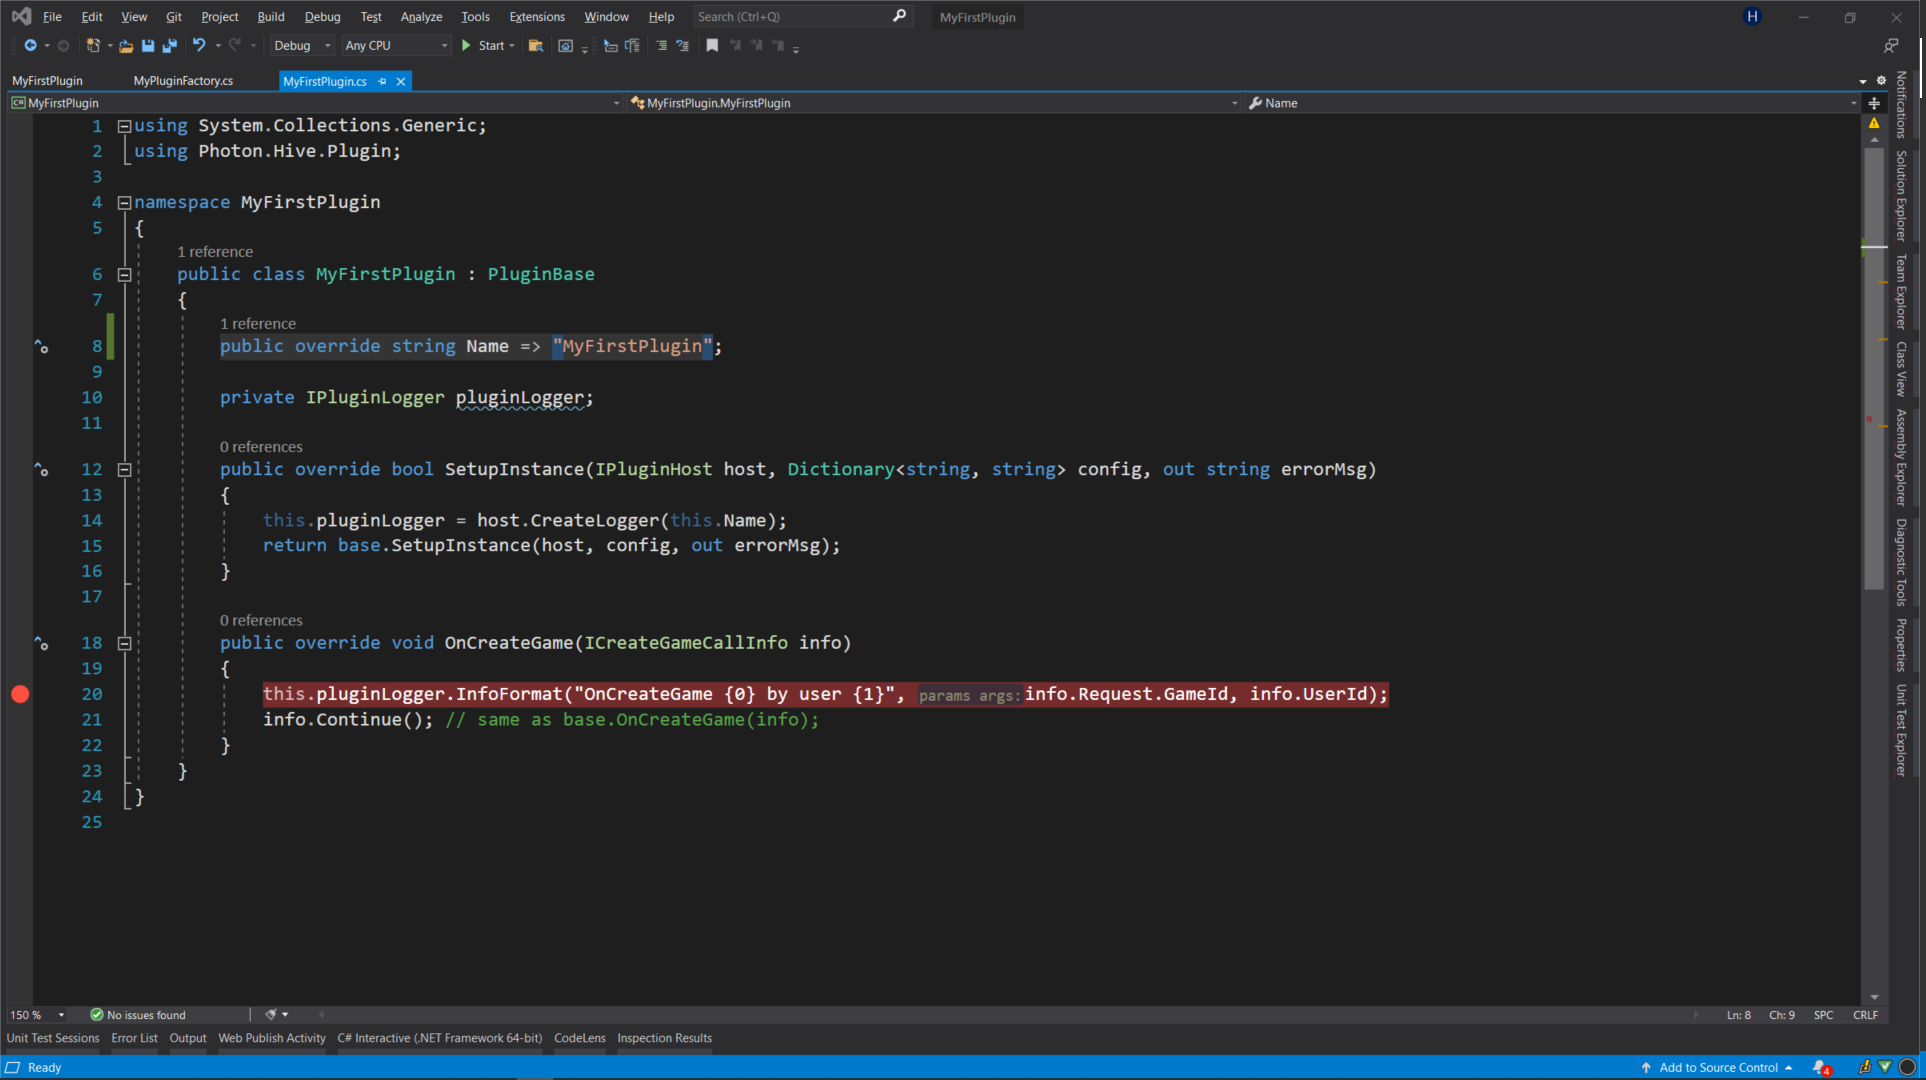
Breakpoint in MyFirstPlugin.OnCreateGame Stop Photon Server from [PhotonControl]:
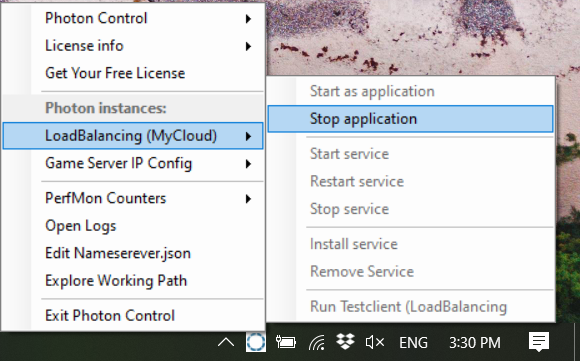
Stop LoadBalancing from PhotonControl Start Photon Server from Visual Studio (F5):
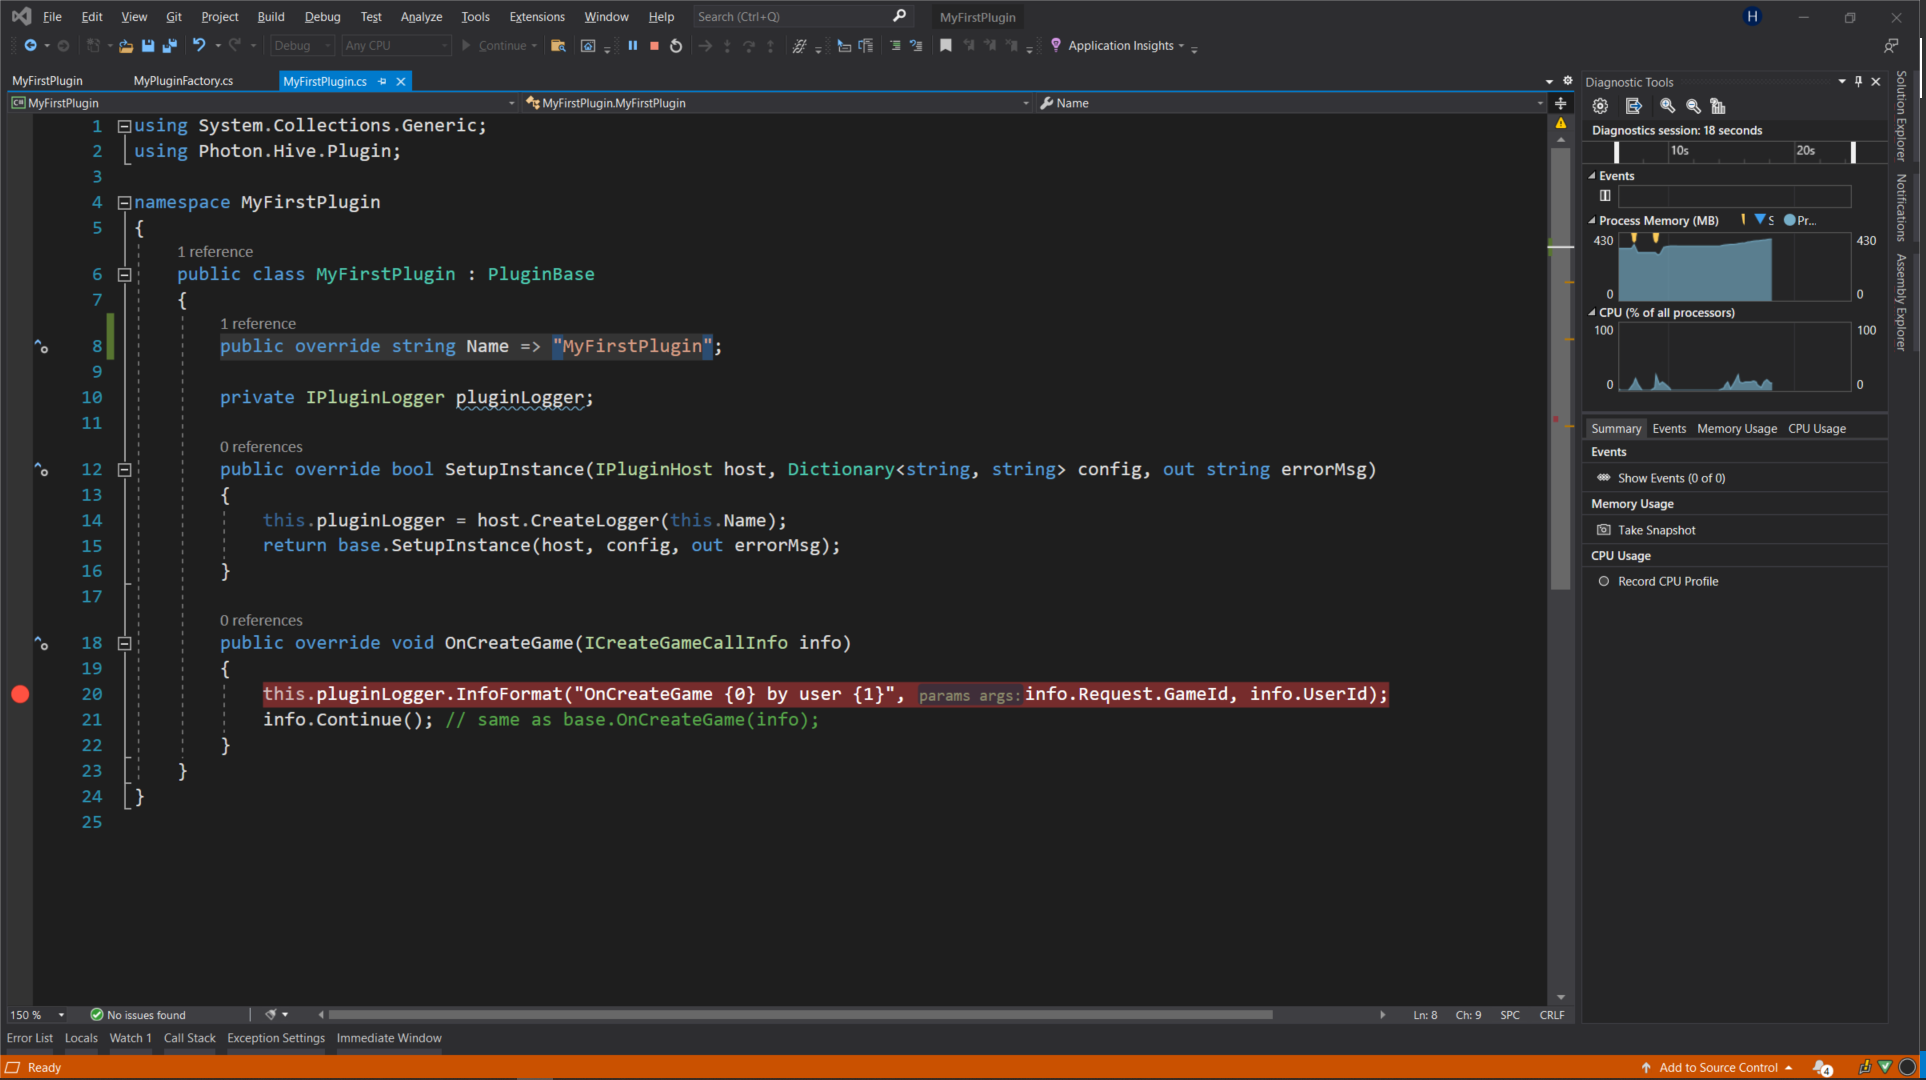
Photon Server debug started from Visual Studio You can check the server is started using TaskManager. The process is named Photon.
Connect to Photon Server. Use any client SDK.
Create a room. Call the appropriate method for your SDK which implements the CreateRoom operation.
Wait for the breakpoint to be triggered:
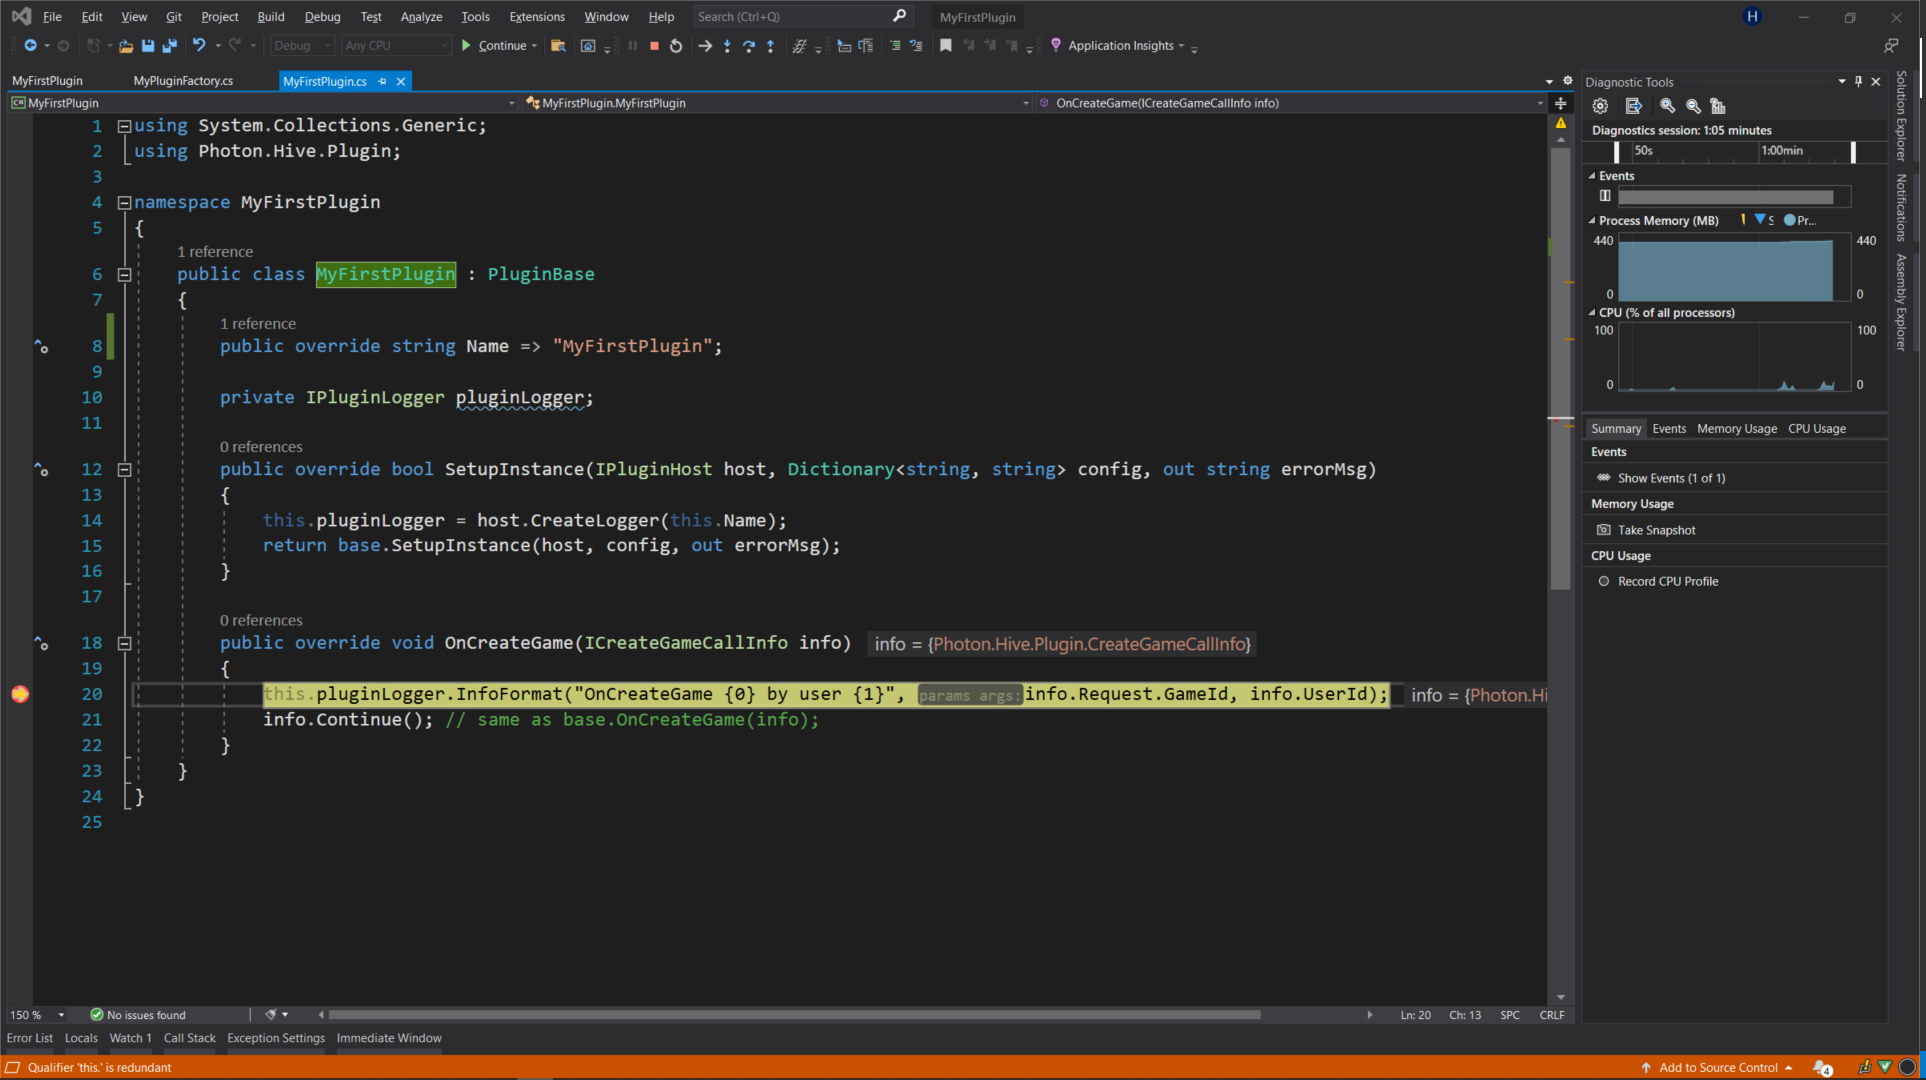
Breakpoint Triggered