Setup
This Addon is for Fusion 2.1.x. It does not support Fusion 2.0.x.
Download Plugin SDK
The SDK is available on the Overview page.
Installation
SDK Setup
- (Windows only) Unblock
FusionPluginSDK-x.x.x.zipbyright-click > Properties > Unblockbefore unzipping it. - Unzip the archive into a folder inside or next to the Fusion Unity project
|
Or | |
- Place your
.licensefile inFusion.Plugin.Custom/Config/. Without it, the server will log a license error and refuse to start games.
Unity Setup
- Inside your Unity project, create a
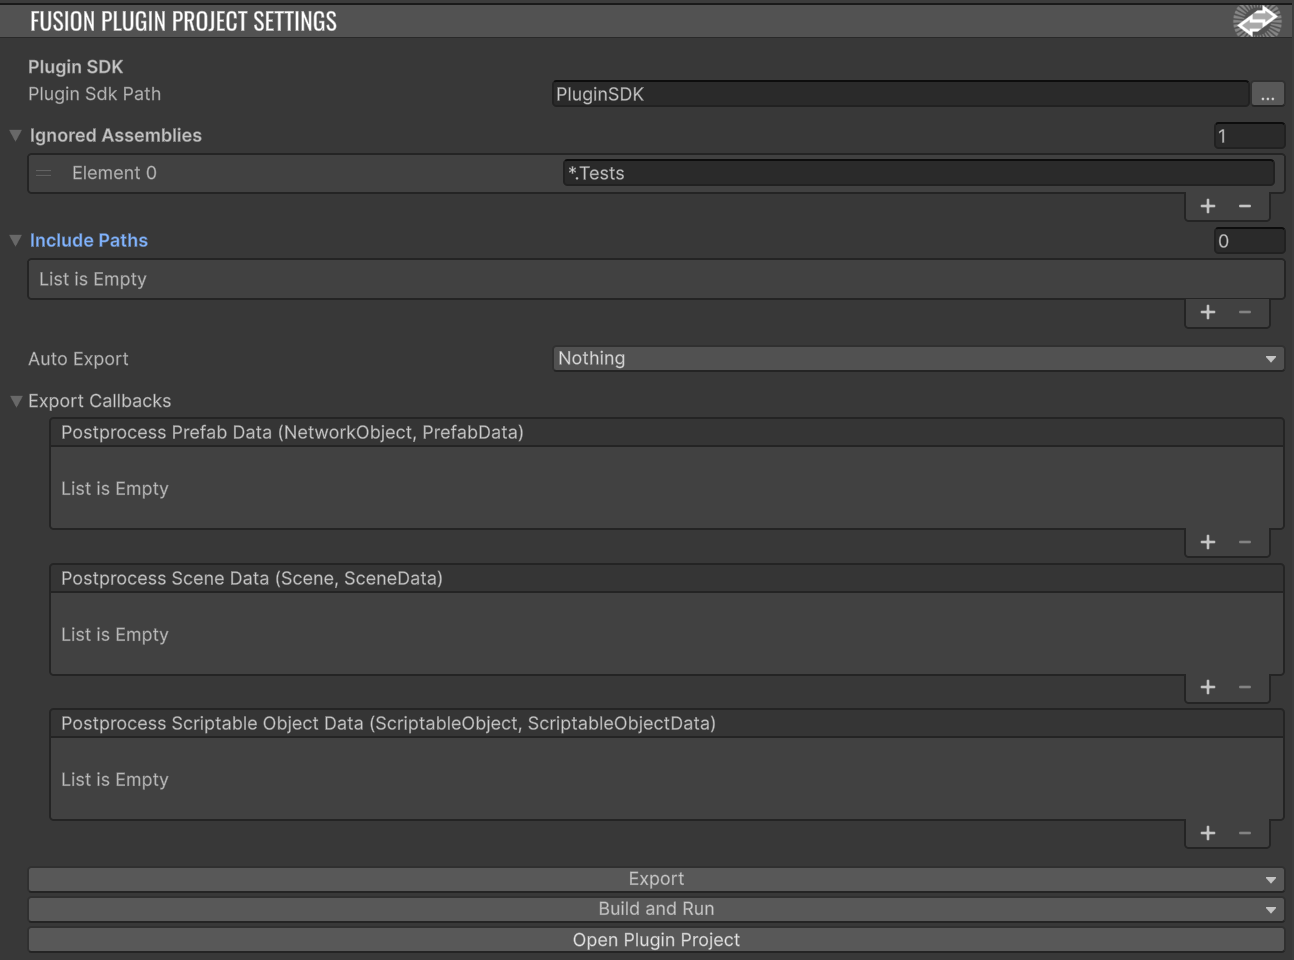
FusionPluginProjectSettingsasset viaright-click > Create > Fusion > Plugin Project Settings. - Set the
Plugin SDK Pathfield to the directory you extracted the SDK into in the previous step.
- Press
Export. It should complete without errors. - Press
Build and Run. This builds your custom plugin and starts the localPhotonServerwith your plugin loaded in a new terminal window. - To get your game to connect to the local server, open
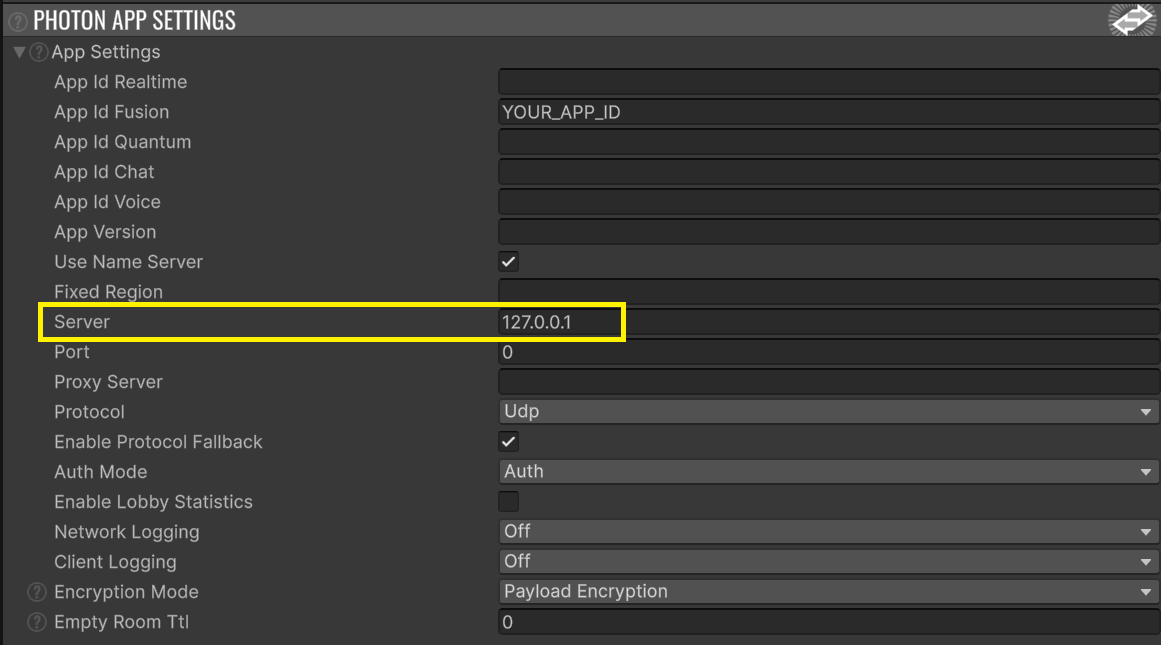
PhotonAppSettingsand set the server IP address to127.0.0.1.
- Run your game and connect. You should see a log line's output in the terminal as the player connects.
IDE Setup
The Build and Run button is convenient but obscures the underlying C# solution. To work on the plugin code directly, open the solution file at PluginSDK/Fusion.Plugin.Custom.sln — either by opening it from your file explorer, or via the Open Plugin Project button in the FusionPluginProjectSettings inspector.
Once the solution is open in your IDE, you can launch the server and plugin straight from the IDE's run/debug button — there's no need to come back to Unity and press Build and Run. This is also the path for attaching a debugger, setting breakpoints, and inspecting plugin state at runtime.
Have a go at extending CustomServer, this is done by placing a new partial in the Fusion.Plugin.Custom assembly, we recommend naming it CustomServer.User.cs
C#
namespace Fusion.Plugin;

partial class CustomServer {
  public override void OnPlayerJoined(NetworkRunner runner, PlayerRef player) {
    base.OnPlayerJoined(runner, player);

    Log.Info($"Adding player {player}");

  }
}
Run your server from the IDE, or from the button in Unity and reconnect. You should now see the following log line when the player connects
15:01:58.317 [Plugin.Custom] [8 ] INFO - adding player [Player:1]SDK structure
Inside the extracted SDK you'll find:
| Directory | Description |
|---|---|
Fusion.Plugin.Custom/ |
Core plugin project — the plugin lifecycle classes (CustomServer, CustomPlugin, CustomPluginFactory) live here, and this is where you extend them (see Plugin entry points). |
Fusion.Plugin.Types/ |
Home of your exported types and the related static JSON database. This is where most of your plugin code lives — your partial extensions of exported NetworkBehaviours, networked structs and other generated types must sit here, alongside the generated partials they extend. |
Lib/ |
Prebuilt Fusion runtime binaries (Debug and Release). |
Photon.Server/ |
Local Photon Server used for development. |
Fusion.Plugin.Custom.sln |
Top-level solution. Open this in your IDE. |
After any change in Unity to networked types or assets (prefabs, scenes, scriptable objects) that the plugin needs to see, press Export again. The plugin works against a snapshot taken at export time.
Next steps
You now have a custom plugin running and connected. To extend it with game-specific behaviour — overriding server-side callbacks, intercepting RPCs, making properties plugin-authoritative, baking custom data in from Unity — see Features.
Last updated on
Back to top