Lobby Manager
In terms of online multiplayer games, one of the main aspects that can make your game really interesting and sometimes standout is how you join together your clients, matching certain types of play style or skill level, in order to provide the best experience to all your players.
Considering this scenario, the Photon Bolt team has built a basic Lobby/Matchmaking system giving you a headstart, and that can be used as a basis to implement your own, extending the features or only replacing the visuals, but keeping the core code.
You can modify it as you want.
Main features implemented on the Lobby sample:
- Create new Sessions with custom name/id;
- Join a Random Session;
- Browser of Sessions on your current region;
- Kick players from a game session;
- Custom attributes of players (name and color) while inside a session;
- "Ready" status for each players;
- Configurable minimum number of players to start the game;
In rest of this page, we will describe how to use the interface of the sample and how you can configure it. All source code of this sample can be found on our Bolt Samples Github repository here.
We will start with the main window that it presented when the player first load the PhotonLobby scene. In this scene, you will find an instance of the LobbyManager prefab, which will take care of running and managing Photon Bolt.
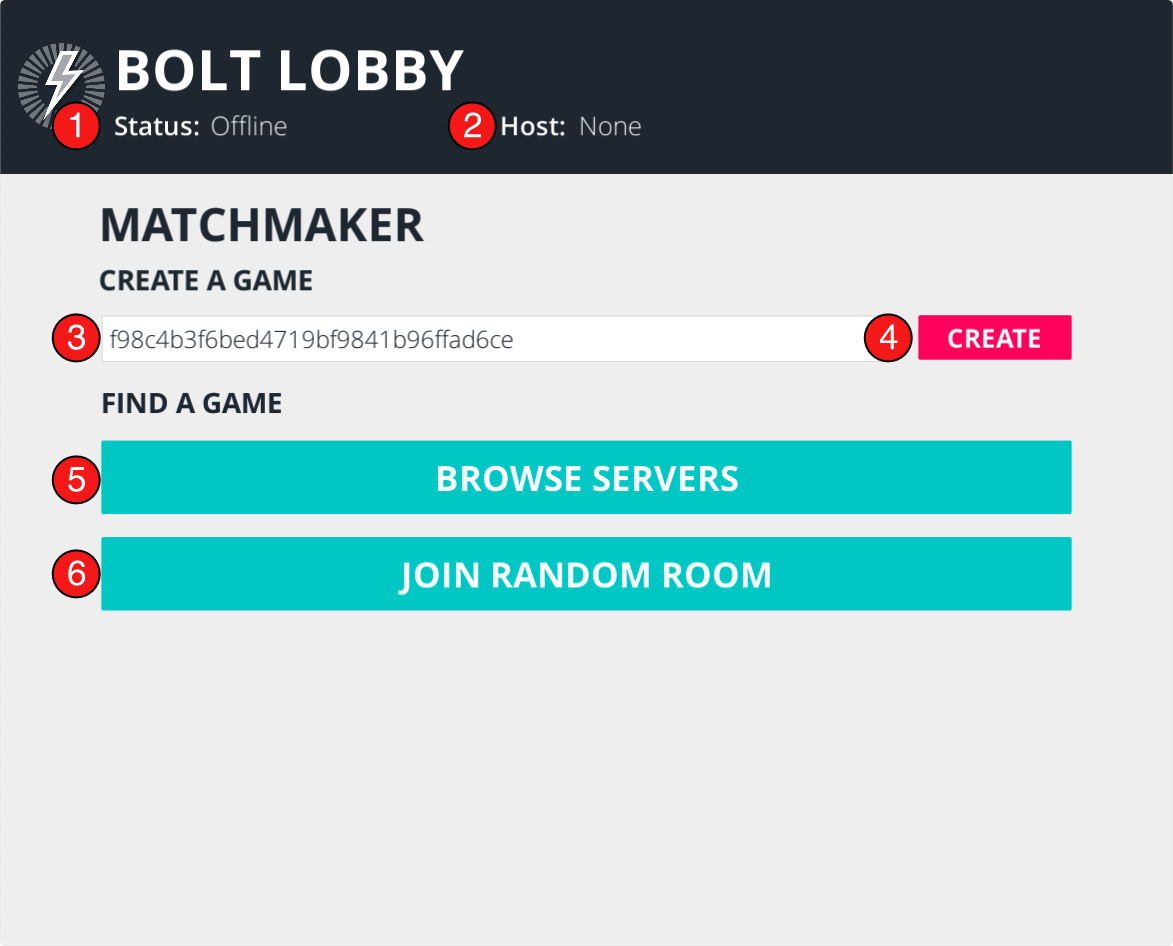
On the interface you will find the following elements:
- Status label: this will show the current status of the local peer, if it's started or not, a server or a client;
- Host label: this will show the current session identifier on the case of a client, or "self" if you are running as server;
- Session name input: here you can configure the name of your session/room to any arbitrary name. By default it's generated a random ID;
- Create session button: click on this button in order to start the a new session and wait for other players;
- Browse servers button: this button will make the peer start as client and look for available sessions on the Server List window (presented next);
- Join Random button: if you player click here, the peer will be started as client, and will join to a random available session, entering directly into the room window (presented next).
We will continue by creating a new session (click on the Create button on the screen), this will bring to you the following window. In order to make the example a bit more interesting, we've also started three other clients, and joined that session using the Join Random button - just click and you are in.
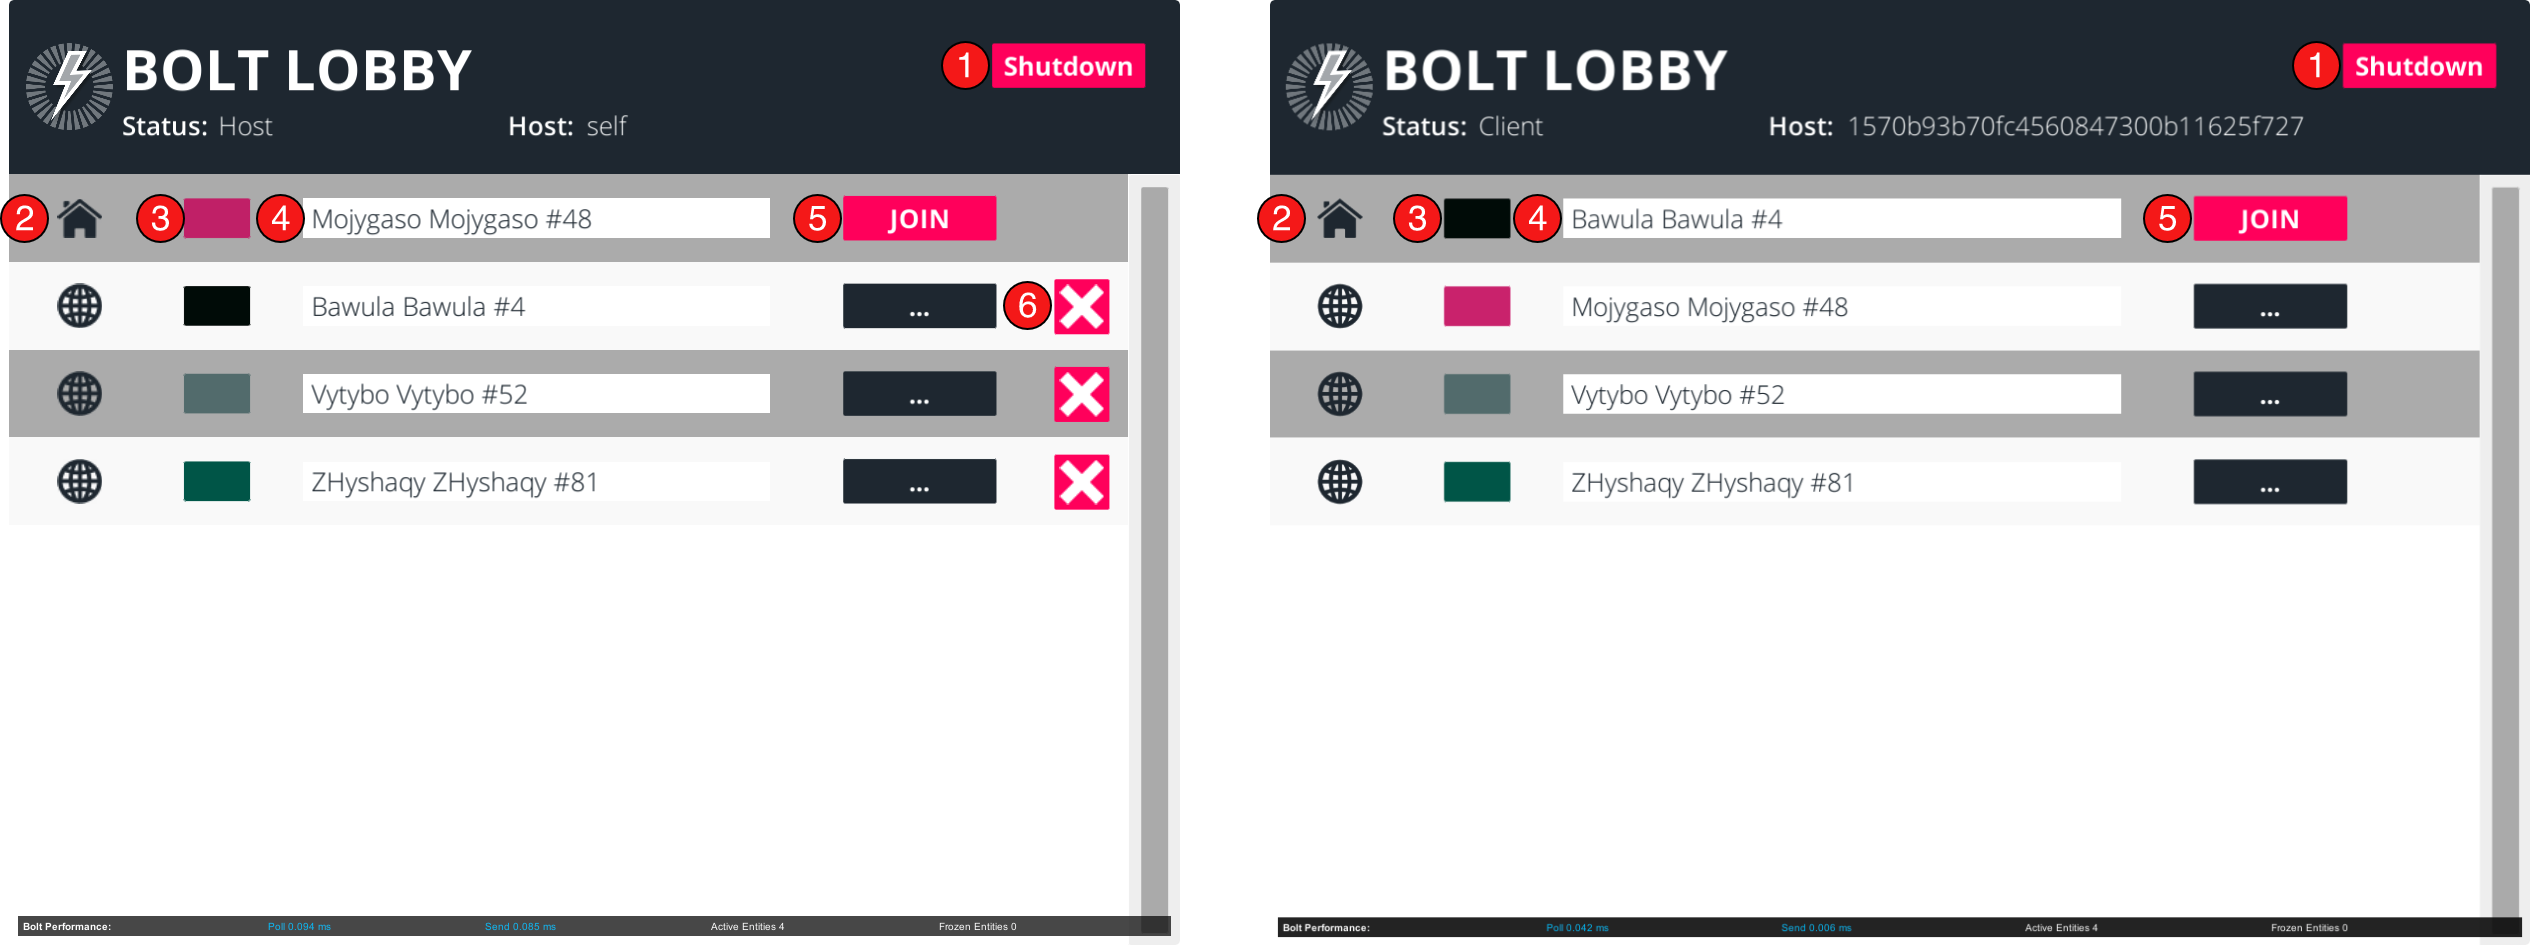
The session window can be described by the components:
- Shutdown button: this will shutdown Bolt on the local peer, this can cause the destruction of the session (in the case of the server) also making all clients to shutdown, or just the local client will shutdown, removing its entry from the list of connected peers;
- Home icon: it's used just to mark the entry of the local peer;
- Color picker button: custom color property associated with the player inside the room, this is just an example of what can be synched. Click on the color to randomly pick another one;
- Player name input: here you can configure your player name, this is also a custom example property. By default, the sample will generate a random name for each player;
- Join/Ready button: use this button to signal the server that you are ready to enter the game.
- Kick button: this option is only available on the server-side, and as the name implies, it's used to kick a player from the room, making it shutdown on its end and return to the main window.
Now that you've seen the in-room interface, let's now take a look on the session list UI, where the clients can choose to which room they will join:

The session list UI is really simple, each row represents a running server (this information is updated every time a server is created, destroyed or updated), and it's made of the sections described below:
- Session/Room name label: this is the session identification of the server, just a human readable text informed by the creator of the session.
- Slots label: describes the current number of players in the room and the max allowed.
- Join button: the client can click on this button in order to initiate the connection process with this particular server.
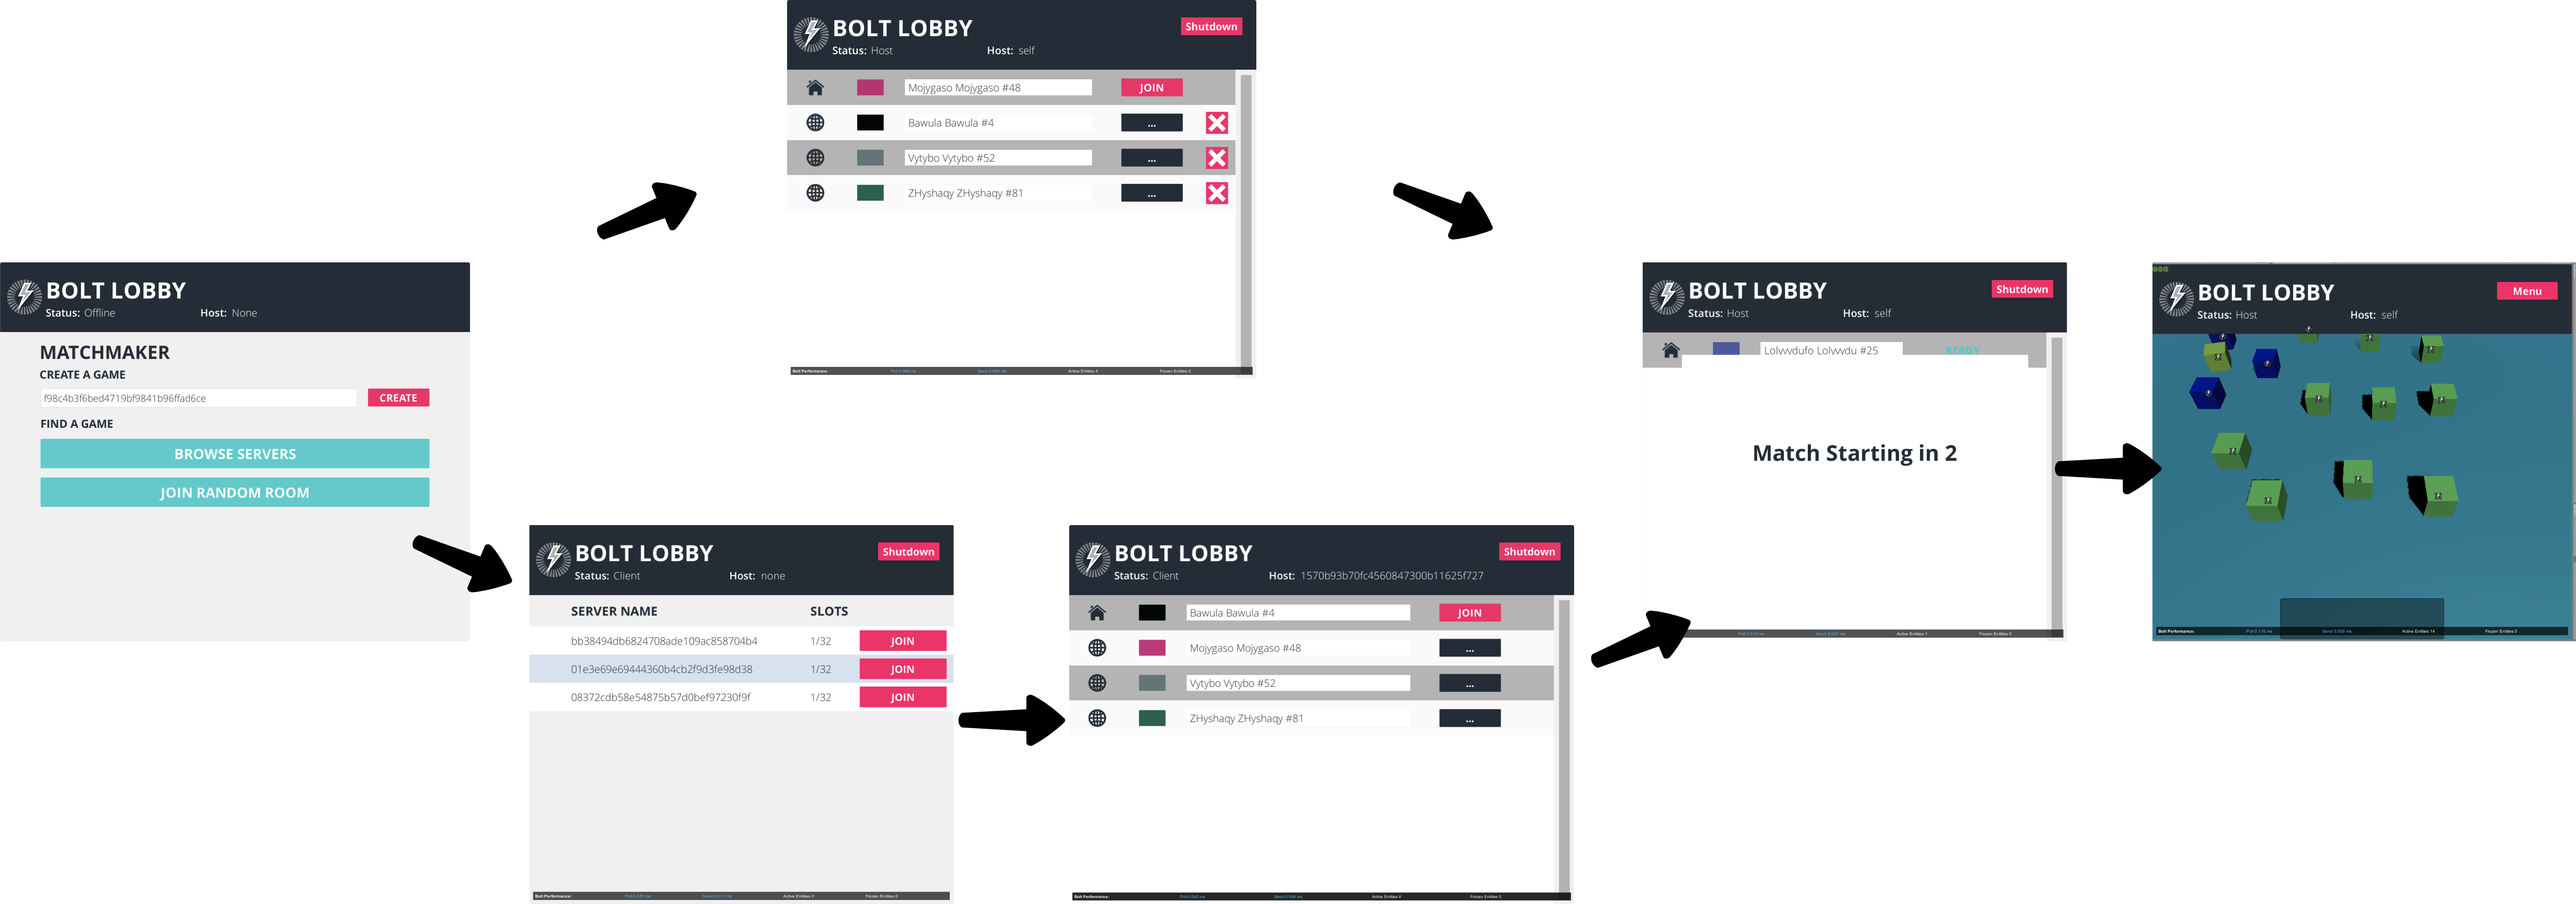
Here we present the complete flow when using the Lobby Sample.
As you can see, it's not long, but accomplish the basic matchmaking requirements of many games.
You can extend it with custom session parameters, filter by game type and much more.
Configuration
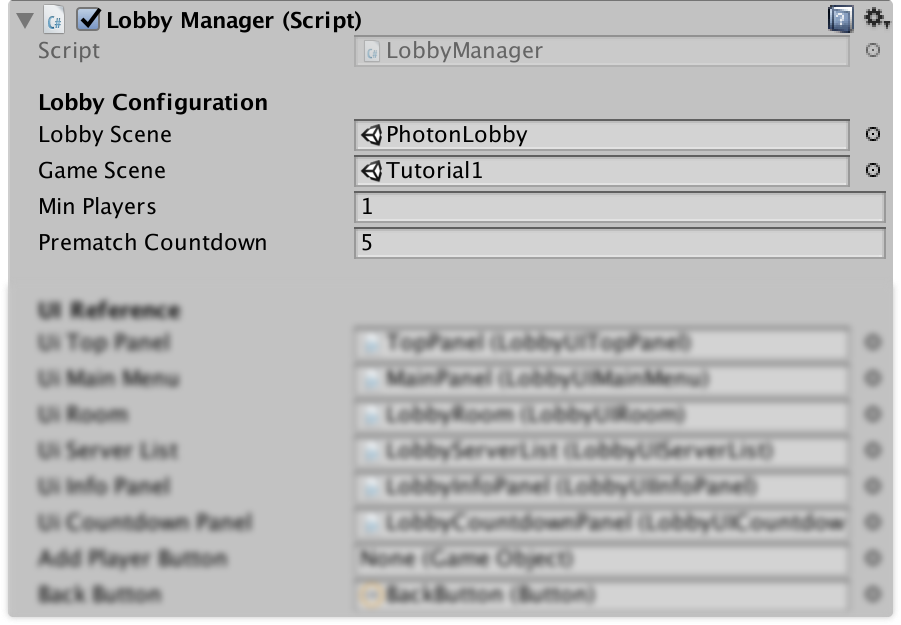
The Lobby Manager sample has just a few configurations available, and they are all exposed through the LobbyManager component associated with the LobbyManager prefab.
Below you can see those settings:
- Lobby Scene: the current Scene where the Lobby Manager will be used. This is necessary to load the original scene when the player leaves the match;
- Game Scene: the target Scene that will be loaded when the players are ready;
- Min Players: minimum number of player in order to start the match;
- Prematch Countdown: seconds to count before starting the game after the minimum number of player were reached.