Dedicated Server
Overview
The Fusion Dedicated Server Sample shows how a Fusion project can be built around the concept of a Dedicated Game Server, so it is possible to build a headless instance of game that will act as the Game Server.
A Dedicated Server is nothing more than a Fusion peer started in Server Mode, meaning there is not a local Player and it will act as the State Authortity over the complete Game State.
The sample shows to detect if the instance is running in headless mode, so it can be started in Server Mode automatically, along with a simple Menu to either start as Client and join a random Game Session or join a Lobby and select a particular Session to join.


Before You Start
To run the sample, first create a Fusion AppId in the PhotonEngine Dashboard and paste it into the App Id Fusion field in the Real Time Settings (reachable from the Fusion menu).
Download
| Version | Release Date | Download |
|---|---|---|
| 1.1.9 | Jul 10, 2025 | Fusion Dedicated Server 1.1.9 |
| 1.1.6 | Fusion DedicatedServer 1.1.6 |
Prefabs
Server_NetworkRunner.prefab:NetworkRunnerprefab used by the Server. It contains scripts to manage the complete game, the main one beingGameManagerdescribed below.Server_Manager.prefab: it will check if the current instance of the game is running in Headless Mode and spawn theServer_NetworkRunner.prefab, also capturing the necessary arguments to customize the Fusion Server.Client_NetworkRunner.prefab:NetworkRunnerprefab used by the Client. It is also responsible for capturing Input from the player.Client_Manager.prefab: create a simple GUI to let a Client join a specific or a random Session, or to join a Lobby and check the available Sessions. Make use of theClient_NetworkRunner.prefab.Player.prefab: a simple Player that will be spawned by the Server when a Client joins the game.
Scenes
0.Launch: the launch scene holds aServer_Manager.prefabinstance and will either be used as the starting point for the Server to load theGameScene when running in Headless Mode or will just load theMenuScene in a normal scenario.1.Menu: this scene is used only by Client instances and it shows the simple menu build by theClient_Manager.prefab.2.Game: a basic game scene where players will be spawned and can move around.
Scripts
SceneDefs: holds the scene list by index, as it makes it easier to reference.CommandLineUtils: set of methods to check if the instance is running in Headless Mode (command line contains-batchmode -nographics) and to get the values from arguments passed by via the command line.ServerManager: make use ofCommandLineUtilsto choose between starting theGame Serveror load theMenuscene. If starting a Server, will try to load the following arguments:-session: custom Session Name to be used by the Server.-region: custom Region to where the Server must connect to. List of Supported Regions.-lobby: custom Lobby where the Session will be created.-port: custom Port which the Server will try to bind to when starting.-P: set of custom properties.
GameManager: runs only on the Server and will basically spawn/despawn Players when joining/leaving.ServerEventsInfo: it will log the most common events from Fusion on the Server side.ClientManager: controls the Client Menu and make use of theClient_NetworkRunner.prefabto connect to the Game Server.PlayerController: simple controller that will read the Inputs from the Client and move thePlayer NetworkObject.InGameMenu: it will display the Shutdown button when running as a Client in theGamescene.
How to Run
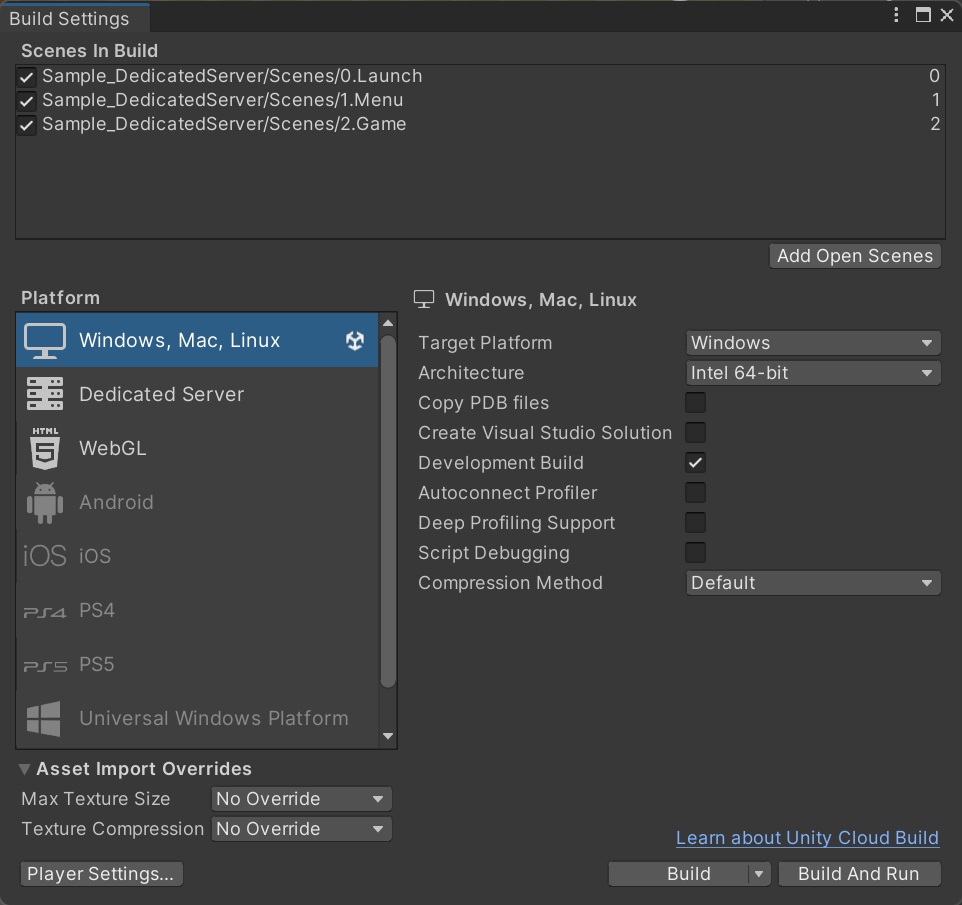
In order to run the Sample, make sure all three Scenes are in the right order in the Scene in Build (Launch, Menu, Game).
This will make sure the application can check of the command line arguments and start either the server or client.
How to start each mode is described below.
Dedicated Server Mode
In this mode, a Game Server will be started using the default settings or any custom arguments passed when starting. Considering that the server is meant to be executed without any displays or visuals, there are a few mandatory arguments and some optional ones.
The Game Server can be build using two main build targets:
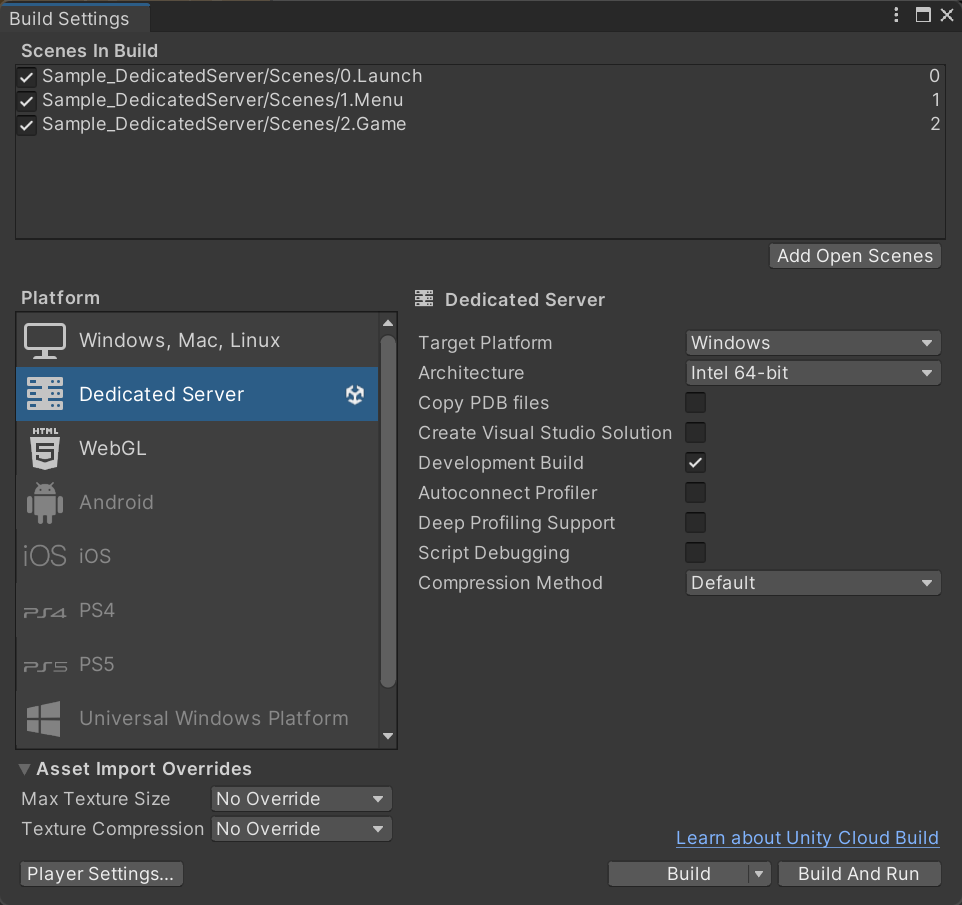
Standalone Build: this is usual build target used to build executables for the main platforms (Windows, Linux, macOS). There are few downsides in this case: (i) the build will contain all game assets and (ii) once executed, it will run in the background (forcing it to close require killing the process);Dedicated Server Build: this build target can be found only in Unity 2021.2+ and was designed specifically for this purpose, removing unnecessary files and has a better integration with the terminal. More info about this build target can be found here.
If you change the Build Target Platform (from Standalone to Dedicated Server, for example), make sure the FUSION_WEAVER symbols is defined in the Scripting Define Symbols for that specific target. Otherwise, Fusion will not be able to weave your project.
Starting from the folder where the build is located, opening a terminal console and typing the following:
.\FusionDedicatedServerSample.exe -batchmode -nographics -logFile output.log
That is enough to run the Game Server, creating a new Game Session and publishing in the Best Region based on the location of the hosting machine using all default settings.
Let's break down the arguments:
-batchmode -nographics(mandatory): this will execute the Unity instance in Headless Mode. That is what triggers the start of theGame Server.-logFile output.log(optional): this will create a file namedoutput.login the same folder with all logs from the server.
The arguments above are all Unity related and more info about them can be found here.
As described earlier, the Game Server can parse extra arguments, described below with some example values:
.\FusionDedicatedServerSample.exe -batchmode -nographics -logFile output.log -session my-custom-session -region us -lobby my-custom-lobby -port 30001 -Pmap city -Ptype free-for-all
With the call above, the Game Server will:
-session <custom session name>(optional): start aGame Sessionwith name my-custom-session. Default is a random GUID;-region <region ID>(optional): connect to Region US. Default is Best Region;-lobby <custom lobby name>(optional): publish theGame Sessionon theLobbynamed my-custom-lobby. Default is ClientServer Lobby;-port <custom port number>(optional): bind to port 30001. Default is27015;-P<property name> <value>(optional): and setup the custom properties map = city and type = free-for-all. Default is an empty list.
None of the above arguments are mandatory and can be used alone or mixing any particular sub-set of them.
Once started, the Game Server will wait for clients to join, and will automatically shutdown and close when all clients disconnect from the session.
API
Running Photon Fusion in Server Mode is pretty straightforward, but depending on the network characteristics of the hosting machine where the Server will be in execution, it might be necessary to set it up differently.
For that reason, below it is shown the three main ways to start a Fusion with GameMode.Server.
- Full Automatic: the peer will start and bind to any available port given by the OS to the socket layer. This will work in most scenarios where a pre-defined port is not necessary. The STUN Protocol will be used to resolve the Public EndPoint (
IP:Port) of the peer. This is mostly suited for common networks that do not block ports by default, like domestic internet connections.
C#
NetworkRunner.StartGame(new StartGameArgs() {
    GameMode = GameMode.Server
    // other args
});
- Pre-defined Local EndPoint & Automatic Public EndPoint: similar to case 1, but here a particular Local EndPoint is set to be used by the Server. The peer will fail to start if there are any other Service bound to that same port, so make sure it is available. In the example code, the Server will try to bind to EndPoint
192.168.0.10:27015, which must be anIPassociated with one network card of the host machine and a freeport. If there is no need to specify a localIPbut only theport, useNetAddress.Any(27015)(meaning0.0.0.0:27015) instead. This is suited for scenarios with a restricted list of available ports that are open for communication on the Host Firewall, so it is necessary to stick with some particular ports.
C#
NetworkRunner.StartGame(new StartGameArgs() {
  GameMode = GameMode.Server,
  Address = NetAddress.CreateFromIpPort("192.168.0.10", 27015) // or NetAddress.Any(27015)
  // other args
});
- Pre-defined Local & Public EndPoint: extending the case 2, both the Local Endpoint and Public Endpoint of the peer can be set. Fusion will completely bypass the use of the STUN Protocol for the Public EndPoint discovery and just relay the one passed as an argument. In the example, the peer will bind to the same Local EndPoint as case 2, but also use the specific Public EndPoint
10.0.0.1:27030. TheCustomPublicAddressargument is intended to be used in scenarios where the hosting service already provides the mapping between Local and Public EndPoints.
C#
NetworkRunner.StartGame(new StartGameArgs() {
  GameMode = GameMode.Server,
  Address = NetAddress.CreateFromIpPort("192.168.0.10", 27015),
  CustomPublicAddress = NetAddress.CreateFromIpPort("10.0.0.1", 27030)
  // other args
});
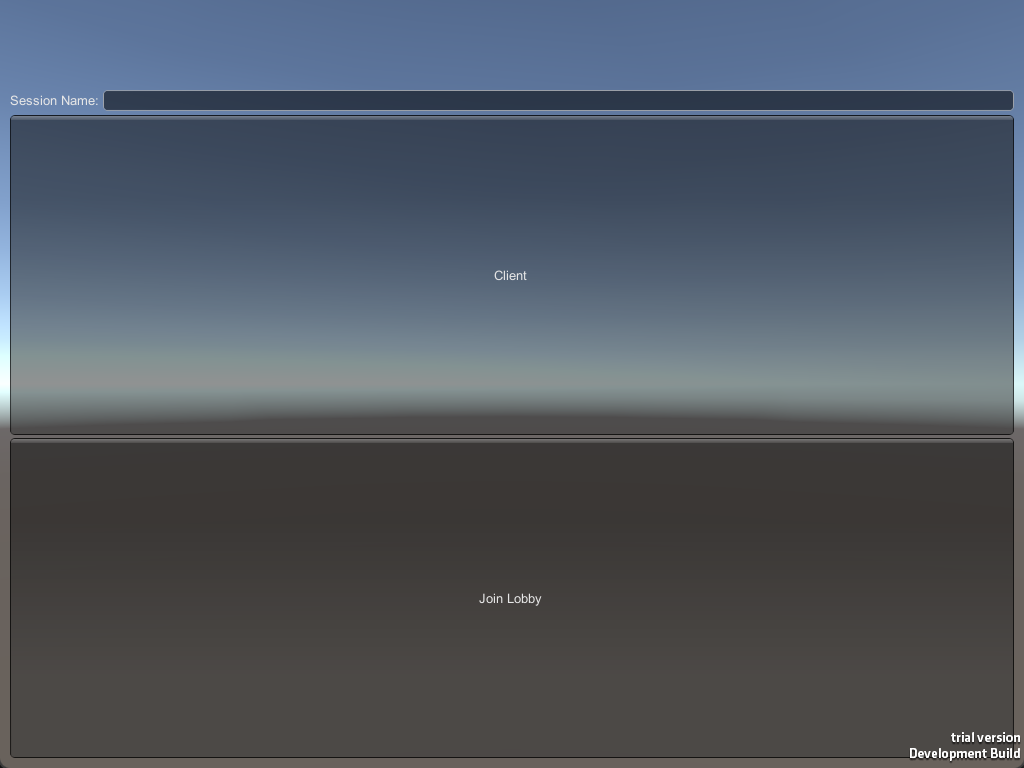
Client Mode
Just starting the application normally, the usual double-click, will open the game window with some options for the Client side of the game.
From there, it is possible to:
- Join a specific game by filling the
Session Namefield or keeping it empty and joining a random game. - Join the default
ClientServerLobby or a custom one specified via theCustom Lobbyfield.- If joined a Lobby, the list of available
Game Sessionsfrom that particular lobby will be presented, with the option to join a game by clicking atJoinbutton. - It is also possible to shutdown the
NetworkRunnerfrom the Lobby via theShutdownbutton and start again.
- If joined a Lobby, the list of available
Once connected to the Game Server, each client will receive one player that can be controlled using the usual WASD to move around the level.
A client can disconnect itself from the Server by clicking at the Shutdown button, will also load the Menu scene again.