0 - Introduction
The PUN Basics Tutorial is a Unity based tutorial.
We will develop a first simple multiplayer game with PUN 2 using the Photon Cloud.
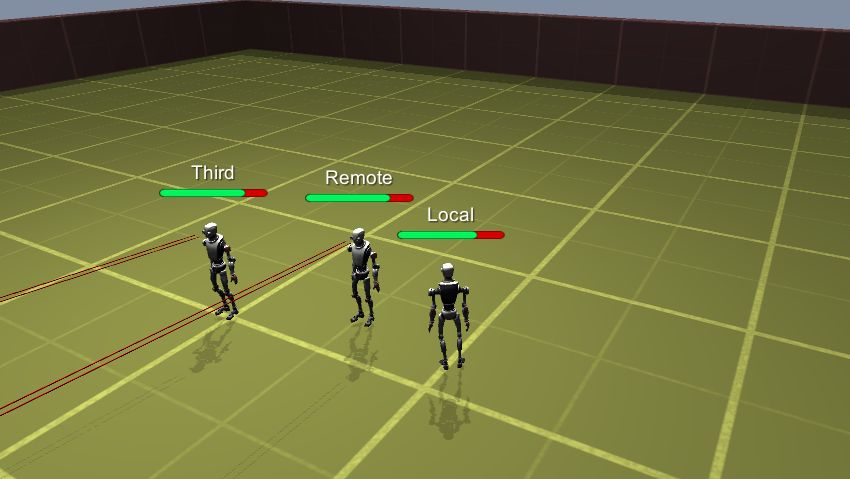
The goal is to synchronize an animated character per player, the health values and basic raycast shooting.
We'll learn along the way many important features, tips and tricks to get a good overview of the approach to network based development with PUN 2.
Overview
This tutorial will guide you step by step throughout the whole creation process, starting from an empty project.
Along the way, concepts will be explained, as well as common pitfalls and design considerations for networked games.
We will implement a simple UI to enter a NickName and we will show the connection progress to the user.
The game will have up to 4 players and have a custom sized arena, based on the number of players in the room. This is mostly to show several concepts around syncing scenes: How to deal with players when loading different scenes and what could possibly go wrong when doing so :)
In order to not just have players walk around and do nothing, we'll implement a basic firing system coupled with a player's health management. By that, we will learn how to synchronize variables across the network.
When your health is 0, it's game over and you leave the arena. You are then presented with the intro screen again letting you start a new game if wanted.
What You Need To Know
This tutorial assumes only the very basics of using the Unity Editor and programming.
However, it's preferable to have a good knowledge and some experience with creating games in order to concentrate on the new concepts Photon Unity Networking introduces.
The sample code is written in C#.
Photon Cloud
Let's go: Importing PUN and Setup
Make sure you work with either a Unity version equal or higher than 2017.4 (beta versions are not recommended).
Create a fresh Project, this is recommended when working on tutorials in general.
Open the Asset Store and locate the PUN 2 asset and download/install it.
Let Unity recompile when you have imported all the assets.
The PUN Setup Wizard is there to help you with the network settings and
offers a convenient way to get started with our multiplayer game:
The Photon Cloud!
Cloud? Yes, Cloud.
It's a bunch of Photon servers which we can use for our game.
We will explain in a bit.
Creating an Exit Games Account is free and without any obligation to purchase any Exit Games products, so for now we just enter our mail address and the Wizard does its magic.
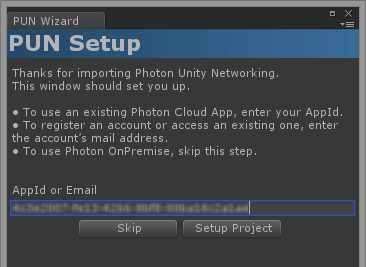
New accounts get an "AppId" right away. If your mail address is already registered, you are asked to open the Dashboard.
Login and get the "AppId" to paste it into the input field.
When the AppId is saved, we are done with this step.

So, what exactly does this "Photon Cloud" do?!
Basically, it's a bunch of machines with the Photon Server running on them.
This "cloud" of servers is maintained by Exit Games and offered as hassle-free service for your multiplayer games.
Servers are added on demand, so any number of players can be dealt with.
Even though Photon Cloud is not completely free, the costs are low, especially compared to regular hosting.
Read more about the pricing here.
Photon Unity Networking will handle the Photon Cloud for you but this is what's going on internally in a nutshell:
Everyone connects to a "Name Server" first.
It checks which app (with the AppId) and which region the client wants to use.
Then it forwards the client to a Master Server.
The Master Server is the hub for a bunch of regional servers. It knows all rooms for this region.
Any time a room (match / game) gets created or joined, the client gets forwarded to one of the other machines, called "Game Server".
The setup in PUN is ridiculously simple and you don't have to care about
hosting costs, performance or maintenance. Not once.
Application IDs & Game Version
As everyone connects to the same servers, there must be a way to separate your players from everyone else's.
Each title (as in game, application) gets its own "AppId" in the Cloud.
Players will only ever meet other players with the same "AppId".
There is also a "Game Version". This is a string you can edit and it will separate players with older clients from those with newer ones.
Regions
The Photon Cloud is organized in separate Regions across the globe for optimal connections between players.
Each region is separate from all others, which is important to remember when working with remote teams spread in different regions. Make sure you end up in the same region.
PUN 2 helps you by figuring out a "Dev Region", which is used for all development builds.
Rooms
The Photon Cloud is built for "room-based games", meaning there is a limited number of players per match (let's say: up to 16), separated from anyone else.
In a room everyone receives whatever the others send (unless your send messages to specific players).
Outside of a room, players are not able to communicate, so we always want them in rooms as soon as possible.
The best way to get into a room is to use Random Matchmaking: Just ask the server for any room or specify some properties the player expects.
All rooms have a name as identifier.
Unless the room is full or closed, we can join it by name.
Conveniently, the Master Server can provide a list of rooms for our app.
Lobby
The lobby for your application exists on the Master Server to list rooms for your game. It does not enable players to communicate with one another!
In our example, we will not make use of the lobby and simply join a random room if one is available, or create a new room if no existing room can be joined (rooms can have a maximum capacity, and so they can potentially be all full).
Development
Each section of this tutorial covers a specific part of the project development stage.
The level of assumptions on scripting and Photon knowledge increases gradually.
In best case, work through them in order.
- Creating the basic Lobby Scene.
- Improving the Lobby Scene with a User Interface (UI).
- Creating the Game Scenes.
- Implementing Levels loading.
- Creating the basic Player Prefab.
- Making the camera follow your player.
- Modifying the Player Prefab to add network features.
- Player Instantiation and Scene Switching.
- Player User Interface (UI).
Beyond the Tutorial
Of course, there is a lot more to do to create a complete game, but this is only building on top of the foundations we covered here.
- Make sure you read the "Get Started" section.
- Be curious, explore the documentation and API reference just to get a overall view of what's available.
You'll likely not need everything straight away, but it will come back to memory when you will need it, or when implementing a new feature.
You'll remember that some methods or properties were related, and so it's time to learn properly about them. - Make use of the Forum, don't hesitate to share your problems, issues, and even frustrations :)
It's essential that you do not get stuck with a problem.
By having to write about it for others to understand your issue, you will formulate it outside your brain, which is known to help solving problems.
There is no such thing as stupid questions, it all depends on your level of expertise and how far you are in learning/mastering Unity and PUN.