Custom Animator
Introduction
Quantum’s deterministic animator works by baking information from Unity’s Mecanim Controller. It imports every configuration such as the states, the transitions between the states, the motion clips and so on.
The main advantage of using it is that it can control animations to be 100% in sync across machines. Animations will snap to the correct state if a rollback informs that a transition happened some frames ago. So it provides very accurate tick based animations, which is something that is usually needed on Fighting and some Sports games because the animations should be perfectly in sync between all client simulations.
The Animator is a part of the default Quantum SDK 1.2.x versions. But we decided to stop improving the Animator because of the dependencies that it currently have on Unity's mecanim, and because by the date that this document was written, Unity still hadn't launched any new stable animation tool.
Because of that, we decided to have the Animator as open source code that you can import into your quantum.state and quantum.systems projects, change and rebuild it accordingly to your needs.
This document explains how the Custom Animator should be imported and used into your own projects. On Quantum 1.2.x versions, this is a replacement because these versions still have the default Animator there.
PS: This document has instructions specific to Quantum 1.2.x versions. If you use Quantum 2.0 version, please find this same document on the 2.0 documentation.
Importing the Custom Animator package
- Download the Custom Animator here;
- Unzip it and put the content of the folder
QuantumCustomAnimator_stateon yourquantum.stateproject; - Put the content of the folder
QuantumCustomAnimator_systemson yourquantum.systemsproject;
PS: these are the files that you can change in order to have your own custom animator code. You will see that the classes names are the same as the original Animator, but they are all under theQuantum.Custom.Animatornamespace, and they only reference each other, so it does not uses any of the old animator classes/structs. - The package comes with a partial implementation of the
Frame.InitUsermethod, which is responsible for initializing theCustomAnimatorUpdater. If your project already have a partial implementation of the same method, please just make sure to include a call to theInitializeAnimatorUpdatermethod inside your ownInitUser, and do not import theFrame.User.csfile from this package; - With everything included in your solution, build the
quantum.systemssolution; - On Unity, import the file
QuantumCustomAnimator.unitypackageto the project; - If you are using versions prior to 1.2.4.2, you also need to import a small fix on the QuantumAOT generation. Unzip the
codegen_unity.zipfile and put its content on the folder<YourProjectRoot>/tools/codegen_unity. Then, rebuild your quantum solution again.
This completes the initial steps to have it all building and running. Now, in order to actually use the new component and new baking tools, here are the instructions:
Using the custom Animator
Insert the CustomAnimator component into your entities:
use CustomAnimator;On Unity, you will create a new data asset of type
CustomAnimatorGraph. This is the asset responsible for storing information related to Unity's mecanim controller, so you need to find it on the quantum side in order to setup the custom animator component. Finding the animator asset:
var animatorGraphAsset = DB.FindAsset<CustomAnimatorGraph>("MyAssetGUID");Initializing the CustomAnimator component:
CustomAnimator.SetCustomAnimatorGraph(&knight->CustomAnimator, animatorGraphAsset);Similarly on how it is done on Unity, use Getters and Setters in order to read/write to the Animator:
C#
// Getters
CustomAnimator.GetBoolean(&fighter->Animator, "Defending");
CustomAnimator.GetBoolean(&fighter->Animator, "Direction");
CustomAnimator.GetBoolean(&fighter->Animator, "Speed");

// Setters
CustomAnimator.SetBoolean(&fighter->Animator, "Defending", true);
CustomAnimator.SetInteger(&fighter->Animator, "Direction", 25);
CustomAnimator.SetFixedPoint(&fighter->Animator, "Speed", FP._1);
It is important to notice that Unity’s Trigger parameters works like Booleans here. So, in order to trigger some param, you need to use the
SetBoolean(&fighter→Animator, "MyTrigger", true)to set it to true, and aSetBoolean(&fighter→Animator, "MyTrigger", false)on the next tick so the trigger isn’t activated again. You can have some pre-animation system which sets every trigger parameter to false every tick;You can increase the amount of parameters supported by the Custom Animator by going into the
CustomAnimator.qtnfile and changing this array size:
C#
array<CustomAnimatorRuntimeVariable>[8] AnimatorVariables;
Every
AnimatorStatehas anAssetLinkthat you can use in order to make references to custom assets. You can extend the baking process on Unity, grabbing even more information from the Unity's animator, save these information on you custom asset and reference it on the state, so you can read it on the simulation. You can, for example, create assets which has hitbox/hurtbox information baked in the form ofFPAnimationCurves. You can save Unity events names/time into the asset so on the simulation you know when some animation event happens, etc;On your
SystemSetup.csfile, do this replacement:
C#
// Old
new Core.AnimatorSystem(),

// New
new CustomAnimatorSystem(),
On Unity, create the Custom Animator Graph asset, from the context menu:
Create/Quantum/Assets/CustomAnimatorGraph;This is how it looks like on its default state:
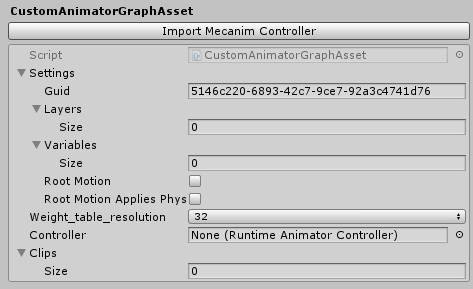
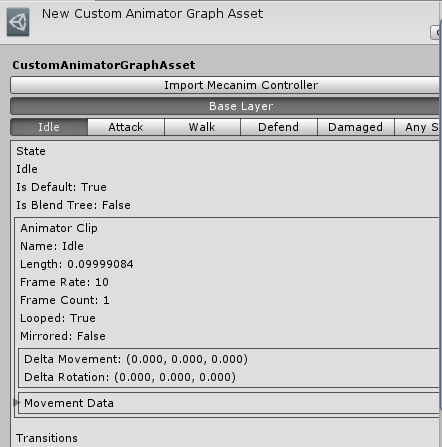
- Reference an Unity’s Animator Controller asset using the
Controllerfield and hit theImport Mecanim Controllerbutton. You should then see the animations information filled, such as the states, transitions, parameters and so on:
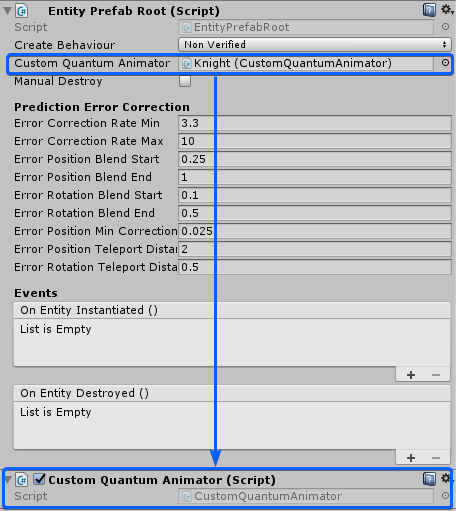
Open your
EntityPrefabRootclass, and add the fieldpublic CustomQuantumAnimator CustomQuantumAnimator;. You can delete theQuantumAnimatorfield if you want, as the idea is to completely replace it;
PS: Remember that this file can be overwritten upon Quantum version upgrade, so remember to re-insert these custom codes if needed.Add the component
CustomQuantumAnimatorto the GameObjects that will be animated. Of course, it needs to have anEntityPrefabRooton it, so make the reference to the component that you just added, using the field that you created on the instruction above;
- On your
EntityPrefabViewUpdater, there is a line which gets theAnimatorcomponent from a given entity. It needs now to search for aCustomAnimatorinstead. So replace these lines:
C#
// Old
if (instance.QuantumAnimator) {
  var animator = Entity.GetAnimator(entity);
  if (animator != null) {
    instance.QuantumAnimator.Animate(animator);
  }
}

// New
if (instance.CustomQuantumAnimator) {
  var animator = Entity.GetCustomAnimator(entity);
  if (animator != null) {
    instance.CustomQuantumAnimator.Animate(animator);
  }
}
- The last step is to add a Unity's Animator component to your object. It can be placed on the same object which has the
EntityPrefabRootor it can be placed on a child object:
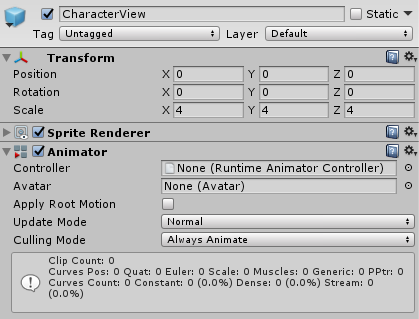
Now that you have done the replacements on your quantum code, the replacements needed on the Unity side, and you have your CustomAnimatorGraph with information baked directly from a Unity's mecanim controller, you are ready to go.
Parts of the code already comes with simple comments. On the Quantum side you’ll find everything related to the internal state machine itself, such as the AnimatorConditions, which are used on the AnimatorTransitions, the AnimatorVariables (parameters), Layers, Motions and so on.
On the Unity side, you will find the code related to drawing the custom editor for the Custom Animator Graph asset, and all of the code responsible for the baking process, which you can surely extend in order to bake more data into your animator asset, such as FPAnimationCurves for collision information, animation events from Unity and so on.
Known issues
The CustomAnimator as it comes by default has these known limitations:
- No support for hierarchical states;
- No support for Unity’s animation events;
- No support for states with no motion (no animation clip set);
- No support for the Layers menu, which means that it's not possible to mix animations between more than one layer, such as using Avatar Masks, Blending and so on;