此頁面正在修正中,可能有待更新。
Photon Server Stack Overflow
Stack Overflow是一個背景異常,可能會導致無預警當機。對它進行除錯是很棘手的。
這份文件解釋了如何處理由於在Photon伺服器上運行的自定義代碼而出現的堆棧溢出異常。
生產環境
這是我們推薦的程序,以便在發生堆棧溢出時收集轉儲和堆棧追蹤。
先決條件
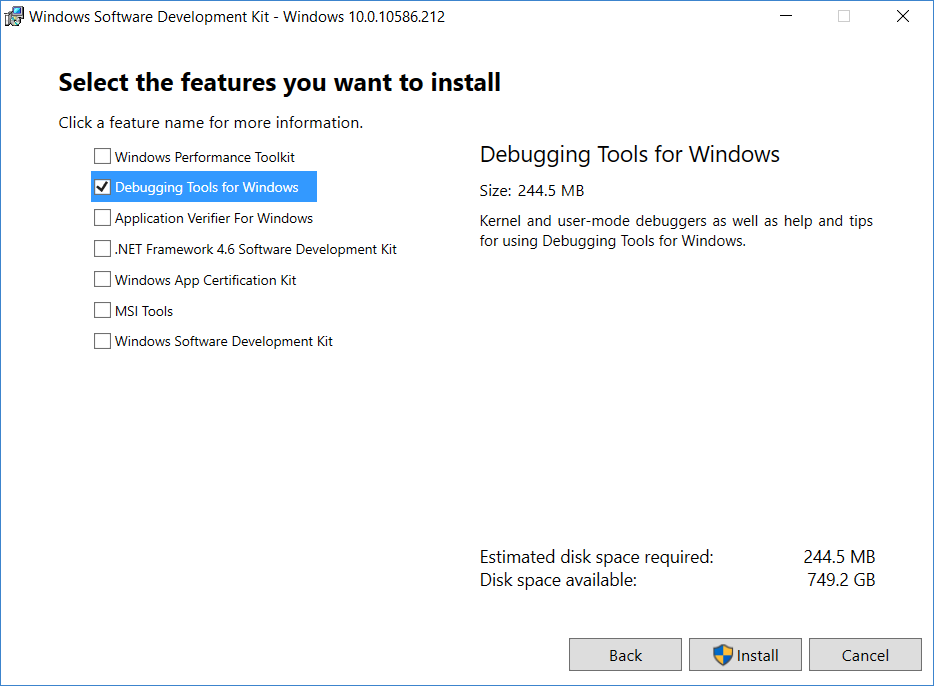
下載並安裝Debug Diagnostic Tool。下載 v2 Update 2 或 v2 Update 3。
下載並安裝WinDBG。Windows除錯器是Windows開發套件的一部分。
請下載相應的開發包。請下載適合您的Windows版本的SDK,並在安裝導向中選擇 "Debugging Tools For Windows "作為要安裝的功能。
設置除錯診斷工具:轉儲聚集
我們將遵循一個逐步的指南:
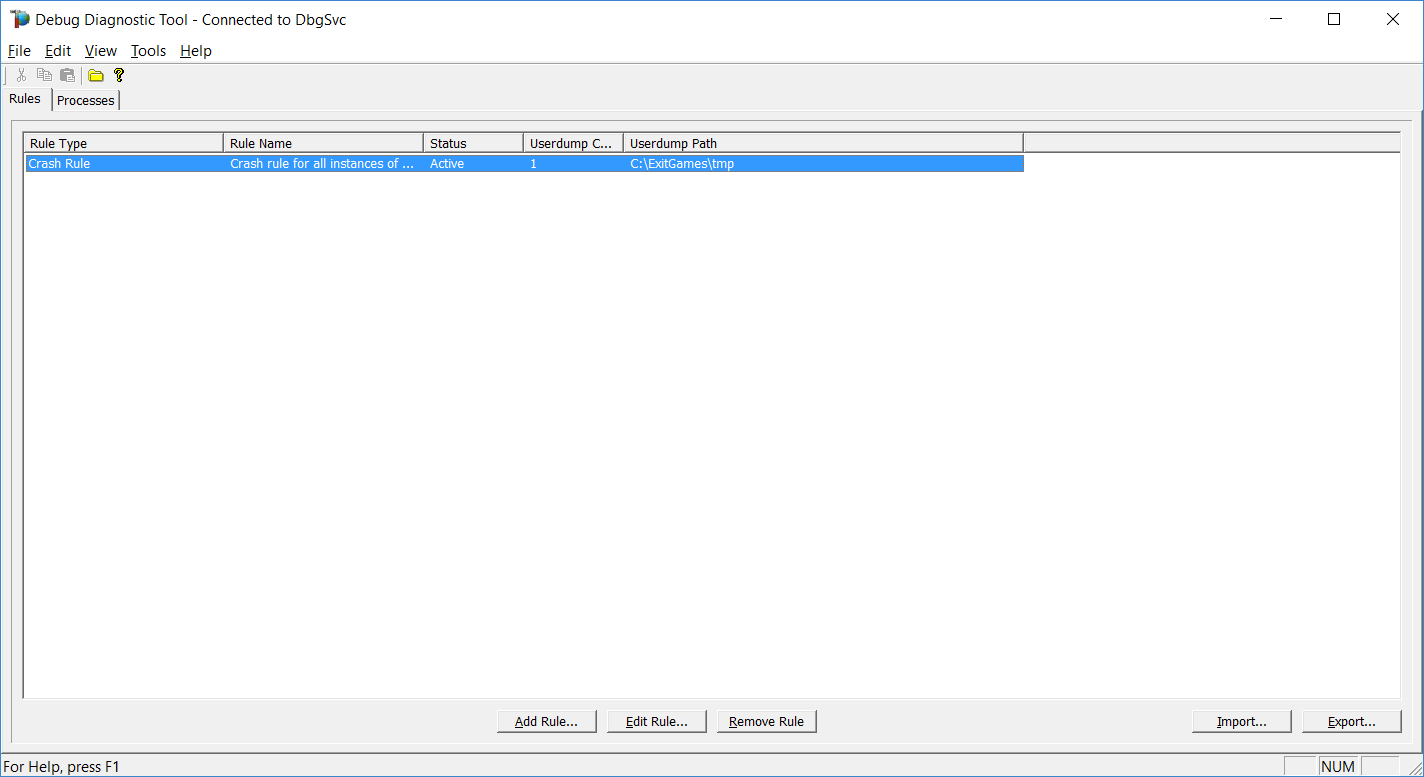
- 打開除錯診斷工具("DebugDiag 2 Collection")。默認情況下,應該打開 "選擇規則類型 "的向導窗口。否則,請點擊 "添加規則"。選擇 "當機 "作為 "規則類型 "並點擊 "下一步"。

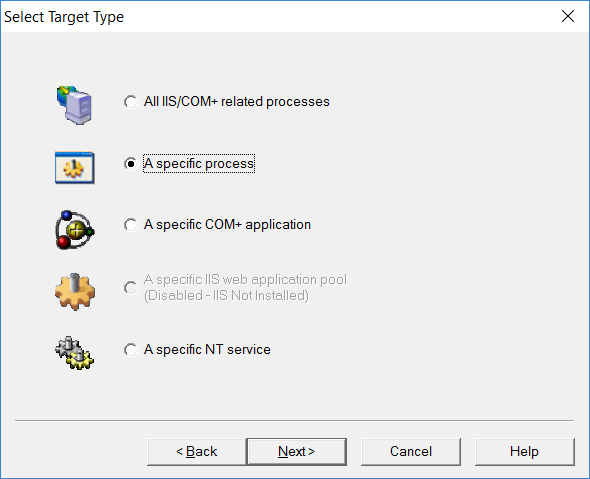
- 在 "選擇目標類型 "窗口,選擇 "特定進程 "並點擊 "下一步"。
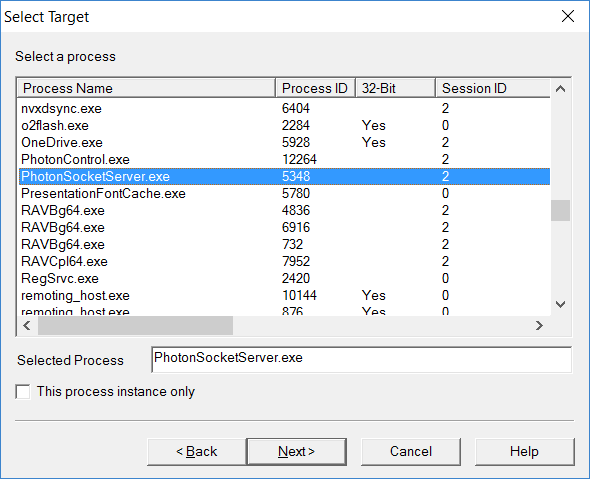
- 在 "選擇目標 "窗口中,從列表中選擇 "PhotonSocketServer.exe "並點擊 "下一步"。
- 在 "進階配置 "窗口中,"進階設置 "部分點擊 "例外"。

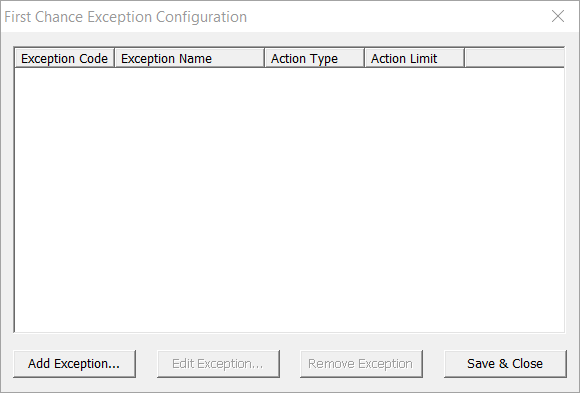
- 在 "第一次例外配置 "窗口中,點擊 "添加例外..."。
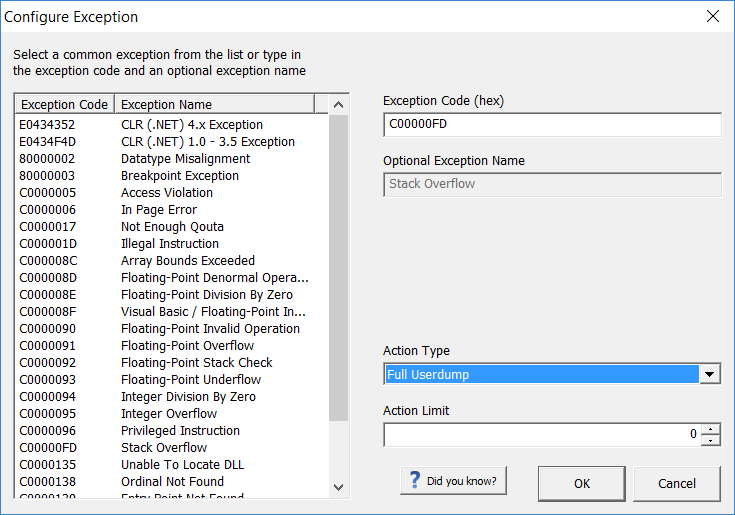
- 在 "配置異常 "窗口中,從異常列表中選擇 "Stack Overflow"。
然后在右邊的下拉選單中,選擇 "Full Userdump "作為 "動作類型",並將 "動作限制 "設置為0。
完成后,點擊 "確定"。
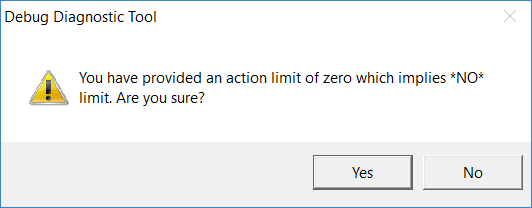
- 將向您顯示一個關於行動限制值為0的警示對話框。繼續點擊 "是"。
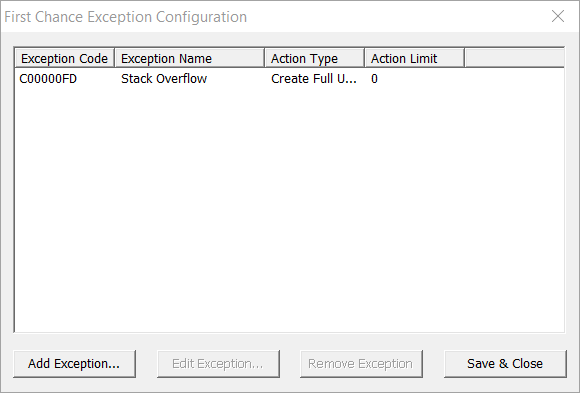
- 現在您能夠看到在 "首次機會異常配置 "窗口中添加了配置的Stack Overflow異常。點擊 "保存並關閉"。
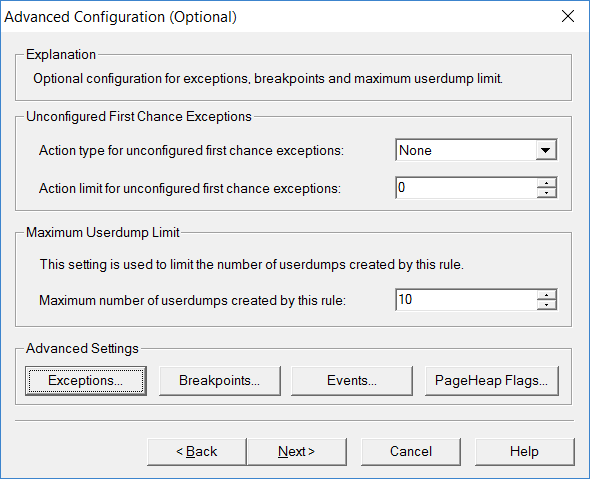
- 回到 "進階配置 "窗口,點擊 "下一步 "即可。
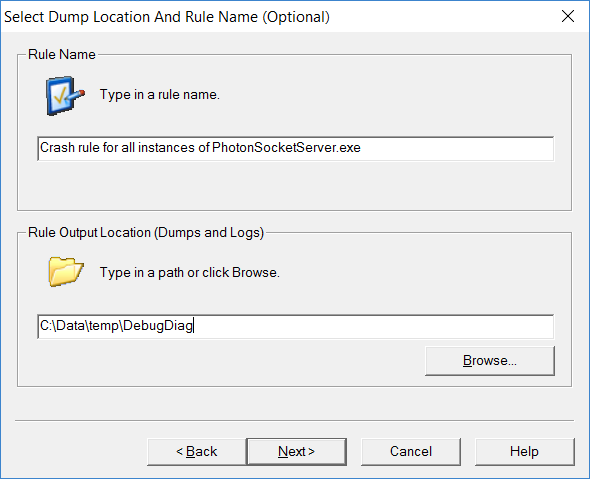
- 在 "選擇轉儲位置和規則名稱 "窗口,您可以改變默認的規則名稱。將 "Userdump Location "設置為您選擇的臨時文件夾路徑,然後點擊 "Next"。
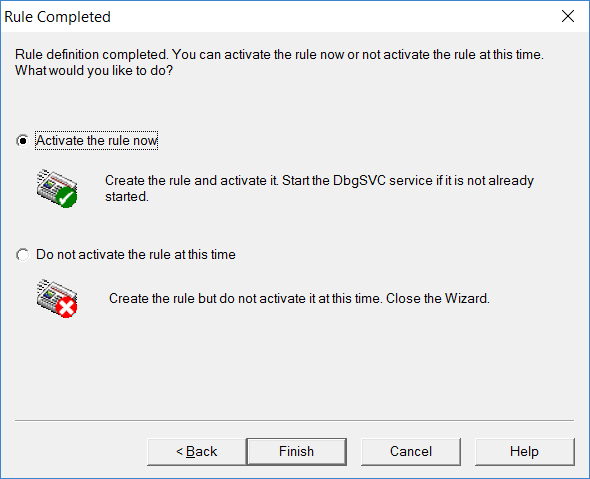
- "添加規則 "導向到達最後一個窗口 "規則完成"。選擇 "現在激活規則 "並點擊 "完成"。
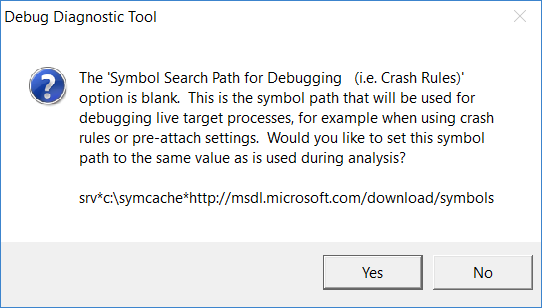
- 除錯診斷應該提示您自動設置 "符號搜索路徑 "為
srv*c:\symcache*https://msdl.microsoft.com/download/symbols。
- 回到除錯診斷工具主窗口,您可以看到配置的規則。
設置除錯診斷工具:轉儲分析
- 現在讓我們打開除錯診斷工具("Debug Diag 2 Analysis")。
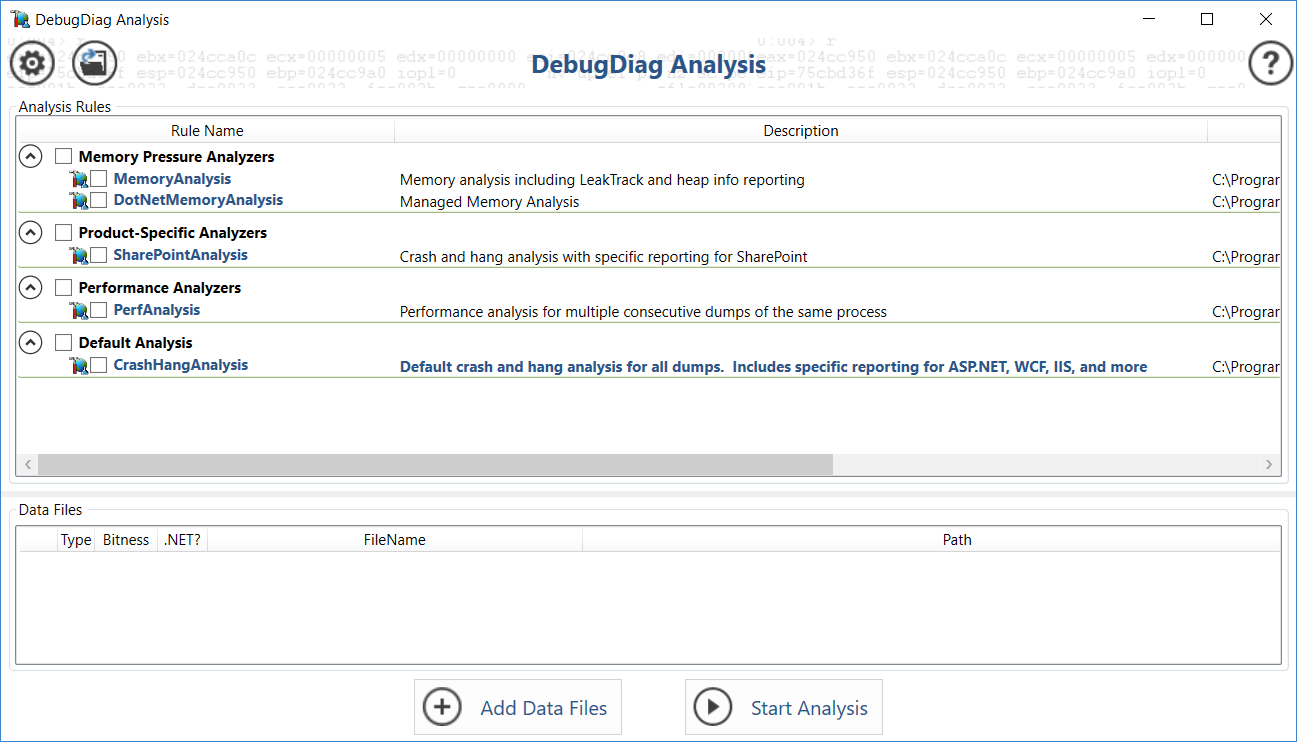
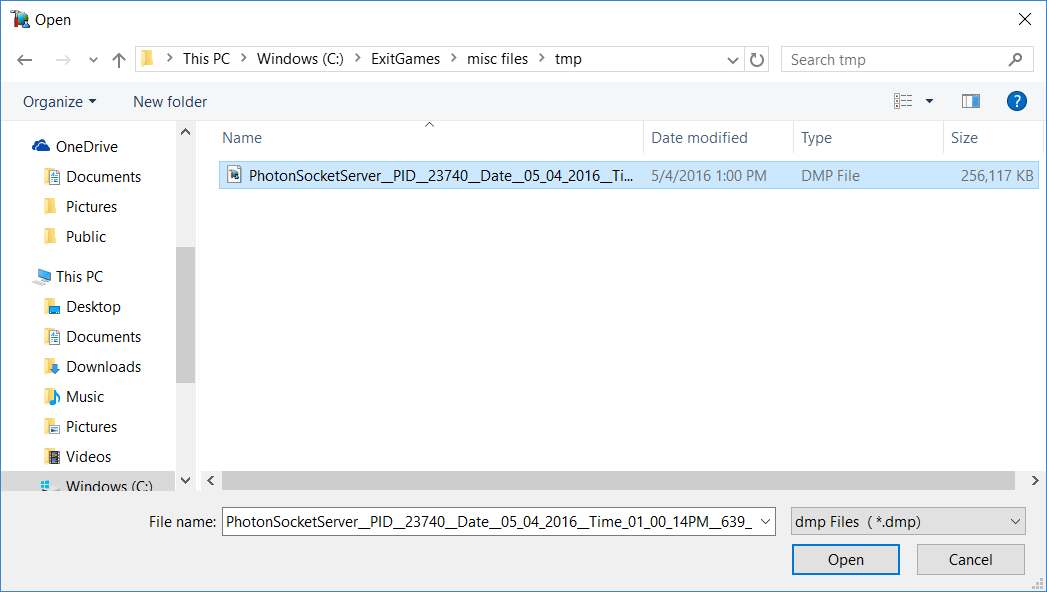
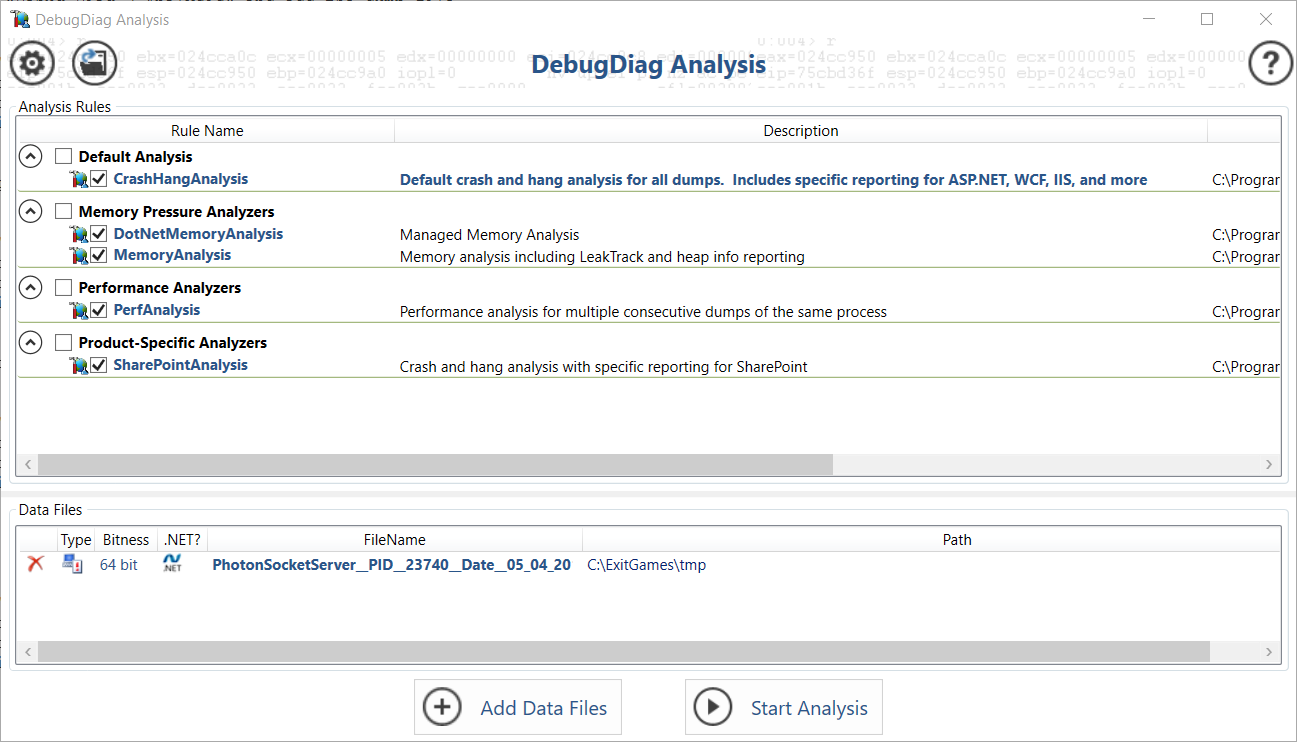
- 讓我們用 "添加數據文件 "來添加轉儲文件。
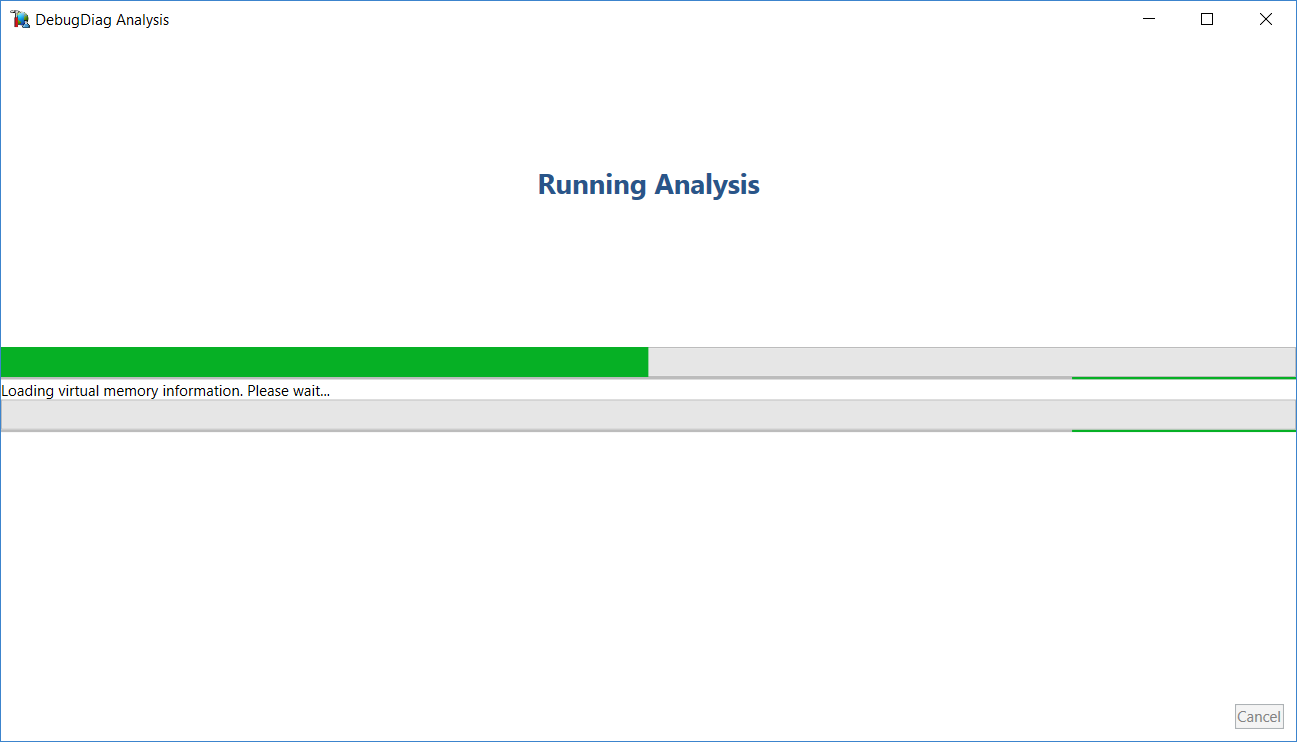
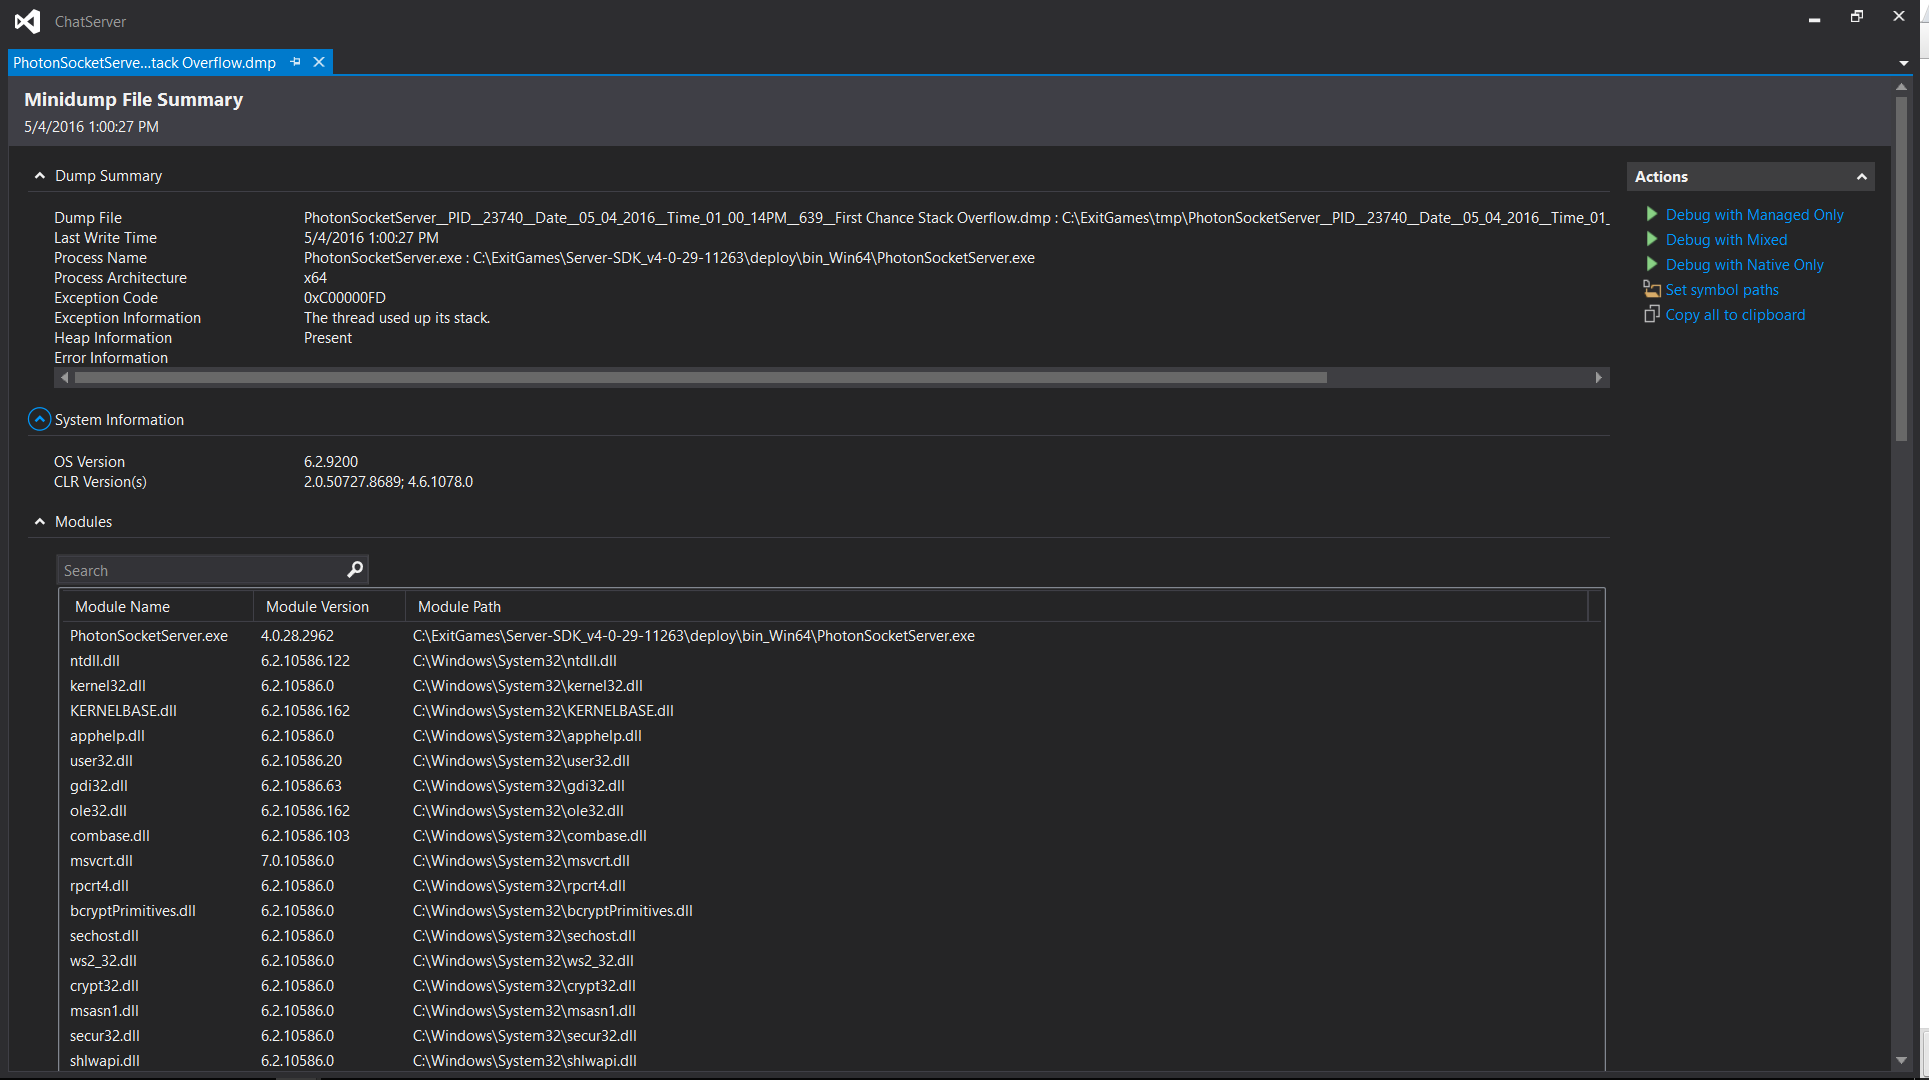
- 一旦我們添加了轉儲文件,我們就可以 "開始分析"。
- 您應該看到分析正在加載,這可能需要一些時間,然後在瀏覽器中打開一個報告。
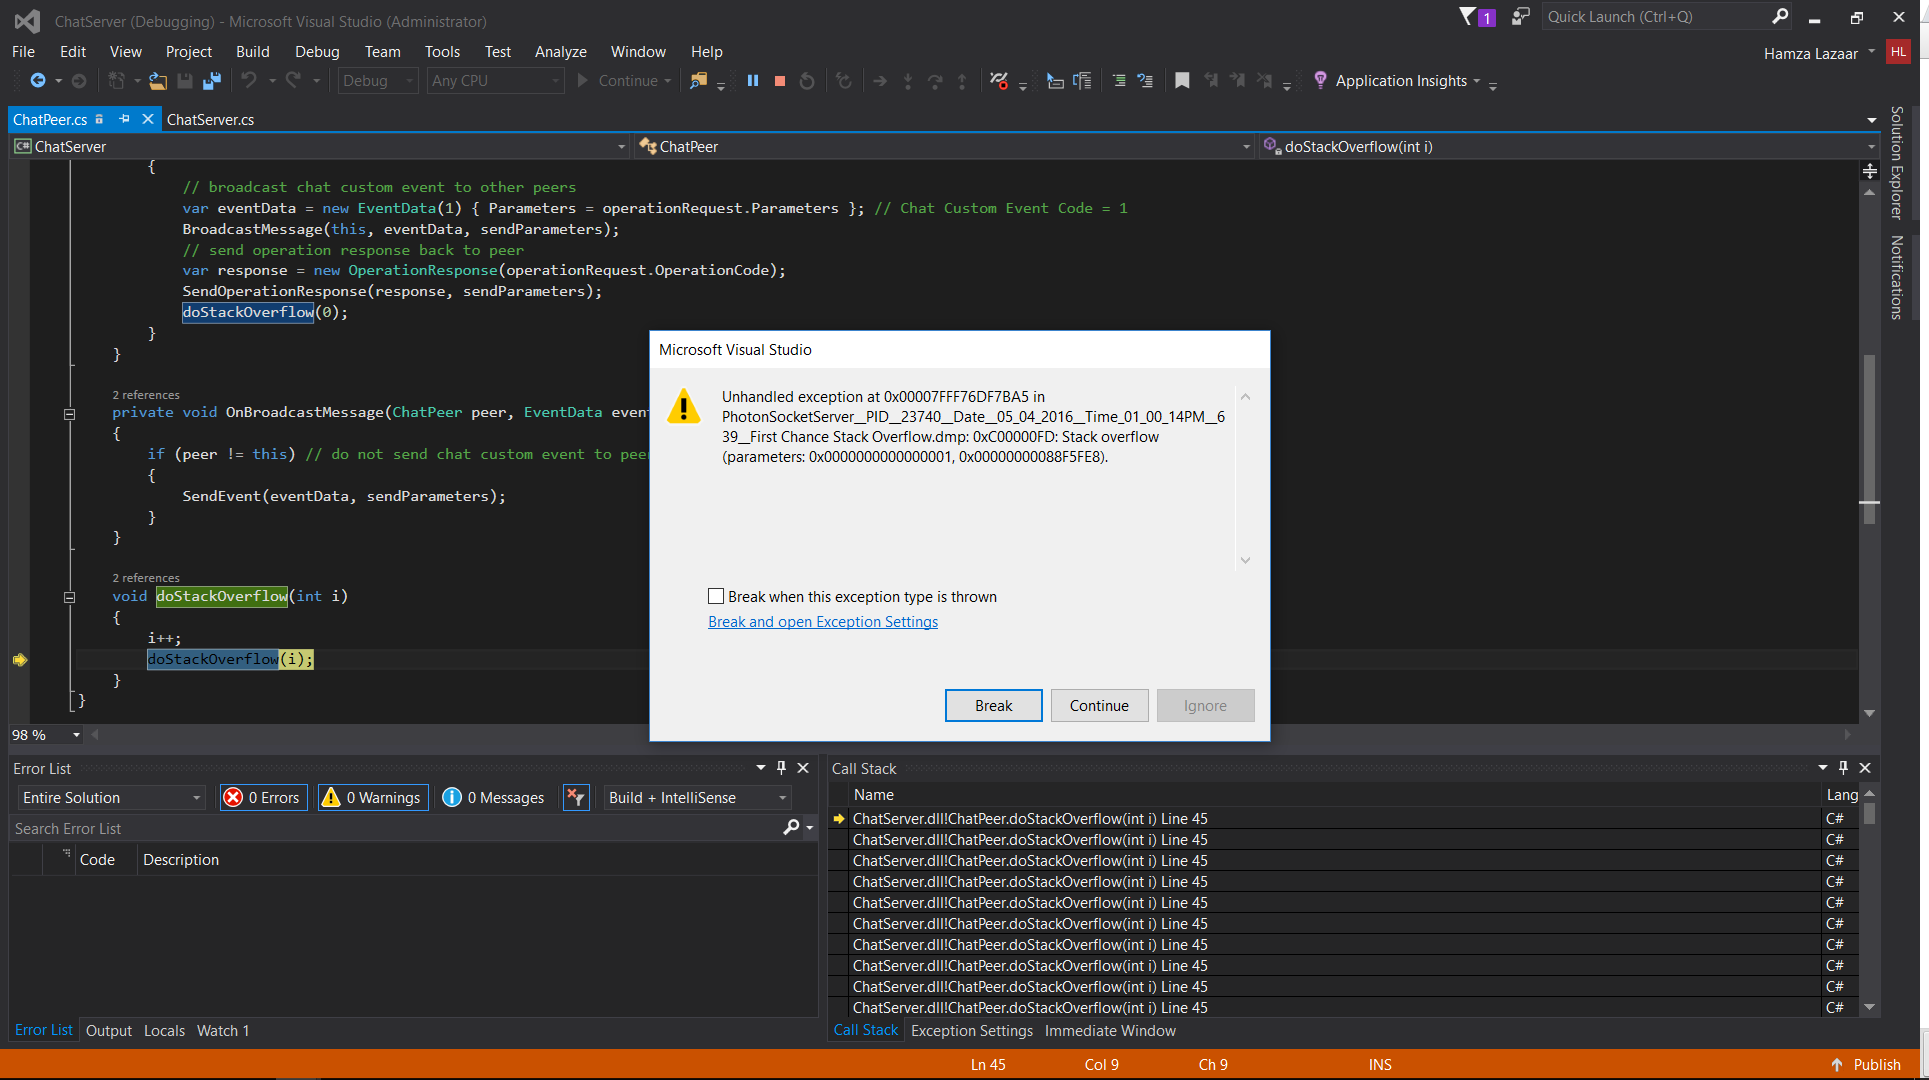
使用Visual Studio打開轉儲文件
在Visual Studio中打開轉儲文件並運行 "Debug Mixed Mode"。
除錯將在堆棧溢出異常發生時中斷。您會得到異常斷點和完整的堆棧追蹤。
使用WinDBG打開轉儲文件
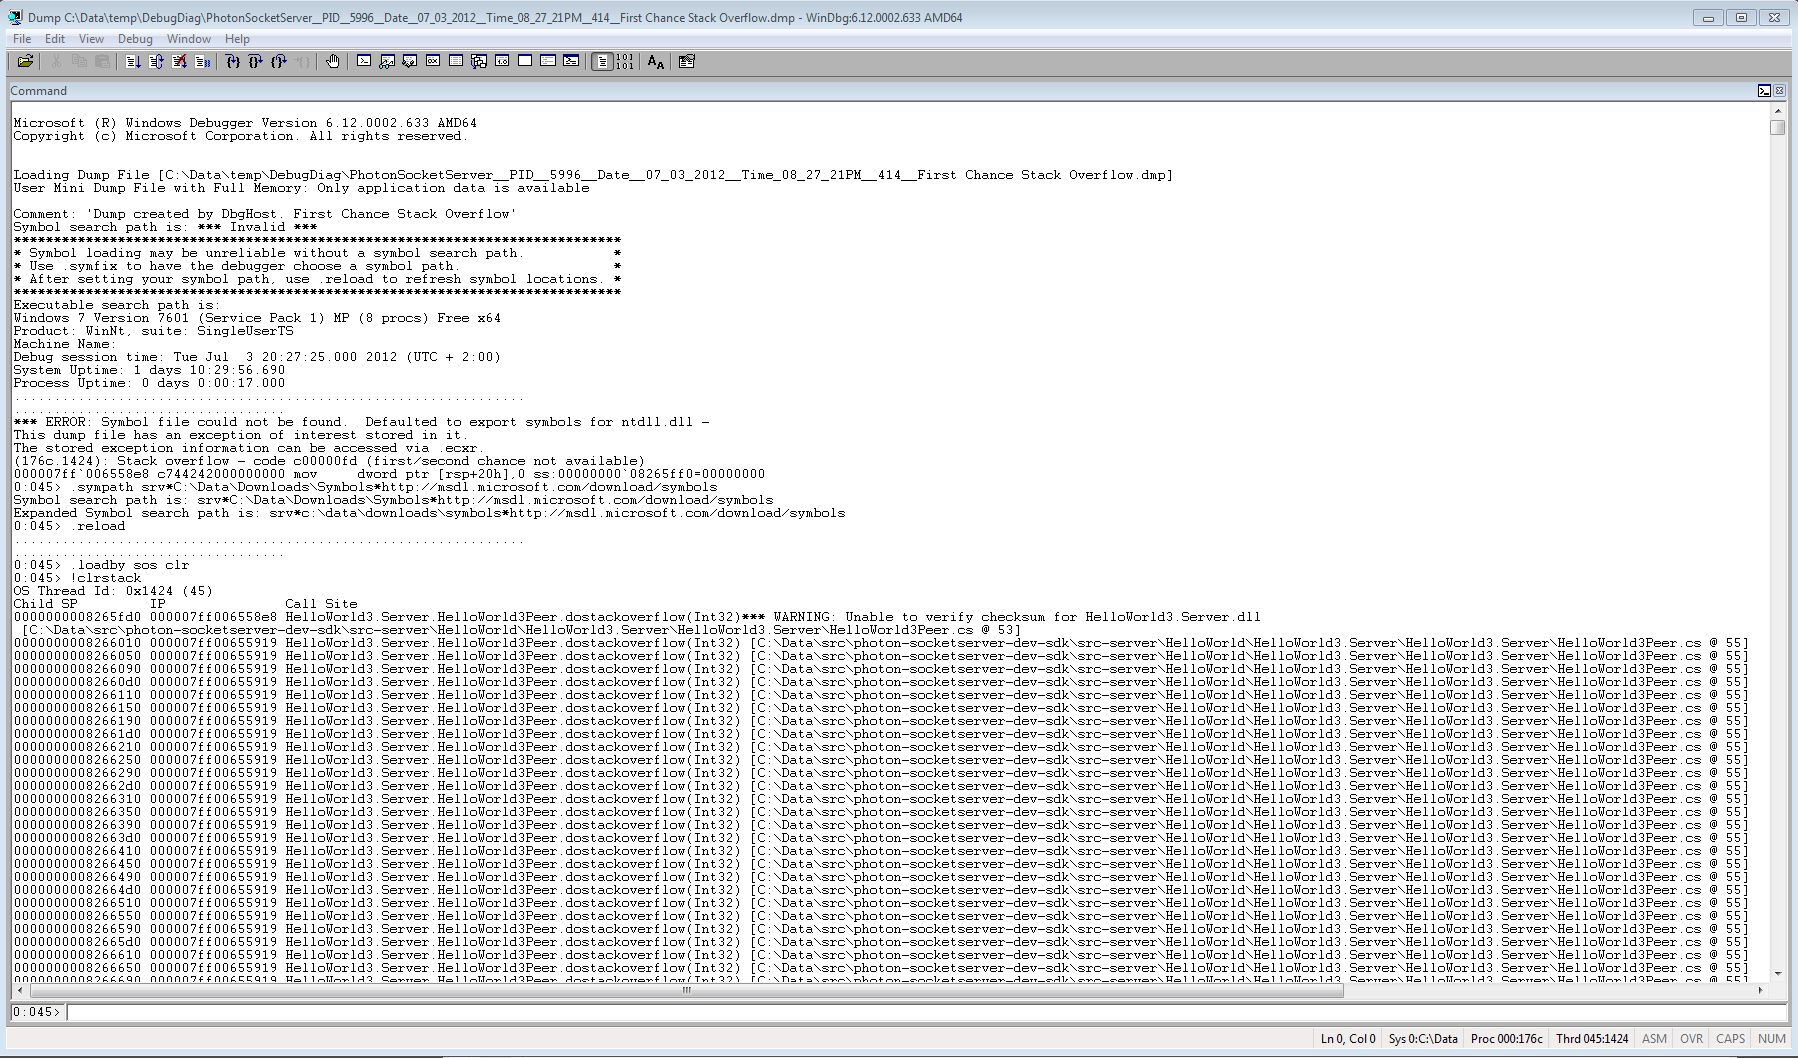
使用WinDBG打開轉儲,並設置以下指令:
.sympath srv*C:\symcache*https://msdl.microsoft.com/download/symbols。.reload。.loadby sos clr。(注意:.loadby sos clr是如果您在除錯.NET 4.0或以上版本,否則指令是.loadby sos mscorwks。)!clrstack
開發環境
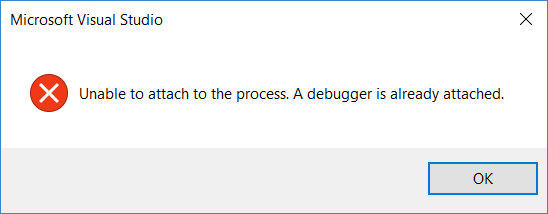
您可以注意到,一旦添加了這個規則,您就不能將Visual Studio除錯器附加到 "PhotonSocketServer "進程中。
這是因為除錯診斷工具會自動將除錯器附加到規則中配置的進程。
如果您碰巧在Debug Diagnostic Tool運行時從Visual Studio啟動Photon Server,並且Photon Server的規則處於活動狀態。
後者會在啟動時當機而不留下任何轉儲。
我們建議刪除以下注冊表鍵,以確保除錯工具不會互相妨礙:
HKEYLOCALMACHINE\SOFTWARE\Microsoft\Windows NT\CurrentVersion\AeDebugHKEYLOCALMACHINE\SOFTWARE\Microsoft\Windows\Windows Error Reporting\LocalDumps