3 - Setting up a Scene
Overview
In part 3 of the tutorial, how to set up a basic scene and create entities with Quantum is introduced.
Open Game Scene
The Quantum SDK comes with files to help you get started.
Inside the QuantumUser/Scenes folder there is a QuantumGameScene scene. This scene act as the starting point for the Quantum 100 series. Open the QuantumGameScene scene. Create a copy of the scene by going to "File > Save As" in the Unity menu and saving as "AsteroidsGameplay" in the "Assets/Scenes" folder.
There are a few noteworthy GameObjects in the scene.
QuantumMap: The workflow for creating scenes in Quantum is pretty much identical to creating a scene for a single player game in Unity. The map data component bakes the entities, static colliders and NavMesh data in the scene so that they can be used by the deterministic Quantum engine.- The
QuantumEntityViewUpdateris responsible for instantiating and destroying the GameObject representations of entities (views) for entities that are created by gameplay code at runtime. - The
QuantumDebugInputwith theDebug Inputscript is an example for how to pass Unity input into the deterministic Quantum engine. It will be extended later in this series. - The
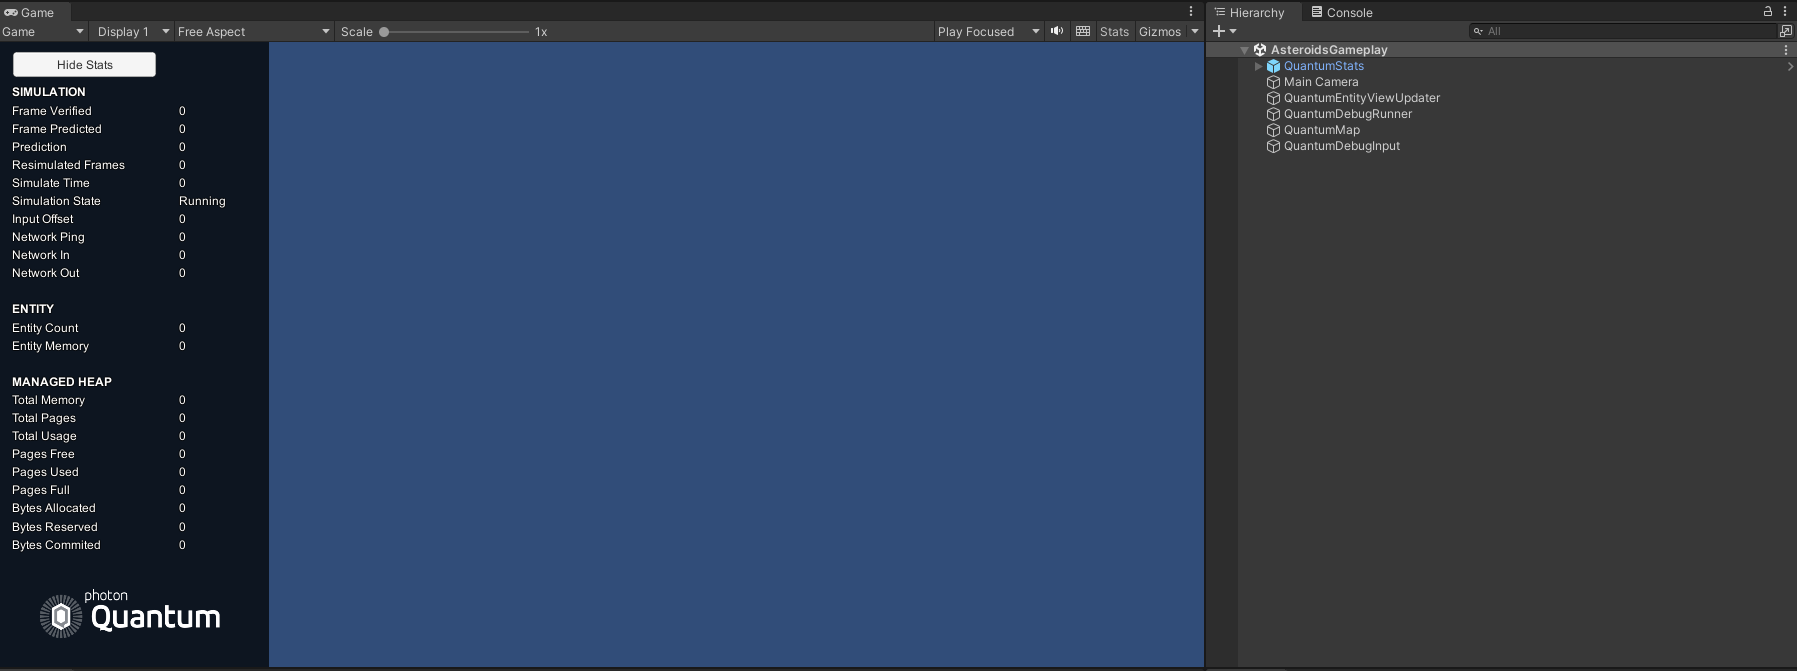
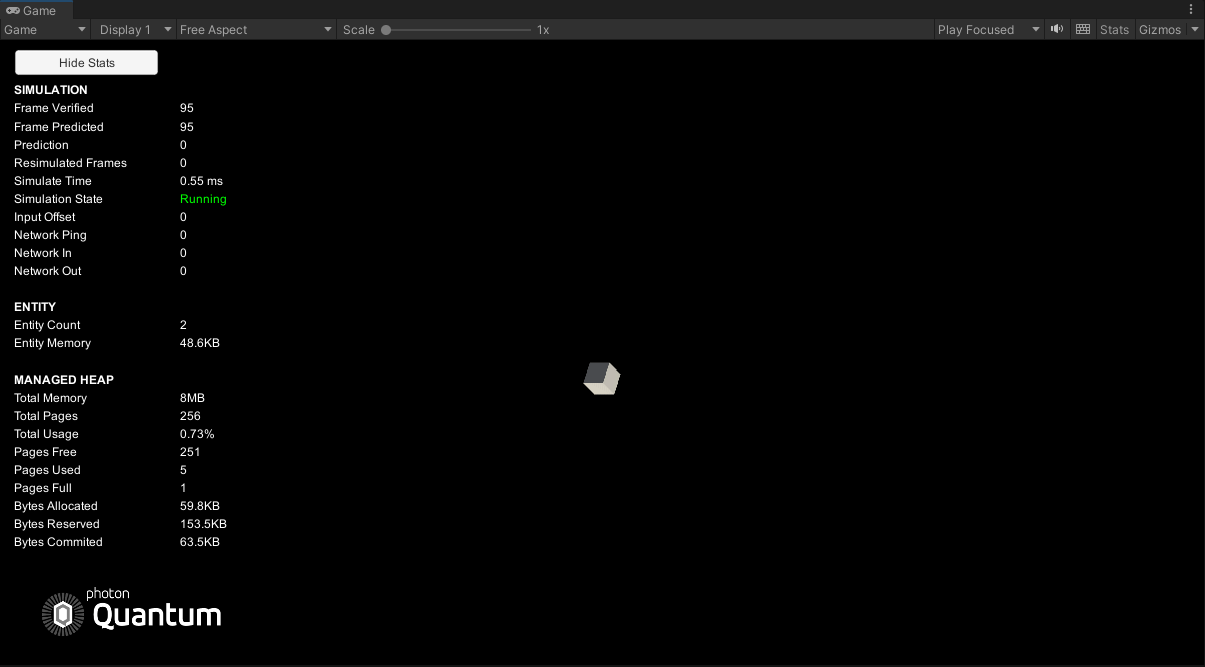
QuantumStatsGameObject displays the stats window that is visible on the left side of theGameeditor window. It displays many useful stats about the active Quantum simulation.
MapData AssetObject
Quantum Assets are immutable data containers which are used to configure the gameplay simulation. Each scene in Unity has a corresponding Quantum Map Asset that is linked to this scene. This asset contains deterministic information about the scene such as the objects and colliders in the scene which get baked into the asset.
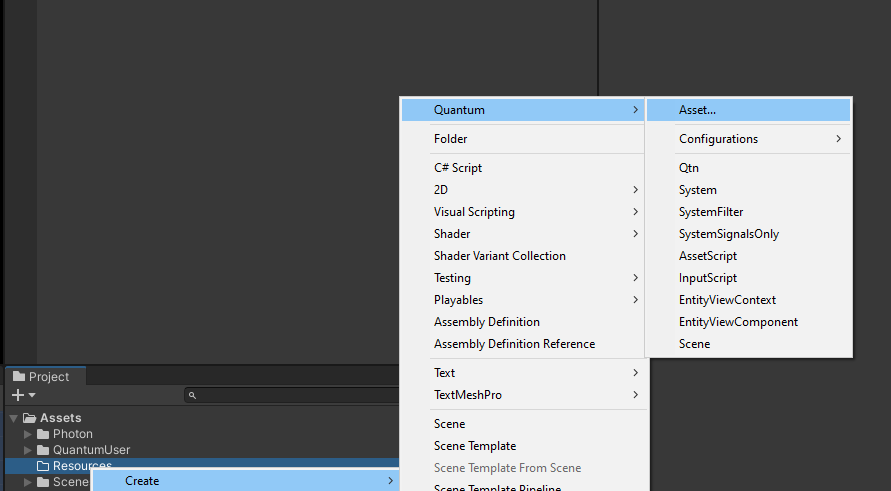
Create a new Resources folder then right-click on the folder and select Create > Quantum > Asset and then select Map in the list interface popup. Name the new asset AsteroidsMap.
NOTE: The Resources folder is used so that Quantum is able to load the asset. All Quantum Assets need to be in a Resources folder or marked as addressable.
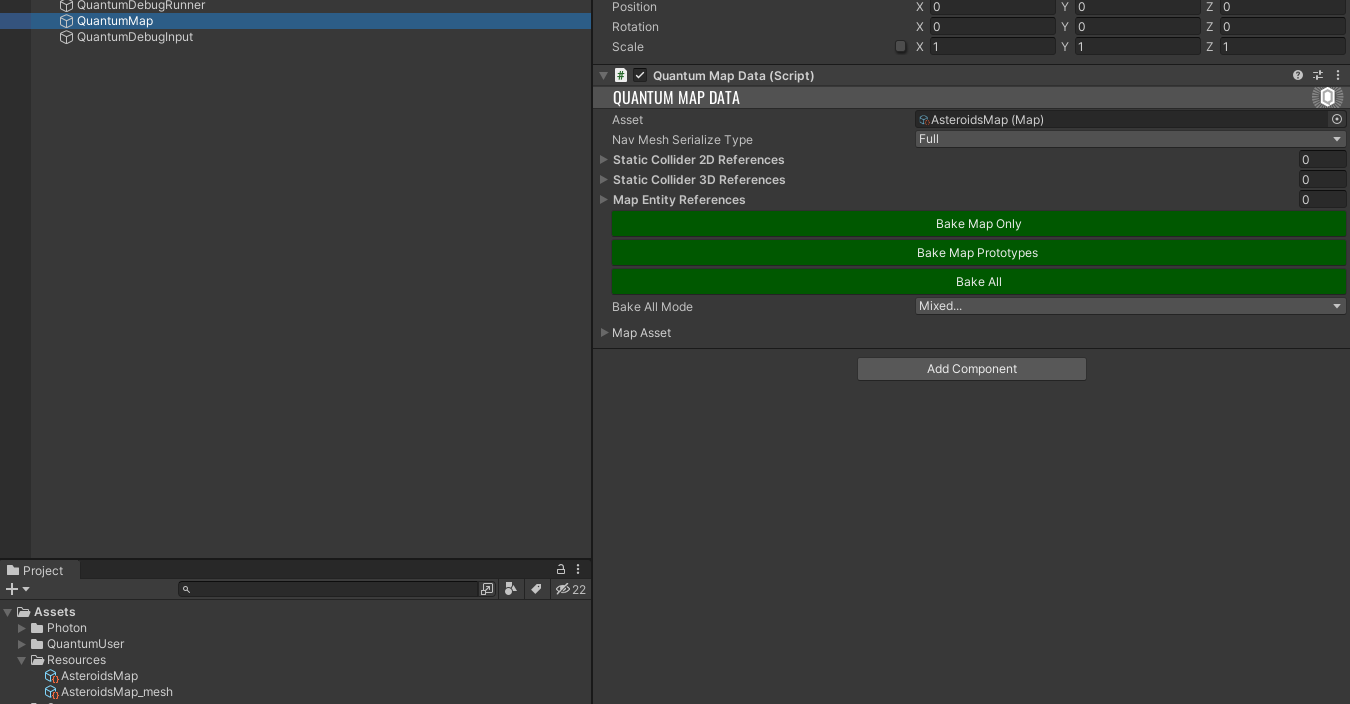
Click on the QuantumMap object in the scene. Currently the pre-existing QuantumMap asset is still linked to the scene. Drop in the new AsteroidsMap asset into the asset field of the inspector to replace it with the new asset then save the scene. A new AsteroidsMap_mesh asset will be generated in the Resources folder when saving the scene. This contains the information about physics colliders in the map.
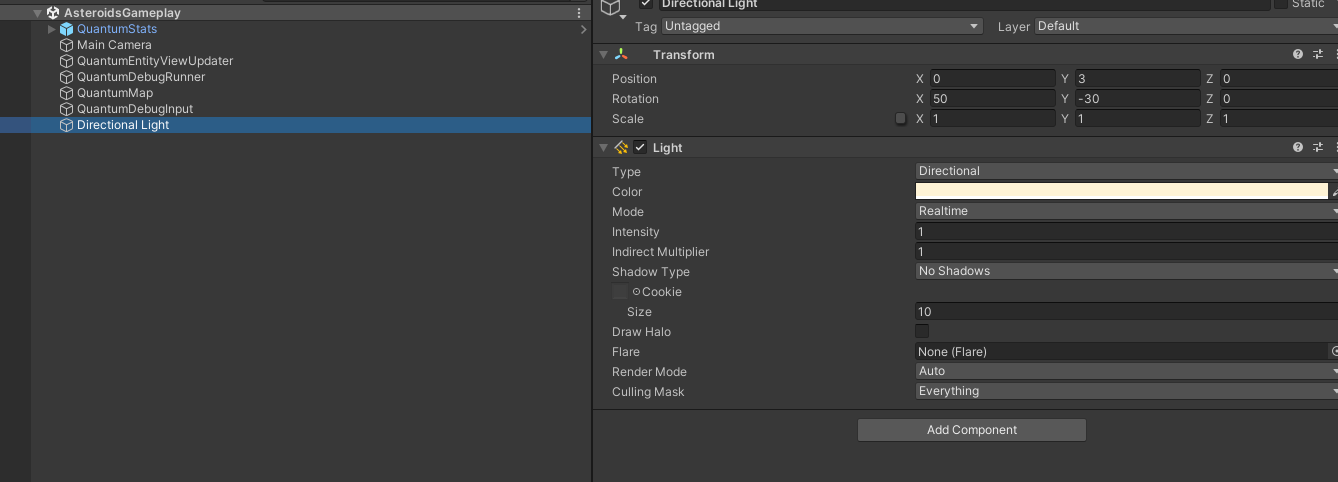
Camera and Lighting
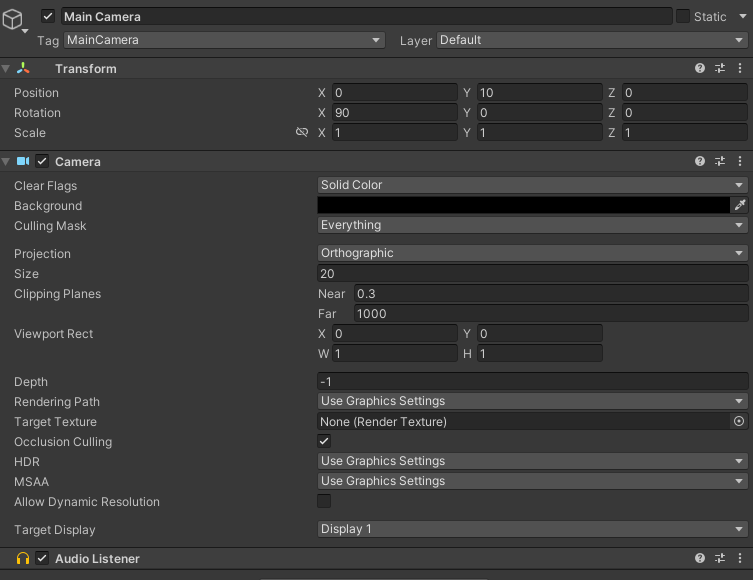
Adjust the Main Camera by setting its position to (0, 10, 0) and its rotation to (90, 0 , 0). Set the Background color to black and adjust the Orthographic Projection Size to 20.
Next add a Directional Light with a soft yellow tint to the scene.
Creating an Entity
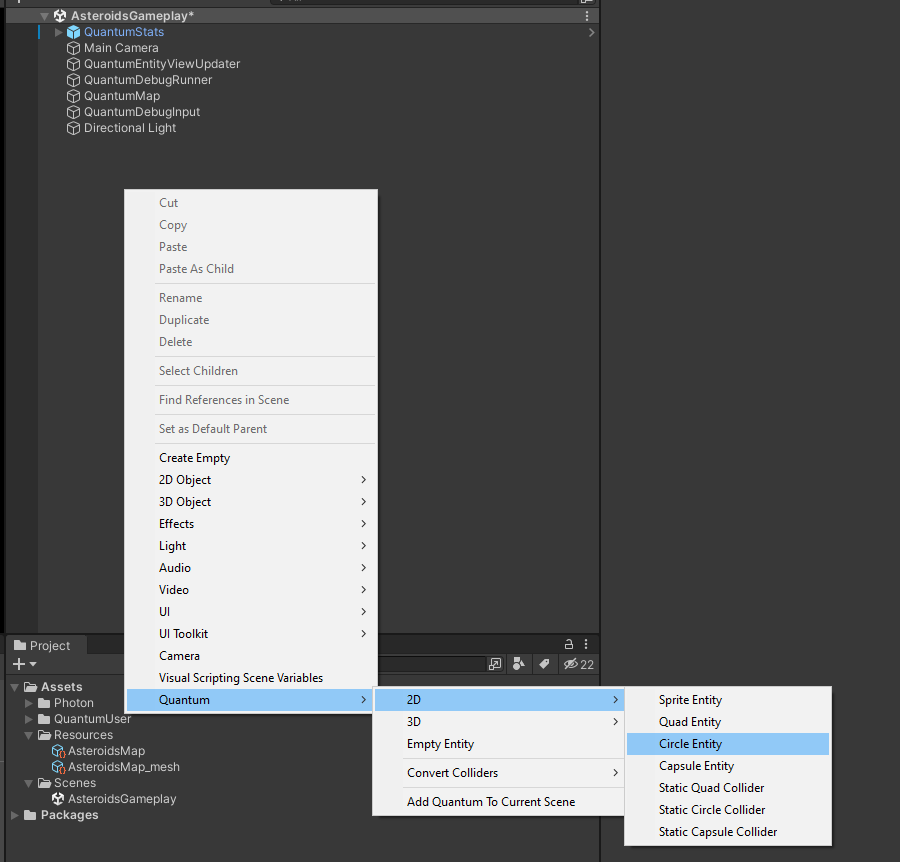
Create a new 2d circle entity. (right-click on the hierarchy window and chose Quantum > 2D > Circle Entity)
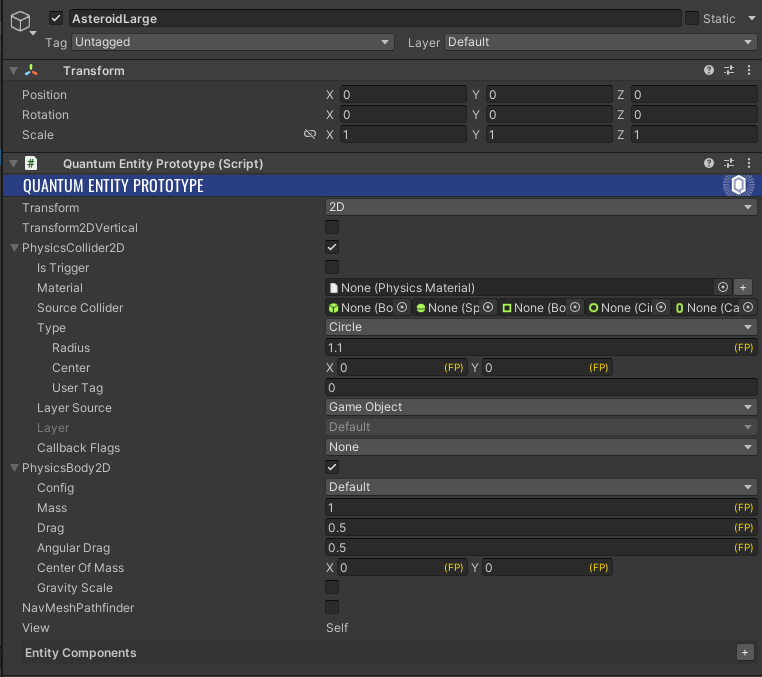
Rename the newly created GameObject to AsteroidLarge. Remove the Mesh Filter and Mesh Renderer component. Adjust the PhysicsCollider2D on the QuantumEntityPrototype to have a radius of 1.1. Finally, check the PhysicsBody2D box to turn the entity into a physics based entity with a rigidbody.
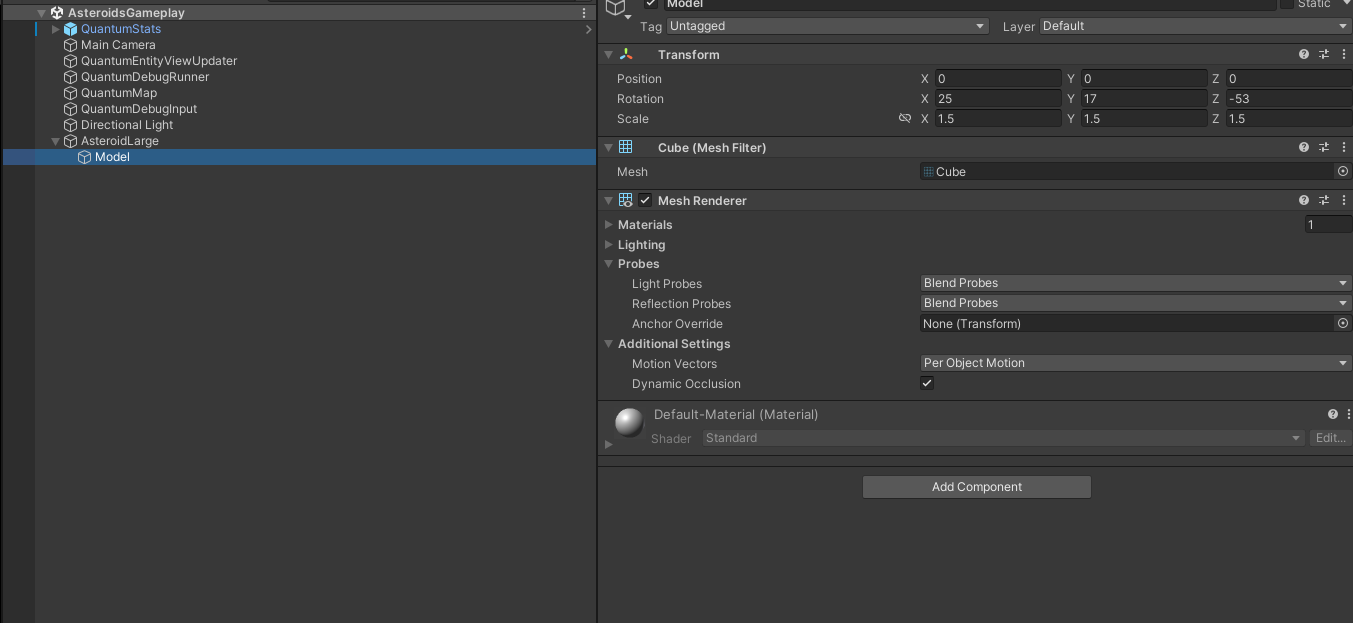
Right-click on the AsteroidLarge GameObject and chose Create > 3D Object > Cube to create a cube as a child object of the asteroid. This child will hold the visual model of the asteroid. Rename it to Model.
It is not necessary to put the visuals on a separate child object it is simply done to keep components more organized.
Remove the Box Collider from the object and set the scale to 1.5 and add rotation to make the visual more pleasing (in this case (25, 17, -53) was used).
Enter play mode. You can see the asteroid entity slowly dropping down the screen due to gravity. (Gravity will be disabled later and force will be manually applied to the asteroids)
Entities in Quantum
In Quantum all gameplay is driven by entities, systems and static data assets which wraps data such as static colliders info. The Quantum simulation code does not handle any rendering, however the EntityViewUpdater instantiates a GameObject for each entity that has an EntityPrototype with an EntityView MonoBehaviour on it in Unity. This view GameObject acts as the visual representation of the entity. The transform of the view GameObjects are also automatically synchronized from their respective entities by the EntityViewUpdater.
Each entity has a set of components. Components are not Unity MonoBehaviours and are added to the entity on the EntityPrototype MonoBehaviours's Enity Component list or via code. Some components are added by checking the checkboxes in the Entity Prototype component such as the PhysicsBody2D component on the cube entity.
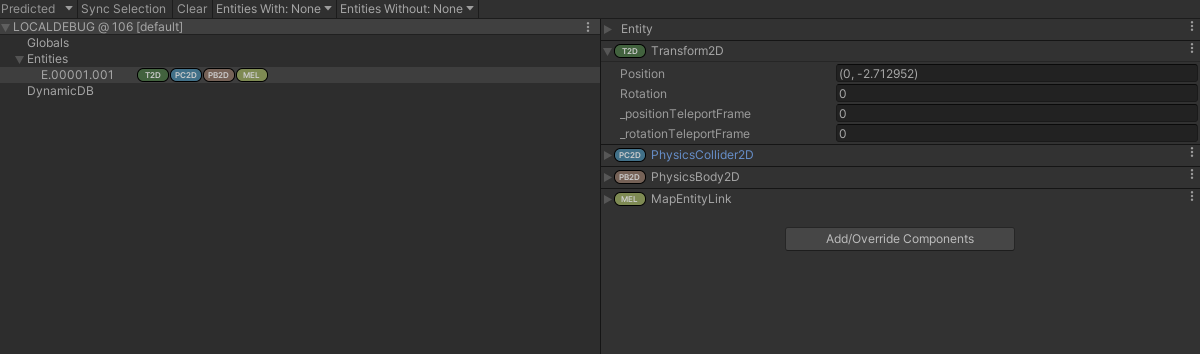
Quantum has a state inspector which shows the state of entity components during runtime. In Unity's menu bar, click on Window > Quantum > State Inspector. This opens the state inspector window. Enter play mode. In the state inspector window unfold the LOCALDEBUG entry and the Entities entry. The asteroid entity is listed as Entity 1. Click on it to reveal all components on the entity and their current state.
Creating a Prefab
Quantum entities can be turned into regular Unity prefabs. Drop the AsteroidLarge GameObject into the Resources folder to create a prefab then delete it from the scene. A AsteroidLargeEntityPrototype asset object is created automatically. This asset holds the baked data of the entity that is used by the quantum simulation.
