What's new in v1.2.14
Main Changes:
For a full list of changes, check the log here.
New PooledProtocolToken
The Photon Bolt team always look into ways to improve the memory allocation of the internal processes enabling the developer to write performant code without concerning that Bolt will be a bottleneck at some point.
In this version we've introduced a new type of IProtocolToken called PooledProtocolToken that uses a pooling system in order to reuse the memory already allocated for high frequent used Token type, as we know that some games rely extensivelly on this custom type to perform communication using Bolt.
A Pooled Token works very similar to the original IProtocolToken, you just need to extend the new PooledProtocolToken, and implement a new method - Reset.
Bolt will invoke this method before returning your Token to the pool in order to reset all Token properties to a desired default value determined on the method.
C#
public class MyPooledToken : PooledProtocolToken
{
    public override void Read(UdpPacket packet)
    {
        // Deserialize Token data
    }

    public override void Write(UdpPacket packet)
    {
        // Serialize Token Data
    }

    public override void Reset()
    {
        // Reset Token Data
    }
}
As usual, the Token type also need to be registered to be used by Bolt, either by registering it manually calling the RegisterTokenClass method or using the new Protocol Token Registry (shown on the next section):
C#
public override void BoltStartBegin()
{
    // Registe the Token
    BoltNetwork.RegisterTokenClass<HitInfo>();
}
In order to get a new instance of this Token type, you need to request it from the internal Pool managed by Bolt itself.
So, instead of creating the instance with new, you use the following call:
C#
// Get instance of Pooled Token
var myPooledToken = ProtocolTokenUtils.GetToken<MyPooledToken>();
From there, you can use the Token as usual, set their properties and send it over, Bolt will take care of reciclyng the Token when necessary.
The full documentation of how to use the new PooledProtocolToken can be found at our dedicated page for the IProtocolToken here.
New IProtocolToken Registry
Protocol Tokens are a useful tool in the Bolt SDK that lets you define your own data type, serialize and deserialize using Bolt Bit Packing API for a really tight memory model.
One of the main issues when dealing with Tokens is that they need to be registered on Bolt before their usage, and the registration process is very sensitive to order of execution, meaning that, if the Tokens as recorded in a different order, they will get different IDs and by consequence, not being able to be transmitted with another peer.
For this reason, is now available a Protocol Token Registry system, that will search for all Token that you've defined into your project and register them automatically when Bolt startup.
This frees you of remembering to register a particular Token, and also make sure that all them will be registered always at the same order.
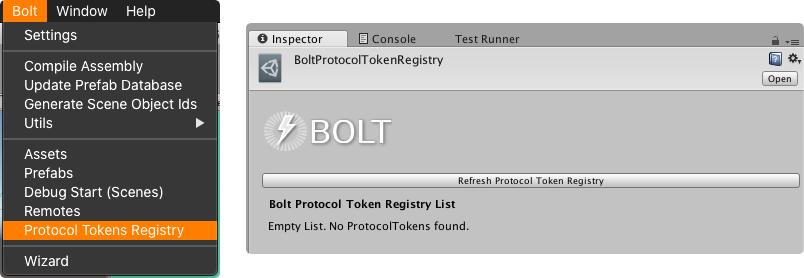
To open the registry just to go to Bolt/Protocol Token Registry Menu, if you don't have a registry already, you will be asked to create a new one.
With the asset created, just click on the Refresh Protocol Token Registry button, Bolt will scan the project and list all IProtocolToken.
That is it, you can new remove all your manual registration code and let Bolt do it for you.
Show BoltHitboxBody Snapshot History
Photon Bolt has a built-in lag compensated physics system used mainly to perform raycast and overlap checks that can be queried in for a certain frame in the recent past, which gives a player that is simulating behind the server shoot and hit other players for example, even in the presence of lag.
We've now included in this version the option the visualize the BoltHitboxBody snapshot history. While in development, you can check if a certain raycast is indeed hitting the target at a certain frame.
To enable the visualization just check the Show Snapshot History checkbox on the BoltHitboxBody component on your Game Object.
Enabling the Gizmos on the Scene, you should have a similar behavior to the one shown below: