Creating Character
KCC prefab variant
The easiest way to create custom character is to create a prefab variant from default KCC prefab:
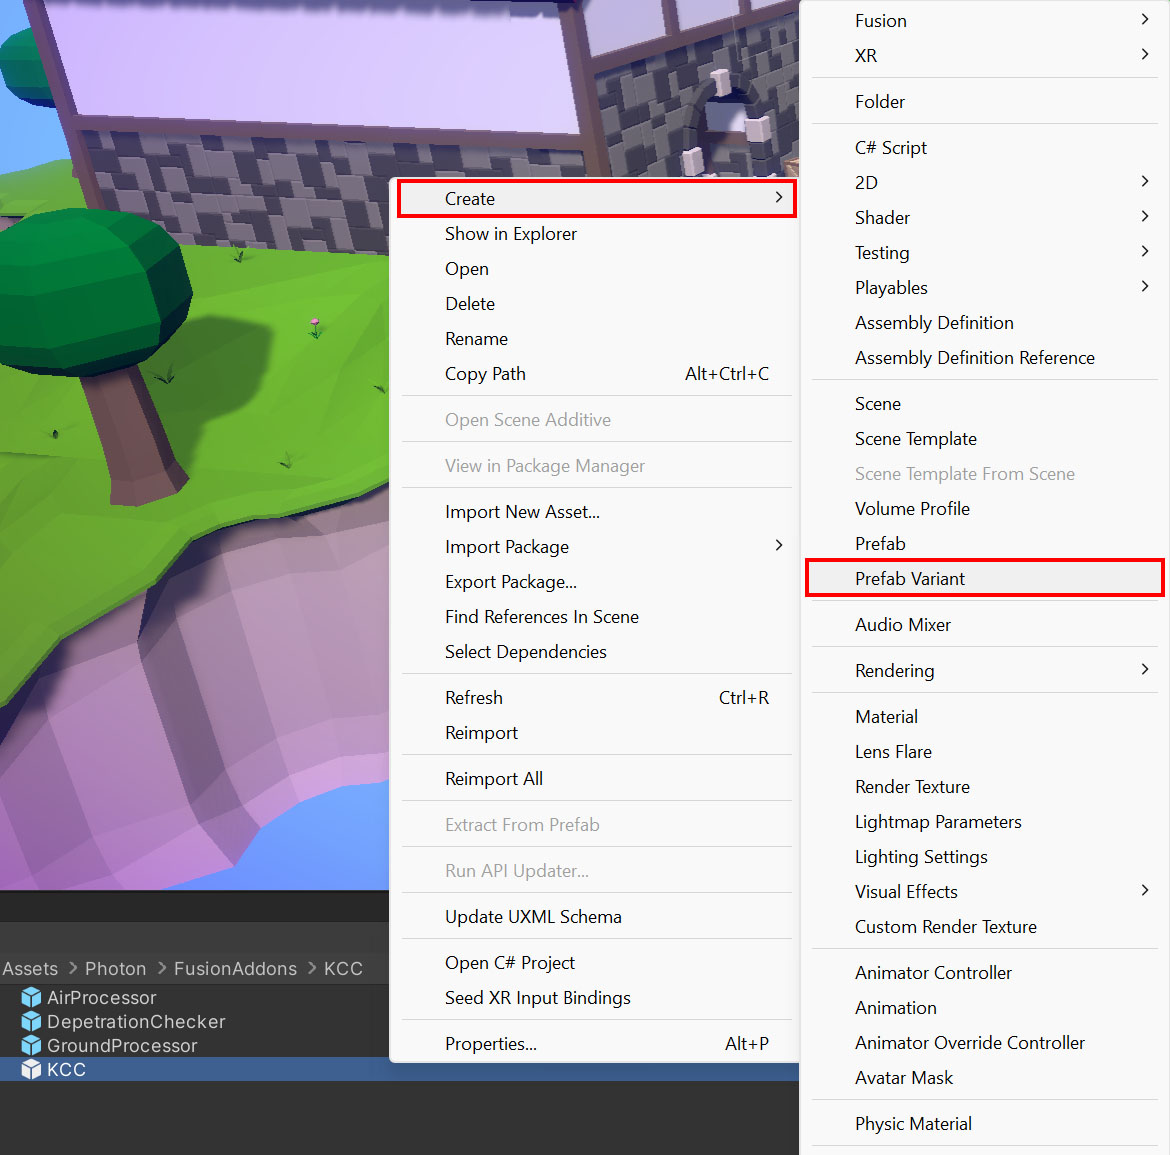
- Right click on
KCCprefab (inAssets/Photon/FusionAddons/KCC/Prefabs). - Select
Create > Prefab Variant.

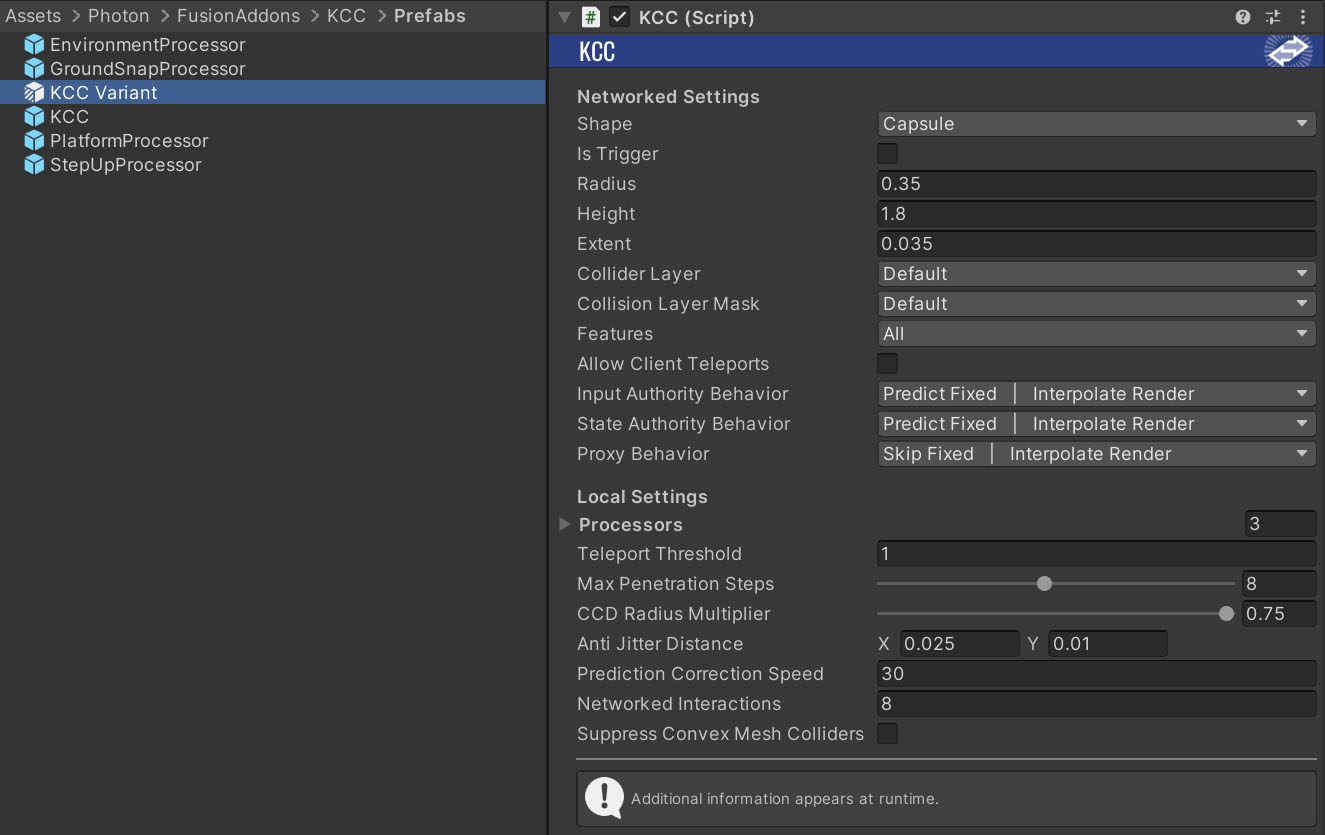
- Configure
KCCsettings (radius, height, collision mask, ...) if needed. More details in KCC Settings section.

- Replace capsule visual with your own visual, add custom components.
- The character is ready for use. Continue with Moving the character
Creating character from scratch
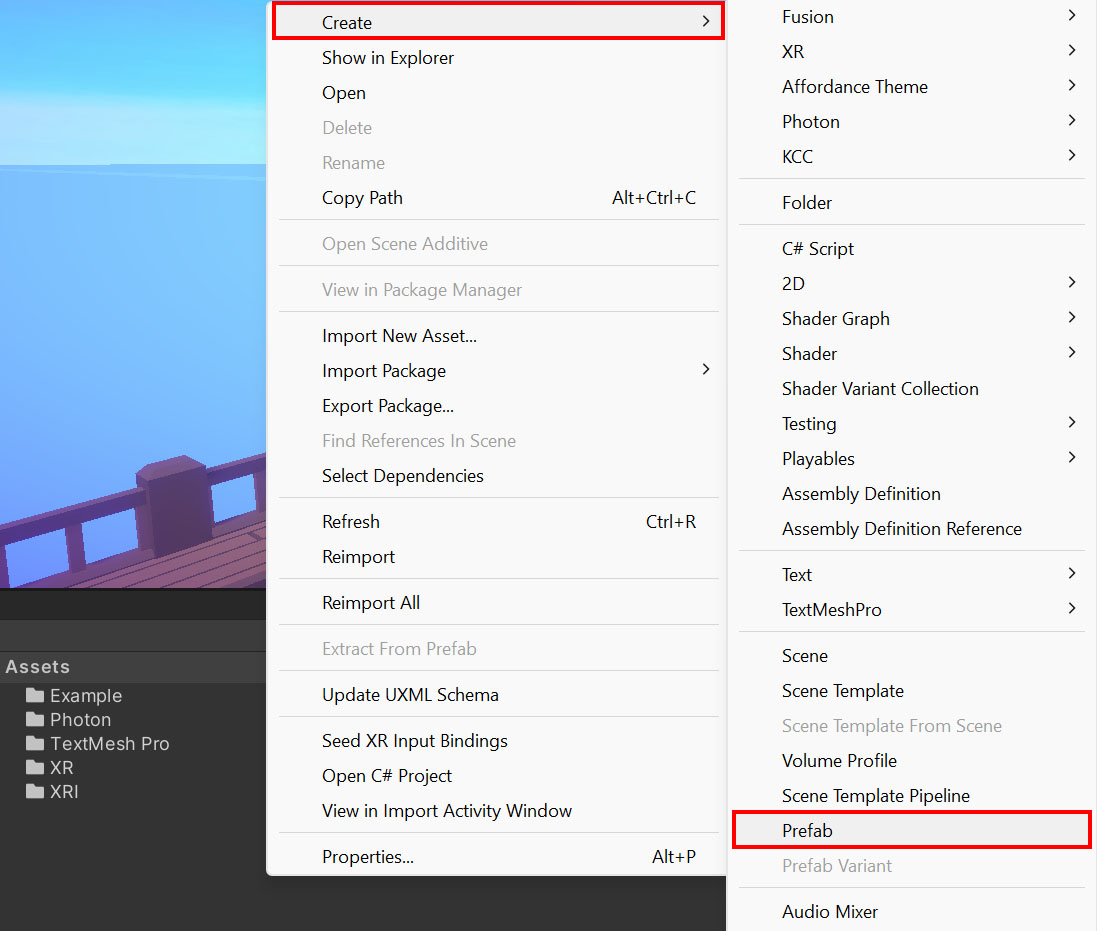
- Create a new player prefab.

- Add
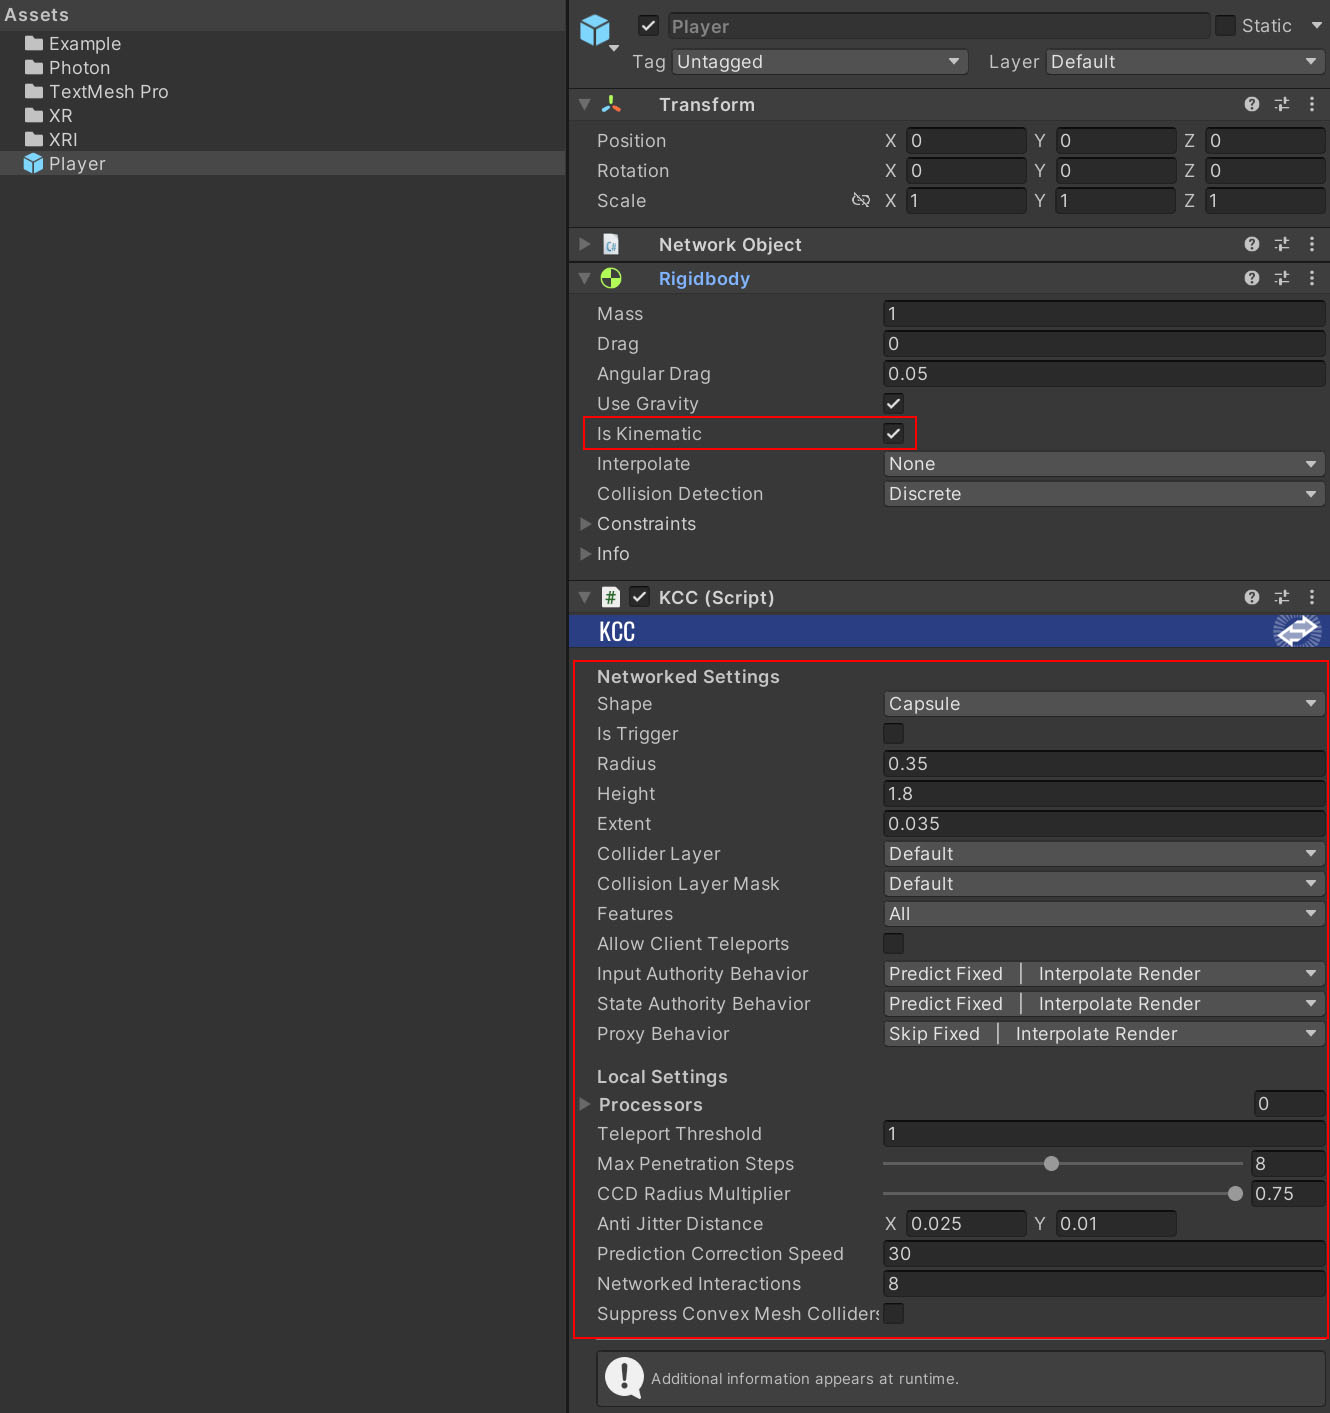
NetworkObject,RigidbodyandKCCcomponents to the root game object.

- Enable
Is Kinematicoption onRigidbodycomponent. - Configure
KCCsettings (radius, height, collision mask, ...) if needed. More details in KCC Settings section.

- Link default processors in
KCCsettings. They are located inAssets/Photon/FusionAddons/KCC/Prefabs.

- Add visual and other components.
- The character is ready for use. Continue with Moving the character
Moving the character
Following example code sets character look rotation and input direction for KCC which is later processed by EnvironmentProcessor.
C#
public override void FixedUpdateNetwork()
{
    if (Runner.TryGetInputForPlayer(Object.InputAuthority, out BasicInput input) == true)
    {
        // Apply look rotation delta. This propagates to Transform component immediately.
        KCC.AddLookRotation(input.LookRotationDelta);

        // Set world space input direction. This value is processed later when KCC executes its FixedUpdateNetwork().
        // By default the value is processed by EnvironmentProcessor - which defines base character speed, handles acceleration/friction, gravity and many other features.
        Vector3 inputDirection = KCC.Data.TransformRotation * new Vector3(input.MoveDirection.x, 0.0f, input.MoveDirection.y);
        KCC.SetInputDirection(inputDirection);
    }
}
It is also possible to skip processors completely and just set the velocity using KCC.SetKinematicVelocity();.
More movement code examples can be found in Sample Project.
Back to top