Creating Character
KCC預製件變體
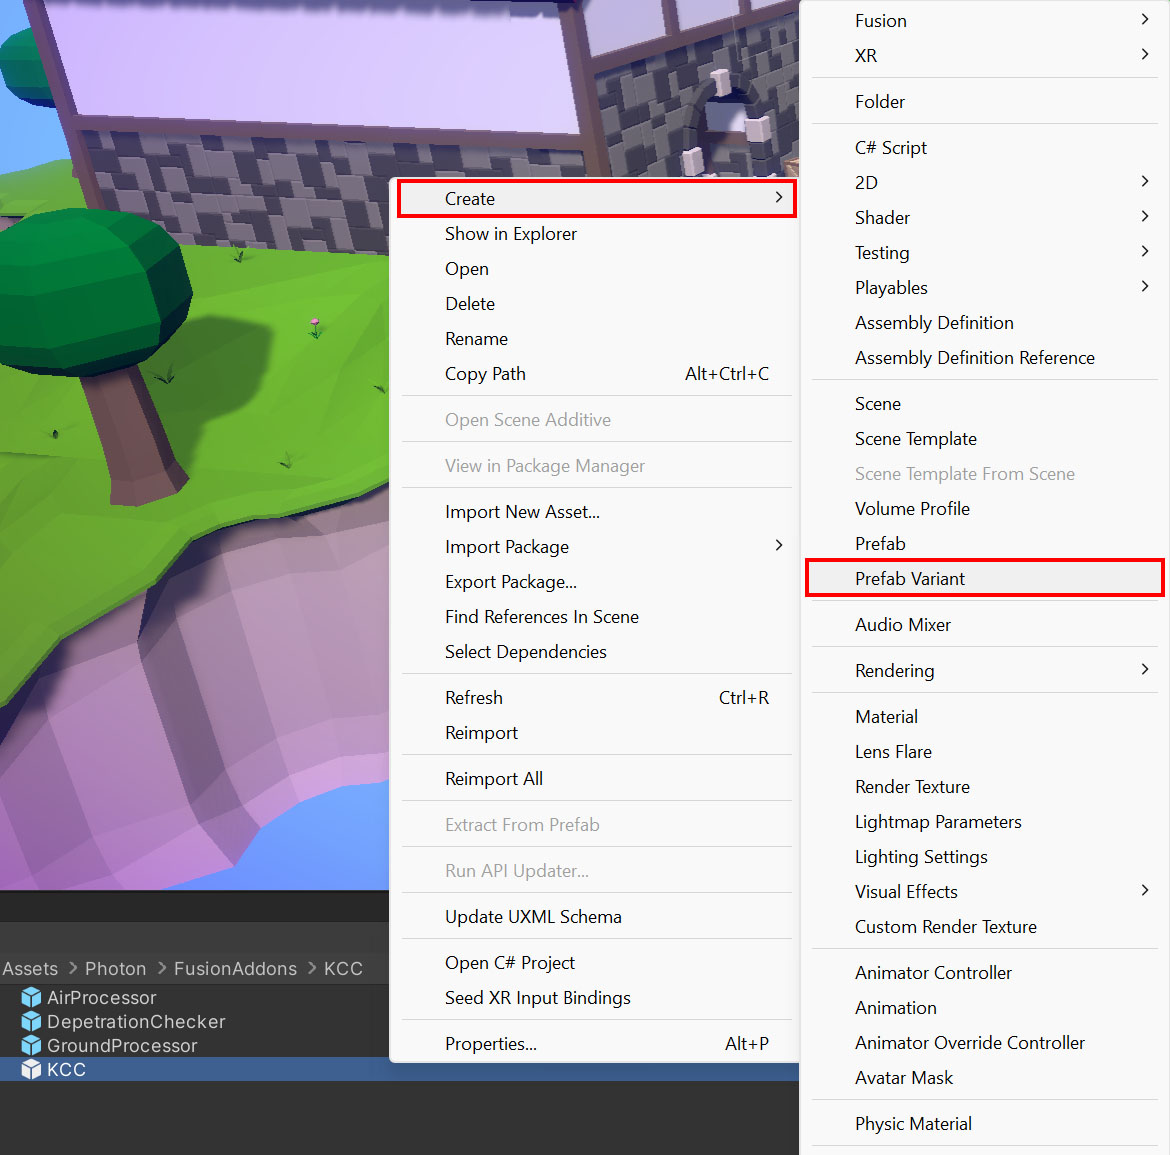
建立自訂角色的最簡單的方式是從預設KCC預製件來建立一個預製件變體:
- 以右鍵按一下
KCC預製件(在Assets/Photon/FusionAddons/KCC/Prefabs中)。 - 選擇
Create > Prefab Variant。
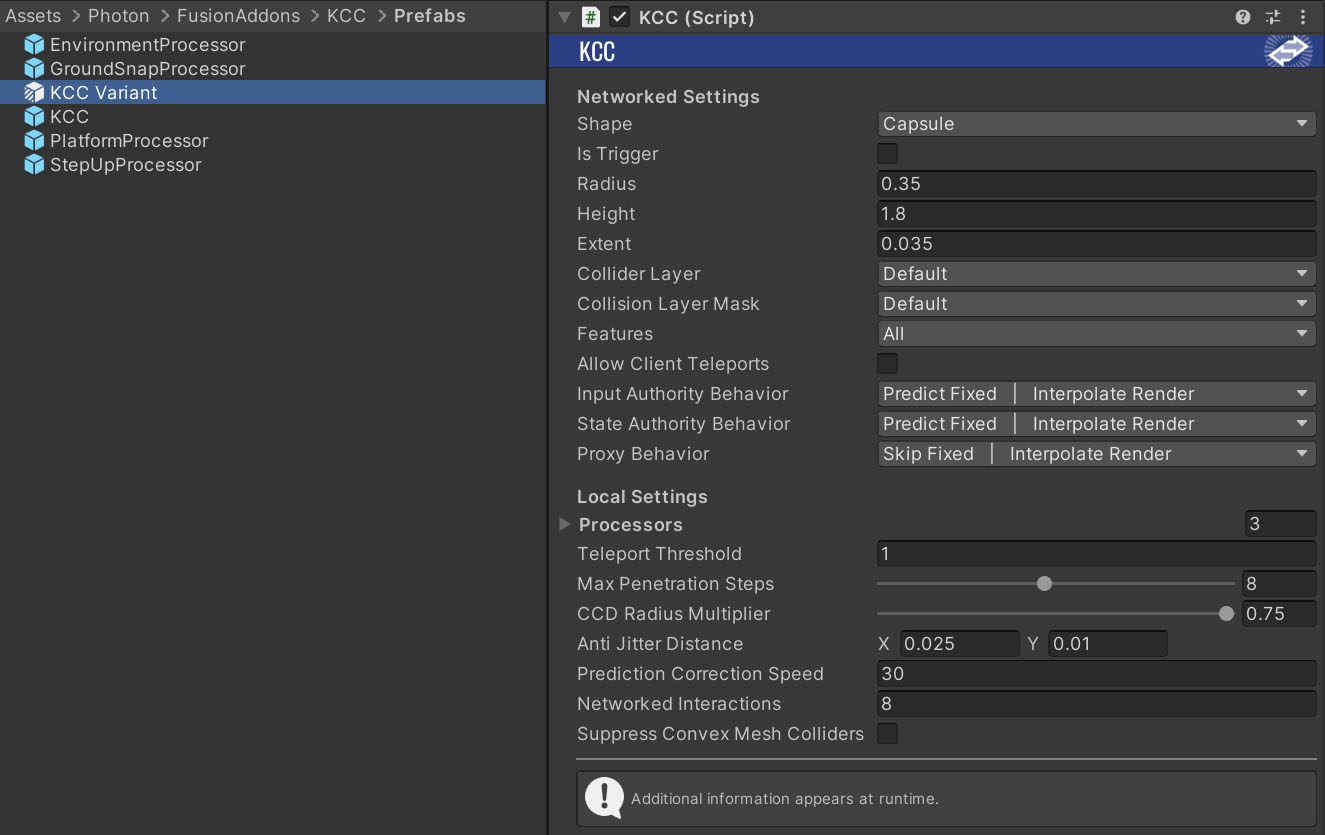
- 按需要設置
KCC設定(半徑、高度、碰撞遮罩等等)。在KCC設定章節中有更多細節。
- 以您自己的視覺效果來替換膠囊視覺效果,新增自訂元件。
- 角色已經準備好使用。繼續進行移動角色
從零開始建立角色
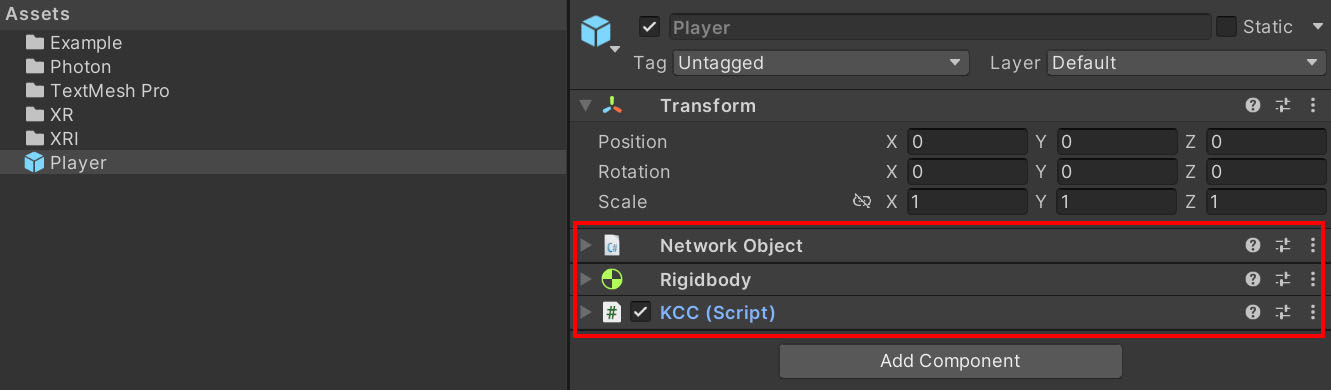
- 建立一個新的角色預製件。

- 新增
NetworkObject、Rigidbody及KCC元件到根遊戲物件。
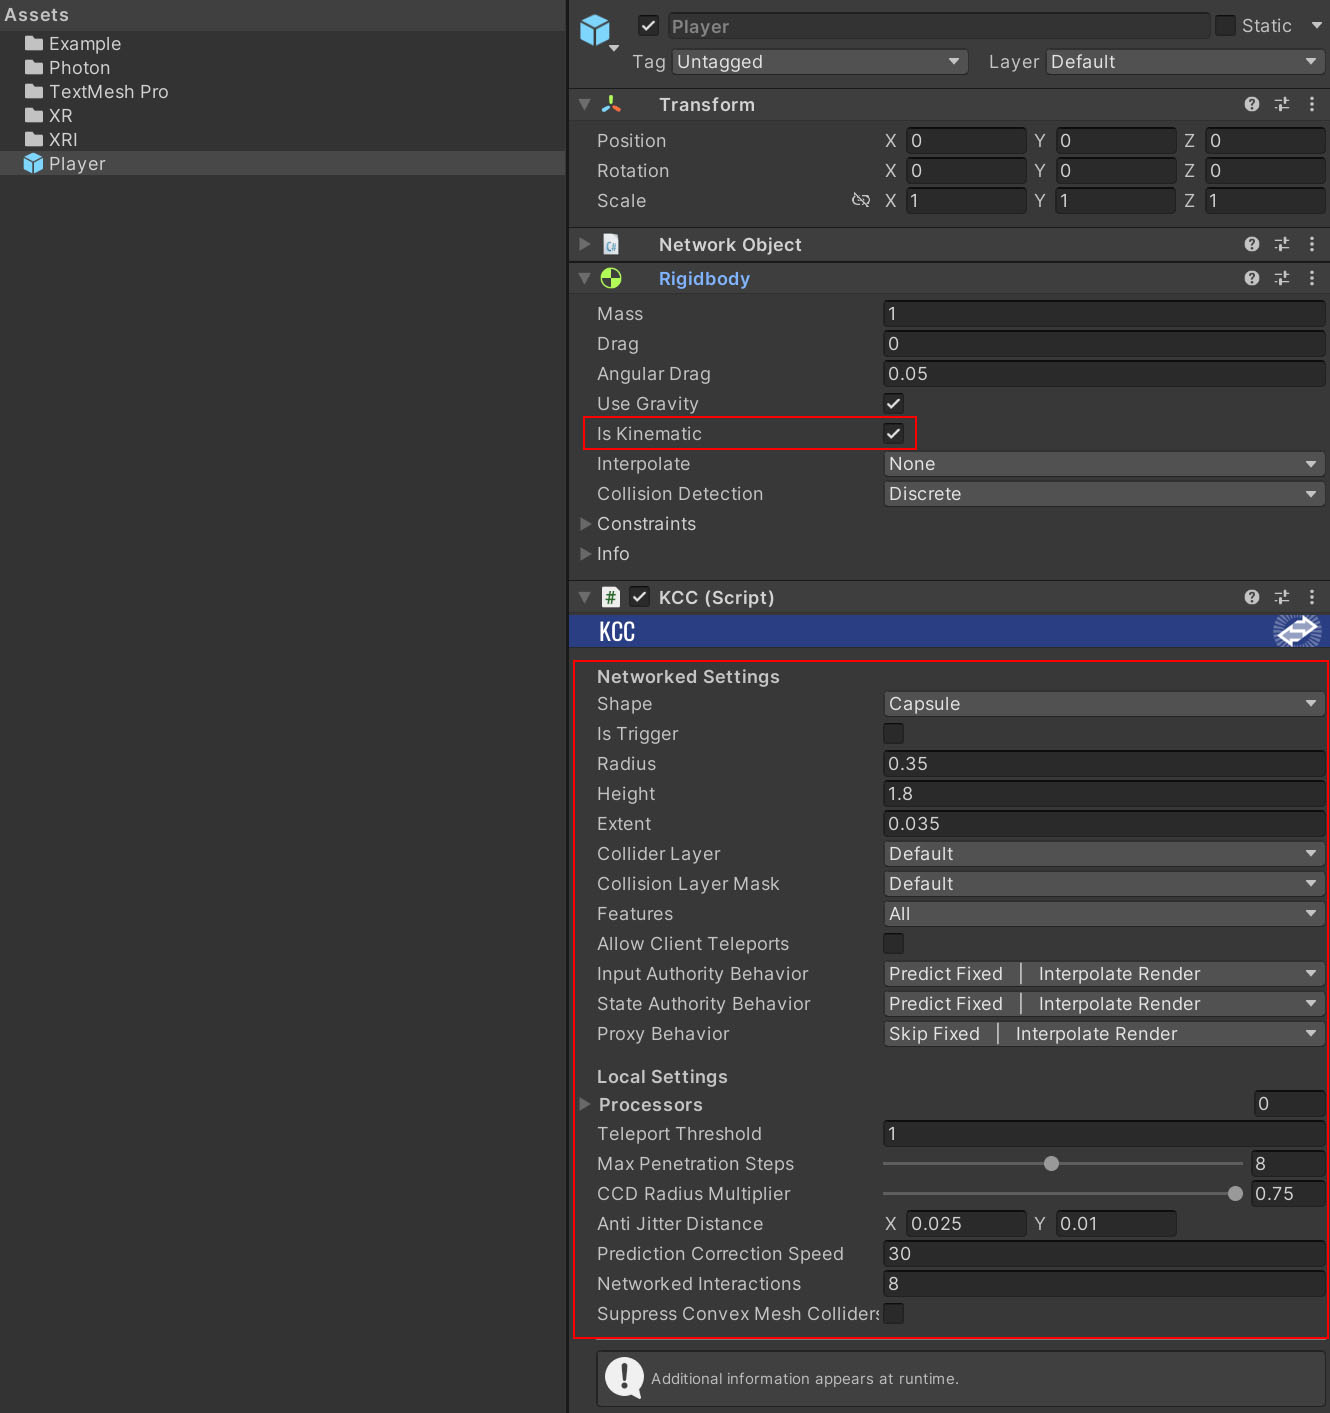
- 在
Rigidbody元件上啟用Is Kinematic選項。 - 按需要設置
KCC設定(半徑、高度、碰撞遮罩等等)。在KCC設定章節中有更多細節。
- 在
KCC設定中鏈接預設處理器。它們位於Assets/Photon/FusionAddons/KCC/Prefabs中。

- 新增視覺效果及其他元件。
- 角色已經準備好使用。繼續進行移動角色
移動角色
以下示例程式碼針對KCC來設定角色查看旋轉及輸入指示,其在稍後由EnvironmentProcessor處理。
C#
public override void FixedUpdateNetwork()
{
    if (Runner.TryGetInputForPlayer(Object.InputAuthority, out BasicInput input) == true)
    {
        // Apply look rotation delta. This propagates to Transform component immediately.
        KCC.AddLookRotation(input.LookRotationDelta);

        // Set world space input direction. This value is processed later when KCC executes its FixedUpdateNetwork().
        // By default the value is processed by EnvironmentProcessor - which defines base character speed, handles acceleration/friction, gravity and many other features.
        Vector3 inputDirection = KCC.Data.TransformRotation * new Vector3(input.MoveDirection.x, 0.0f, input.MoveDirection.y);
        KCC.SetInputDirection(inputDirection);
    }
}
也可以完全略過處理器,而只使用KCC.SetKinematicVelocity();來設定速度。
可以在範例專案中找到更多移動程式碼示例。
Back to top