2 - Download and Integrate PlayFab GSDK
In order to make a Bolt Game Server communate with the PlayFab stack it is necessary to integrate the PlayFab SDK for Unity to our project.
This can easily be done using the Unity Editor Extensions plugin found on the PlayFab's Github repository.
Follow the steps below to configure the SDK into the Unity project:
- Download the PlayFab SDK Unity Editor Extensions from Github https://github.com/PlayFab/UnityEditorExtensions or download directly here;
- Import the package and you will be greeded with the
PlayFab Loginwindow. Login with your account. - After the login, it will automatically detect that you don't have any SDK installed, click on
Install PlayFab SDK; - The extension will download and import the latest version of the PlayFab SDK. You will be able to check the installed version and location on the project directly from the window.
![[1] PlayFab Unity Extension Git repository](/docs/img/bolt/playfab/005_download_playfab_unity_extension.png)
![[2] PlayFab Login using Unity Extension](/docs/img/bolt/playfab/006_playfab_sdk_login.png)
![[3] Install PlayFab SDK, [4] Installed version of SDK](/docs/img/bolt/playfab/007_playfab_install_sdk.png)
Perfect, now you have the SDK properly installed.
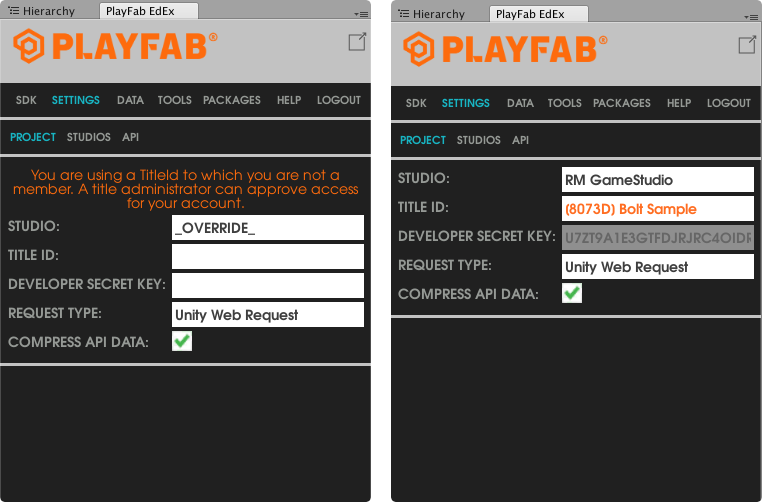
We need to link the Unity Project with the Game Title created on the previous chapter.
Starting from the same window as before:
- Click in
Set My Title, right below the alert warning you that API calls are available only after configure theGame Title; - Select your studio in the
Studiofield; - Select the same
Game Titlewe've setup on the previous chapter in theTitle IDfield.
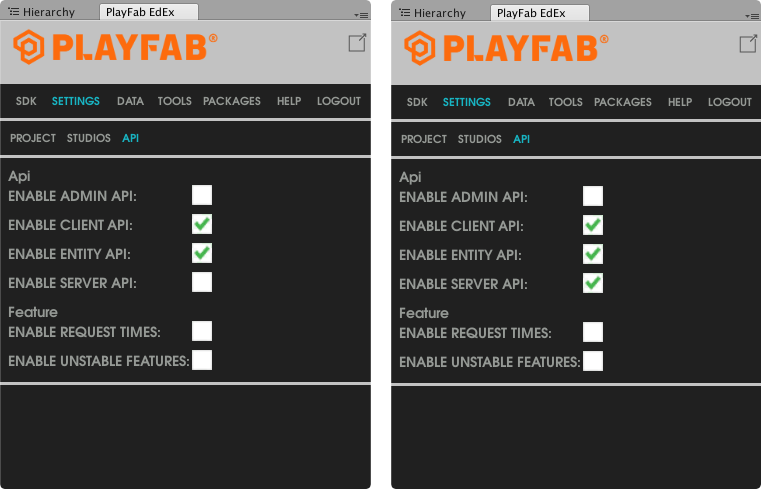
By default, the PlayFab SDK is not configured to be used with the Servers 2.0 APIs and need some extra setup:
(1) go to the API tab, right next to the PROJECT tab that you used to configure the Game Title and (2) click on the ENABLE SERVER API checkbox, Unity will start compiliing to enable this kind of API.
Underneath, the PlayFab Extension package will just include the flag ENABLE_PLAYFABSERVER_API under your Scripting Define Symbols for your current active Build Target.
PlayFab Multiplayer Agent API
We are still missing an important part of the Server 2.0 API, which is the communication with the Agent that runs on each Virtual Machine managed by the PlayFab service.
This Agent is a program that collects information about the Game Server health, along with some other metrics, that can be used to generate insights about the server usage, like player count and so on.
Fortunatelly, this is already implemented by the PlayFab developers and we just need to import into our project.
Later, this will be used by our integration to communicate with the service manager.
Follow the next steps to import the PlayFab Multiplayer SDK:
- Go to
GSDKGit Repo: https://github.com/PlayFab/gsdk; - Inside the
UnityGSDKfolder, you will find thePlayFabMultiplayerSDK.unitypackage(direct download); - Download and import into your project. The implementation will be imported here:
Assets/PlayFabSdk/MultiplayerAgent.
Now you have all necessary code to build the integration between the Bolt SDK and the Thunderhead service.