インストール
Unityプロジェクトで
.unitypackageをインポートします。ルートの
EntityPrototypeゲームオブジェクトを選択し、AnimatorMecanimスクリプトを追加します。
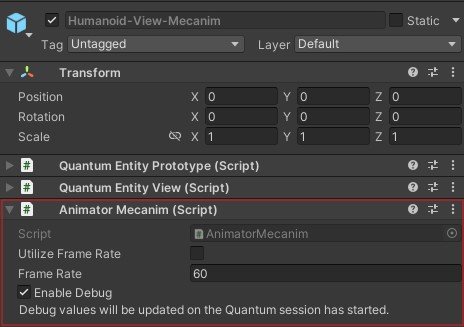
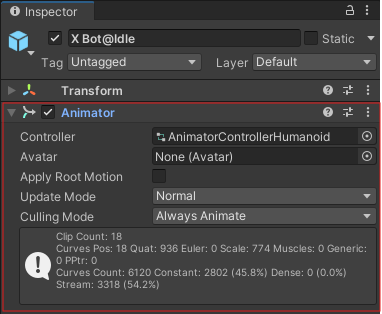
- オブジェクト自身または子オブジェクトに、空のUnity
Animatorコンポーネントを追加します。
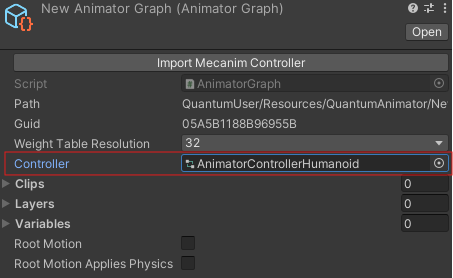
- 好きなフォルダー内に、新しい
AnimatorGraphアセットを作成します。

- 作成したアセットを選択し、
Controllerフィールドに、ベイクしたいUnityAnimator Controllerの参照を渡します。
Bake Animator Graphボタンをクリックすると、ステート・遷移・パラメーターなどがアセットにベイクされます。
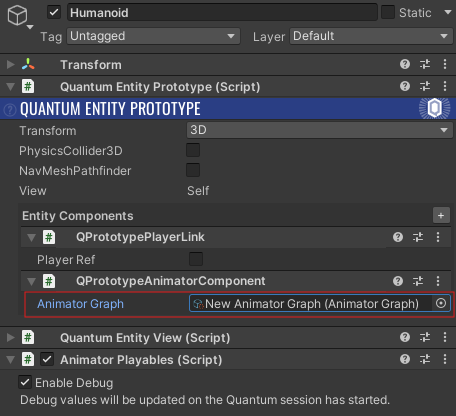
- エンティティプロトタイプに
AnimatorComponentを追加し、Animator Graphフィールドにアセットの参照を渡します。
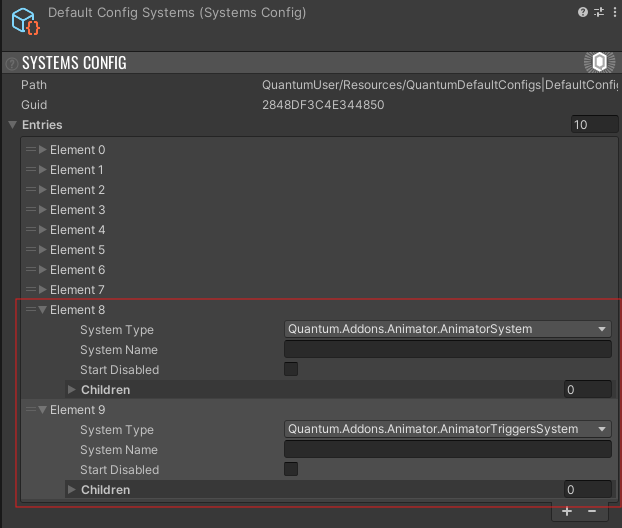
SystemConfigアセット内に、AnimatorSystem・AnimatorBehaviourSystem・AnimatorTriggerSystemを追加します。
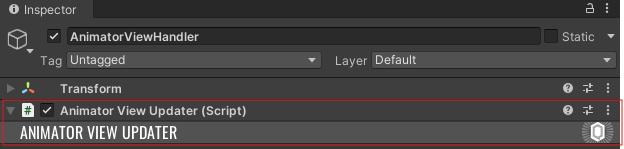
- ゲームシーンに新しいゲームオブジェクトを作成し、
AnimatorViewUpdaterコンポーネントを追加します。
- これで初期設定は完了です。決定論的なアニメーションを開始するには、シミュレーションでAnimator APIを使用して、実行時にアニメーションパラメーターを設定するだけです。
基本的なAPIはUnityと類似していて、Animatorの読み書きにはGetter/Setterを使用します。
C#
// Getters
AnimatorComponent.GetBoolean(frame, filter.AnimatorComponent, "Defending");
AnimatorComponent.GetFixedPoint(frame, filter.AnimatorComponent, "Direction");
AnimatorComponent.GetInteger(frame, filter.AnimatorComponent, "State");

// Setters
AnimatorComponent.SetBoolean(frame, filter.AnimatorComponent, "Defending", true);
AnimatorComponent.SetInteger(frame, filter.AnimatorComponent, "Direction", 25);
AnimatorComponent.SetFixedPoint(frame, filter.AnimatorComponent, "Speed", FP._1);
AnimatorComponent.SetTrigger(frame, filter.AnimatorComponent, "Shoot");
古いCustomAnimatorの置換
- プロジェクトのバックアップを取る。
QuantumUser/Simulation/QuantumCustomAnimatorを削除する。QuantumUser/View/CustomAnimatorを削除する。Scripts/QuantumCustomAnimatorを削除する。QuantumAnimator.unitypackageをインポートする。CustomAnimatorを使用しているすべてのスクリプトをAnimatorComponentに置換する。Frame.UserからCustom.Animator.AnimatorUpdaterを削除する。
CustomAnimatorGraphの置換
CustomAnimatorGraphが動かない場合は、以下の手順を行ってください。
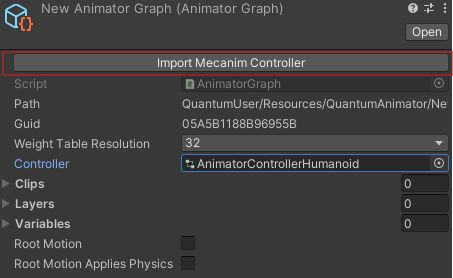
- インスペクターをデバッグモードに変更する。
- アセットを選択し、アタッチされた
Controllerを削除する。 Import Mecanim Controllerをクリックする。Controllerを再アタッチし、Import Mecanim Controllerを再クリックする。